Showing posts with label garden. Show all posts

Wednesday, May 2, 2018

5 Gardening Myths That Seemingly Everyone Believes

5 Gardening Myths That Seemingly Everyone Believes (No. 2 Shocked Us)

Image source: Pixabay.com


We have all grown in our gardening experiences by words of wisdom from those gardeners who have come and gone before us, and we’ve even followed gardeners who have TV shows, blogs and websites dedicated to their art.


Of course, there’s a lot of advice that we’ve accepted that is nothing more than myth. This is not to say the advice is not entirely false, but it is not entirely true, either.


These myths have been around so long that even some of the experts take them to heart.


1. All organic pesticides and sprays are safe. Although it’s common sense to question how safe a pesticide is, many gardeners take organic pesticides for granted. Most of the time it is safe, but there are some natural ingredients that are just as dangerous, or more so, than commercial chemicals.


Need Non-GMO Seeds For Your Organic Garden? The Best Deals Are Right Here!


Sulphur, for example, was used by early gardeners, but it can be deadly. The same goes for warfarin, sabadilla, rotenone and nicotine, even though they are plant-based. Even pyrethrin, when used long enough, can harm you and your garden. When looking for natural alternatives, be sure to investigate their safety.


2. Fresh vegetables are far more nutritious than frozen or canned vegetables. Well, how fresh is fresh? It is true that fresh vegetables are healthier for you, but only when they are freshly picked. The vegetables you purchase in the grocery stores usually make quite the trip from the field to the shelves of the store. Sometimes the journey takes several days or even weeks to get to the final destination. Enzymes are naturally being released by the vegetables during storage and shipping, causing the vegetables to lose nutrients and minerals. However, when the produce is fresh-picked and quick-frozen, most of the vitamins, minerals and other nutrients are preserved. This is good to keep in mind for your own garden produce: If you’re not planning on eating your harvest within a short time, don’t delay in preserving it.

5 Gardening Myths That Seemingly Everyone Believes (No. 2 Shocked Us)

Image source: Pixabay.com


3. Kitchen scraps are all you need for compost. How many of us have compost bins by our gardens, and walk our kitchen scraps out there after each meal? Yet kitchen waste, if that’s all you’re using, is too strong for your garden. You need a mix of leaves (known as brown) and kitchen waste (known as green). There needs to be the correct balance between the two, meaning having more brown than green. The breakdown of these two things creates compost. You can always put extra kitchen scraps into a worm box, or vermicomposter.


4. Watering vegetable plants in the sun will kill them. How often have we been told this one? It’s definitely one believed by many experts. The most common reason gardeners accept this myth is on the premise that the water acts as a magnifying glass. The sun’s rays will hit the water and they will burn the vegetable plants, especially the leaves.


Seamazing: The Low-Cost Way To Re-mineralize Your Soil


The truth is the water isn’t strong enough to magnify the sunlight enough to the required heat needed to burn the leaves and plants. Now, this doesn’t mean high noon is the perfect time to water your garden. Be reasonable.


5. Organic gardens are more expensive than traditional gardens. This myth has become more common as people are starting to want more and more organic products and food. Organic produce from any grocery store is more expensive — it’s true. Growing your own organic vegetables are not, however. When you cut out any commercial fertilizers and pesticides, you are saving money. By making your own mulch and compost from scraps and leaves from your yard, you will be saving even more money. Re-use containers and use mixtures of hot soapy water, garlic and hot pepper to keep away unwanted pests. Dead leaves can be used, along with lawn cuttings and scraps, to make fertilizer. Save seeds from your current produce to use for next season. Dry the seeds out and store them in a cool, dry place away from the sun. This is a great way to have a successful garden, as the healthy plants have healthy seeds.


The best way to garden is to do your research and speak to experts and fellow gardeners alike. The more you know, the better your garden will be. You will be able to decide what is true and what isn’t, and your garden will thank you.


What myths would you add to this list? Share your myths in the section below:


Every Spring, Gardeners Make This Avoidable Mistake — But You Don’t Have To. Read More Here.


The post 5 Gardening Myths That Seemingly Everyone Believes appeared first on Off The Grid News.

Thursday, April 19, 2018

Five “Life Extension” Garden Vegetables To Plant In 2018

There’s no doubt about it: the health benefits of nutrient-dense, fresh, organic produce is a keyreason to break out the gardening tools each season.


Purchased produce simply doesn’t have as many nutrients as the veggies that come from our gardens. Commercial growers typically choose varieties that mature quickly, produce heavily, and give a uniform, visually-appealing fruit–all factors that come at the cost of nutrient density. As well, commercial growers often engage in practices that strip nutrients from the soil, which means the vegetables they grow have nowhere to absorb nutrients from. Finally, harvested vegetables


“Getting high-quality nutrients from key garden vegetables is the single best way to maximize genetic expression for longer and healthier life.”


lose moisture and nutrients over time, as part of a process called respiration. The longer veggies sit between harvest and table, the more nutrients they lose.


For these reasons, freshly-picked home-grown vegetables are inherently healthier than purchased vegetables. That said, you can maximize the health benefits of your garden by planting those veggies that are chock full of nutrients. There are five vegetables, in particular, that pack a powerful nutrient punch: sweet potatoes, broccoli, brussels sprouts, dark leafy greens, and garlic.


Sweet Potatoes


Sweet potatoes are the most nutritious root veggies out there. They’re terrific for our digestive system since they’re high in fiber and they have a high phytosterol content, which may help prevent duodenal and gastric ulcers. These root veggies are also high in beta-carotene (Vitamin A), which helps maintain the health of our skin, mucous membranes, immune system, and eyes. High amounts of antioxidants prevent cell damage by free radicals, which in turn protects the body against cancer. Sweet potatoes also contain Vitamin B, Vitamin C, and several minerals, including iron, calcium, and selenium.


Sweet potatoes are tropical plants that love sun, heat, and humidity. Best in zones 8 and above, but you can successfully grow sweet potatoes as far north as Zone 3 if you keep the soil toasty under plastic sheetingduring early summer. As long as they stay warm, and have plenty of room to run their vines, sweet potatoes are easy to grow.


Broccoli


Broccoli is a powerhouse, providing us with protein and fiber as well as an array of vitamins (A, C, E, K, and some B vitamins including folate) and minerals (iron, potassium, calcium, selenium, and magnesium). The nutrients in broccoli contribute to:


  • Heart health, reducing cholesterol and heart disease.

  • Healthy, dense bones.

  • A healthy immune system.

  • Healthy eyes and the prevention of age-related macular degeneration.

  • The reduction of free radicals, which can assist in keeping our bodies cancer-free.


Broccoli also contains non-nutritive antioxidants and phytochemicals that have been shown to block cancer in its early stages.


Broccoli isn’t difficult to grow, but it does require a little bit of planning and care. It’s a cool weather crop that will bolt in the summer heat. For that reason, startbroccoliearly: seeded or even transplanted out about two weeks before the last frost date. During the summer months, keep broccoli shaded and mulched so that it stays as cool as possible. Water regularly and keep an eye on any potential pests.


Brussels Sprouts


Brussels sprouts (like broccoli, kale, mustard and collard greens, also discussed here) are members of the brassica family of vegetables. Brassicas contain phytochemicals (specificallyglucosinolates) and carotenoids-antioxidants, both of which have been shown to reduce the risk of cancer. Additionally, Brussels sprouts are rich in Vitamin K, which helps our blood clot and our bodies maintain healthy bones. These veggies are also high in Vitamin C and fiber and have a host of other vitamins and minerals, including Vitamin B6, thiamine, potassium, folate, iron, and manganese.


Like other brassicas, Brussels sprouts are a cool weather crop that doesn’t perform well in hot, dry weather. In fact, sprouts that mature when it’s hot outside may be flimsy and bitter. It’s best to start Brussels sprout seeds indoors in May or early June. Care for the seedlings indoors until August, or roughly 45-60 days beforethe first frost date. Once planted out, use mulch to protect the plants during summer’s last hot days. Brussels sprouts are slow to grow but well worth it.


Dark Leafy Greens (Kale, Mustard and Collard Greens, Spinach, Chard)


Kale, mustard greens, and collard greens are all members of the brassica family, and as such, have the same cancer-fighting phytochemicals and carotenoids-antioxidants as Brussels sprouts and broccoli. Further, dark leafy greens of all types are rich in calcium and iron, and also contain Vitamins A, C, E, and K, as well as fiber, folate, and magnesium.


Most dark, leafy greens are fast-growing cool weather crops. If planted in early spring, before the risk of frost has passed, they’ll be ready to harvest before the heat of summer causes them to bolt. The exception is Swiss chard, which–although also quick and easy to grow–tolerates heat well enough to last into the fall.


Garlic


The health benefits of garlic are well known. It can boost the immune system, reduce blood pressure, lower cholesterol levels, and detoxify heavy metals in our bodies. As well, garlic contains antioxidants that may help prevent Alzheimer’s disease and dementia.


Garlic is relatively easy to grow as long as you plant itat the right time. Garlic cloves are best overwintered in the ground, to sprout in the spring or you may try planting as soon as the ground is workable in late winter. Other than standard watering and weeding, keep an eye on your garlic plants for flowers. Should blossoms start to form, cut them off so that the plant directs its energy to its bulb.


Do you have any tried and true tricks for growing these five nutrient-dense veggies? If so, let us know in the comments below.


Saturday, April 14, 2018

Create a No-Till Garden and Retire Your Tiller Forever

Create a No-Till Garden and Retire Your Tiller Forever | 1-No-Till-Garden-Soil-Front-Lawn-Vegetable-Garden-Design-Custom | Agriculture & Farming Organics Special Interests


By Garden Therapy


It is a wonderful feeling to discover a gardening hack that saves you time and effort without decreasing the health of your garden. Imagine the extra time you would have if you never tilled your garden again. Guess what? Not only can you save time with a no-till garden, you can improve the quality of your soil that way too!


My friend Shawna Coronado is a talented gardener, promoter of green lifestyles, and garden-hack pro. Shawna joins us today to share the details on how to create a no-till garden from her wonderful book 101 Organic Gardening Hacks. If you like this time-saving, soil-improving, organic gardening hack, you’ll love the other 100!


Retire Your Tiller


By Shawna Coronado


If you love your soil, stop flipping it over.


Sometimes the best way to improve something is to let it be. A no-till garden is a perfect example. And creating one also means less work for you. Imagine building a large garden without having to turn the soil over in your garden beds.


Turning soil kills the microbes living beneath the ground that contribute to a healthier root system by living symbiotically with your roots. There are billions of bacteria, millions of fungi, thousands of protozoa, and scores of other nematodes and organisms found in one small tablespoon of healthy soil. Hacking your garden soil with a few simple no-till tips can make for hugely successful growing because you keep those vital creatures alive and happy in your garden beds.


A no-till garden has other benefits. Because you are consistently smothering weeds with mulch or compost, they struggle to grow there, and an undisturbed, enriched soil requires far less fertilizer in order to support successful plants. The no-till technique works in almost any garden space and can help grow extremely healthy organic vegetables and herbs.


How to Create a No-Till Garden


Create a No-Till Garden and Retire Your Tiller Forever | 1a-No-Till-Garden-Soil-soil-addition-Custom | Agriculture & Farming Organics Special Interests


Instead of turning your soil over for a garden, start by removing all of the grass, either by stripping the sod or smothering the grass (see Hack 79: “Kill Grass by Smothering It”).


  1. Put down a 2-inch layer of rotted manure or compost on top of the bare soil. Do not turn the soil over.

  2. Dig holes to plant your plants.

  3. Mulch the garden the first year with wood chips or another natural mulch, such as pine needles, rotted leaves, or straw.

  4. After the harvest at the end of the season, do not pull out the vegetable or herb plants by the root; cut their stems at the base of the soil and leave the roots in the ground to overwinter and eventually rot. Compost the cut plant matter.

  5. Next planting year, cover the garden with another 2-inch layer of compost.

  6. When planting new vegetables and herbs, only pull out roots from the previous year if they block an area for a new plant. Be sure to rotate the crop so that no plant from the previous season is planted in the same location in the current year.

    Create a No-Till Garden and Retire Your Tiller Forever | 1-No-Till-Garden-Soil-Front-Lawn-Vegetable-Garden-Design-Custom | Agriculture & Farming Organics Special Interests

  7. In your third planting year, follow the same practices, but add a layer of mulch instead of a layer of compost.

  8. In your fourth planting year, follow the same practices, but add a layer of soil instead of a layer of mulch.

  9. In the fifth planting year, follow the same practices, but add a layer of rotted manure instead of a layer of soil.

  10. In the sixth planting year, follow the same practices, but add a layer of compost instead of rotted manure.

  11. Continue every season layering up the compost, mulch, soil, and rotted manure without ever turning over the soil.


Create a No-Till Garden and Retire Your Tiller Forever | Shawna-Coronado-Author-of-Grow-a-Living-Wall-shares-How-to-Build-a-Vertical-Garden-600x563 | Agriculture & Farming Organics Special Interests


Shawna Coronado is an author, columnist, blogger, photographer, and spokesperson for organic gardening, green lifestyle living, and culinary preparation who campaigns for social good. Shawna’s goal in authoring gardening and green lifestyle books is to promote a world initiative to encourage healthy and sustainable living. She was featured as a Chicago Tribune “Remarkable Woman” and speaks internationally on building community, simple urban garden living, and green lifestyle tips for the everyday person. Shawna lives in the western suburbs of Chicago where she has a famous front lawn vegetable garden. You can learn more about her at www.shawnacoronado.com.


The post Create a No-Till Garden and Retire Your Tiller Forever appeared first on The Sleuth Journal.

Monday, April 2, 2018

7 Common Household Items That Make For GREAT Garden Fertilizer

7 Common Household Items That Make For GREAT Garden Fertilizer

Image source: Pixabay.com


Self-sufficient gardeners avoid the use of pre-packaged fertilizers and soil from the store. While fertilizers are easy to use, off the grid living means a store isn’t always nearby, and you might not have the means to purchase the items. Chances are you have plenty of items in your house that can be used to fertilize your garden, saving you money and time. Let’s take a look!


1. Coffee grounds. Do you start the day with an overflowing cup of coffee? Those dried coffee grounds add nitrogen, potassium and magnesium to your garden, all vital nutrients for the growth of your plants. However, it is important to remember that coffee grounds can change the pH of your soil, possibly affecting plants that need a delicate balance.


2. Tea bags. If you aren’t a coffee drinker, tea bags have a very similar effect to the soil as coffee grounds. You have to remove the tea grounds from the bags and allow them to dry before application. Many gardeners notice tea grounds are particularly beneficial around tomatoes.


3. Egg shells. Your chickens can contribute to more than just breakfast. Egg shells are a fantastic calcium source. Remember, you can grind them up and mix into their feed if you notice the shells becoming soft.


After breakfast, wash out the shells and let them dry. Break the shells into smaller pieces and put them in the ground when planting tomatoes. You can also add them around the base of already planted tomatoes. Tomatoes require more calcium than other plants.


4. Fish scraps. Early Pilgrims had trouble growing crops when they arrived in North America, mostly because of nutrient-lacking soil. The Indians who came to their aid, including the famous Squanto, taught the Pilgrims a trick – burying fish with the seeds. You don’t need to plant multiple fish inside of your garden, but using the scraps can help.


If you have an aquarium, don’t dump the water down the drain. Use this water to hydrate your garden beds and potted plants. The fish waste provides vitamins to the plants without any extra steps for you! If you filet a fish, save the bones and scraps. Some gardeners like to puree them with water and milk, creating a strong fertilizing mixture. You could bury scraps as well,


5. Wood ash. Those who have a wood stove or fireplace have a free source of fertilizer, adding potassium and calcium carbonate to the soil. Remember never to use the ash if you added anything else! Ash is an easy way to increase your soil pH, so don’t use it if your soil is alkaline. Ash is also known for keeping slugs away from your plants.


6. Bananas. Do you have kids who eat bananas like candy? Your garden loves banana peels, as well! Putting them in your compost pile is a good first step. You can also put them right into your garden to give the soil a quick potassium boost. Peels degrade fairly quickly, and they don’t produce a nasty odor. A benefit of using banana peels is that they repel pests!


7. Powdered milk. Do you have powdered milk in your cabinet that is past expiration? Don’t throw it away! You can mix one part milk into four parts water. You can also use expired milk in your fridge. Milk is a fantastic source of calcium for more than just humans! It also contains proteins, vitamin B, and sugars that improve the overall health of the plant. Plants that are failing to grow to their full potential can benefit from a boost in calcium. Milk also helps with blossom end root, commonly ailing squash, tomatoes and pepper plants.


There are so many different household items that fertilize your garden. Instead of spending money at the store, raid your cabinets! Remember to put your vegetable and fruit scraps into the compost to save money and add nutrients to your garden.


What would you add to our list? Share your additions in the section below:

Monday, March 26, 2018

10 Essential Steps To Starting Seeds Indoors

10 Essential Steps To Starting Seeds Indoors

Image source: Pixabay.com


One of best reasons for starting your own seedlings indoors is the cost-savings. When young plants are in their prime at nurseries and garden centers they also have a premium price. If you’re planting an ambitious garden, it can get expensive.


Maybe the best reason is the feeling of accomplishment, especially if you do it with the kids. This will give them a good lesson in plant germination, growth and the care and feeding of vegetables once they’re planted in the garden. They also may find them to be more interesting at the dinner table if they feel like they planted them themselves.


Seamazing: The Low-Cost Way To Re-mineralize Your Soil


Here are 10 steps to get started:


1. Decide want to plant. Hardware stores, nurseries and garden centers all have stocks of seeds you can choose from, but before you buy the rack, take a look at your garden space. Or, you can get a catalog.


2. Decide where to plant. All gardens come in a certain size. Some are large, and some are small. You need to think about how much space a mature vegetable needs and plan accordingly. Plants that are too tightly cluttered together will compete with each other for water, nutrients and sunlight. High-density planting also can create an environment for fungal growth that can wipe out an entire garden in a matter of days.


3. Know your plants. Some vegetables do better in the shade — cabbage, Brussels sprouts, cauliflower, kale and broccoli. Other plants get along well when they’re planted next to each other. A classic combination for companion planting are onion sets planted between rows of tomatoes. The two plants seem to thrive next to each other; this allows you to squeeze a little more space out of your garden. Other vegetables enjoy sun and a lot of space. All varieties of squash fall into this category, especially zucchini, tomatoes and peppers.


4. Choose a pot. Or, start saving those egg cartons. But there’s a certain kind of egg carton you need to buy and save. They’re the egg cartons made from a pressed cardboard. These cartons allow water to soak up into the soil through the carton when placed into a pan of water. The styrofoam egg cartons are water proof and can’t perform the same function.


5. Learn a potting soil recipe. You can buy your own potting soil at a garden center. In fact, some are specifically designed for sprouting. You could also make you own by blending 1/3-part dirt, 1/3-part peat moss and 1/3-part sand. This will create a moist environment for the seeds, and the sand will help with drainage, so the soil doesn’t become water logged.


6. Consider a self-watering system. This is actually quite simple.  You place your egg cartons into a pan filled with about a half inch of water. You then stretch plastic wrap over the top of the egg carton and move the pan with the egg cartons to a sunny spot in your house. What you’ve essentially created is a greenhouse environment. The plastic wrap keeps the soil from drying out in the sun. But check your water level daily to make sure everything is moist.


7. Tend to the first spouts. As your vegetables sprout, you’ll want to “tent” the plastic wrap. This is easy to do with sticks stuck into the egg cartons to keep the wrap above the tender leaves. You’ll eventually remove this tent as more leaves emerge and the plants grow.


8. Harden off your sprouts. You don’t want to plant your sprouts directly into the garden. You’ll want to harden them off to acclimate them to the outdoors. This is as simple as placing the plants outdoors during the day. If you have a picnic table or other raised surface, put the plants on top to keep the pesky rabbits and rodents away. Also, keep an eye on the temperature to avoid an early morning or late evening frost. After about a week of hardening-off, you’re ready to plant in the garden. Keep an eye on your spacing so you don’t over-crowd.


9. Don’t start just anything indoors. The best plants for sprouting indoors are plants that bear fruit or vegetables on the vine or stalk. This includes tomatoes, peppers and squash in all varieties — in addition to broccoli, cauliflower, Brussels sprouts and cabbages. Herbs also take well to sprouting. Vegetables that don’t tolerate sprouting include many root vegetables. Root vegetables also tend to be fast to germinate and grow. We’ve all probably admired radishes popping up so soon in the garden. One root vegetable exception are onions. The small, grass-like sprouts are easily planted and are surprisingly resilient.


10. Get the timing right. The timing for sprouting various vegetables varies. Here’s a general cheat sheet that gives you some average dates for sprouting certain vegetables. This could vary depending on what part of the country you live in, but this chart makes for a fairly accurate average assuming a general planting date in the garden of May 15-30. However, some cruciferous vegetables in the brassica family such as cabbage, Brussels sprouts, kale, cauliflower, broccoli and others have a high tolerance for cold weather and can be transplanted earlier. When transplanting is defined by a range of dates in the chart below, that means you should evaluate your local conditions and frost forecasts.


VegetableStart IndoorsTransplant Outdoors
BasilApril 15thMay 30th
TomatoesApril 15thMay 15th to May 30th
BroccoliMarch 15thMay 1st
CauliflowerMarch 15thMay 1st
PeppersMay 1stJune 15th
ParsleyMarch 15thMay 15th
CabbageMarch 15thMay 1st
PumpkinMay 1stMay 15th to May 30th
KaleMarch 15thApril 30th
CeleryMarch 20thApril 15th
CucumberMay 1stJune 15th
OnionsMarch 30thMay 1st
LettuceMarch 30thMay 1st
MelonApril 15thJune 1st
Brussels SproutsMarch 30thMay 1st
PeasMarch 30May 15th
CornApril 15thMay 15th


Hopefully this year, you will enjoy a longer growing season thanks to something as simple as egg cartons and a little pre-planning.


What planting tips would you add? Share your advice in the section below:

Monday, March 19, 2018

30 Easy-Storage Garden Foods You Don’t Have To Preserve Or ‘Put Up’

30 Easy-Storage Garden Foods You Don’t Have To Preserve Or ‘Put Up’

Image source: Pixabay.com


Food preservation skills are an important part of homesteading. It’s wonderful to pop open a jar of home-canned tomatoes or enjoy your own frozen peaches when the garden and orchards are buried under two feet of snow. But let’s face it—there are only so many hours in a day, and food preservation is time-consuming!


Wouldn’t it be easier if you could grow foods that store themselves? You can. There are plenty of foods you can grow that store well without going to the trouble of canning or freezing or dehydrating. You might be growing many of them already! But just in case, here are a couple of handy lists to use when choosing crops that can help reduce the workload at harvesttime.


Here are some foods that store themselves right in the garden. Depending upon climate and specific cultivars, these vegetables can either overwinter or last partway into winter.


Kale. I leave mine in the garden until it is literally buried under snow. As winter encroaches, it becomes less appealing to eat fresh, but is still great for smoothies, soups, and calzones.


Collard greens. These are hardy in cold weather, but do not last as well as kale in my garden.


Brussels sprouts. The texture changes as the temperature drops, but they are still good to eat.


Cabbage. Like its cruciferous cousins—kale and Brussels sprouts—it loses texture appeal as it freezes, but is still edible cooked.


Parsnips. Around my homestead, April is peak parsnip season. I routinely leave them in the ground all winter and dig them as soon as the ground thaws, with excellent results.


Carrots. Many people leave carrots in the ground all winter. My own success with this method has been marginal, because underground animals—mice and voles, I presume—love to eat them. But for those whose local pests do not love carrots, this is a great option.


Other foods do well in cold storage, harvested and put into a climate-controlled cellar where, ideally, they are kept at just above freezing. As with the list of foods that store well without harvesting, individual success with cold storage techniques can vary depending upon cultivars and the conditions—temperature and humidity—of the storage area. Here’s the cold storage list:


Potatoes. One of the many advantages to potatoes is that they store well for many months in the right conditions.


Sweet potatoes. When well-cured, sweet potatoes last a long time as well.


Winter squashes. This is a category in which types and cultivars vary widely in their ability to last in cold storage. I grow an assortment of winter squashes, and try to eat up the poorer keepers first.


Pumpkins. As with squashes, depending up cultivar, pumpkin longevity in storage can vary.


Leeks. I’ve had great success with leeks lasting well into February, tossed root-down in a plastic storage tote in the coldest part of the cellar.


Onions. The secret to long-term onion storage is to keep them from touching each other. The best way I’ve found to do that is to hang them in old nylon stockings, with a knot tied between each onion.


Carrots. Root-down in a bucket of clean sand, and they’ll last well.


Parsnips. Store them the same way as carrots.


Brussels sprouts. These are easy to store, right on the stalks. Harvest, trim, and keep cold.


Cabbage. It’s a good idea to choose a cultivar developed for long storage, and then just pull them up by the roots and hang them upside down from the root cellar rafters.


Daikon radishes. Any large winter radishes do well in cold storage, much the same as carrots.


Beets. I’ve had good luck storing them in clean sand.


Celeriac. This is another good candidate for cold storage, either just in an open-air basket or in sand.


Garlic. I’ve had good luck keeping garlic for many months, often lasting until scapes begin to form on a fresh crop. The secrets seem to be proper field curing and keeping it in the dark.


Shallots. Like their allium cousins—onions, leeks, and garlic—these store well in open air.


Turnips and rutabagas. These, like most other root vegetables, do well in cold storage, and are not fussy about conditions.


Kohlrabi. Like many brassicas, kohlrabi stores nicely in baskets, totes, or on the shelf.


Popcorn. I have had success drying popcorn on the cob and storing it in a paper bag in the kitchen cabinet—pretty easy!


Apples. Some apples can last in cold storage all the way to March, April, and even beyond. Apples do well in cold humid conditions.


Pears. Many pears last well into winter when kept cold.


Certain herbs. I use cold-hardy herbs like sage and rosemary straight from the garden until they are buried under snow.


Dry beans. When it comes to return on investment, it doesn’t get much better than dry beans. Cheap, hardy, easy, and extremely long-lasting in storage. Beans are happy in cool dry conditions, in screw-top containers.


Many grains. While grains do not exactly store themselves almost straight from the garden like much of the food on this list does—grains do need a bit of processing between the field and storage—they still store without needing to be canned or frozen.


Most nuts. With the outer husks removed, nuts are a great choice for preservation-free food.


Food preservation is an irreplaceable component in the overall diets of most homesteaders. But it never hurts to grow some foods that preserve themselves with little or no effort.


What would you add to our list? Share your thoughts in the section below:

Friday, February 23, 2018

This Do-It-Yourself Garden Hack Is The Secret To An Abundant Garden

This Do-It-Yourself Garden Hack Is The Secret To An Abundant Garden | vegetable-garden-soil | Agriculture & Farming Organic Market Classifieds Organics Special Interests


My grandfather always had a robust garden filled with vegetables. His secret was rich, nutrient dense soil. He taught me that the plants we grow and soil have a symbiotic relationship. If the soil has nutrients, the plants will thrive. That said, many gardeners forget this vital tip and tend to lean towards chemical fertilizers as a way to quickly replenish their soil and grow their plants. Overtime, this can can cause the soil to become depleted of vital nutrients because the fertilizers kill or leaches out the nutritional aspects of the soil. As well, chemical fertilizers are not welcoming to microorganisms that live in the soil. You want to ensure the fertilizer method you use is biodynamic and efficient in the amount of materials used versus the amount of coverage area.


Why is Soil So Important?


Foremost, it is important to understand what soil actually is. According to the Soil Science Society of America, “Soil is not dirt.  It is a complex mix of ingredients: minerals, air, water, and organic matter – countless organisms and the decaying remains of once living things.  Soil is made of life.  Soil makes life.  And soil is life.” In order for plants to grow to their optimum capacity, they need nine different nutrients present in the soil.  While most of these elements and nutrients are naturally found in soil, sometimes they can become depleted and need to be added to keep the soil healthy.


  • Carbon – found in air and water

  • Hydrogen – found in air and water

  • Oxygen – found in air and water

  • Nitrogen – blood meal, fish emulsion, manure

  • Phosphorus – bone meal, rock phosphate, superphosphate

  • Potassium – greensand, mutriate or sulfate of potash, seaweed, wood ashes

  • Calcium – gypsum, limestone, oyster shells, slag

  • Magnesium – dolomite, magnesium sulfate (Epsom salt)

  • Sulfur – sulfur, superphosphate


Creating a no-till garden or utilizing the sheet mulching method can add these vital elements and nutrients back to the soil. This is a type of whole-system approach to gardening that helps feed the soil while vegetables and crops are growing. Another way to do so is by using an old-fashioned compost tea will help restore many of these essential nutrients, microorganisms and vital minerals naturally.


It should be stated that the elements listed above are not the only things that should be present in the soil. Microbes such as protozoa, fungi, algae and bacterias should also be present, as they affect soil structure and fertility. In fact, millions upon millions of microbes are present in healthy soil and it is important to ensure they make your soil their home. Ensuring that you have a lot of biomass present in your soil will keep them thriving.


Compost Tea


Compost tea takes the beneficial bacteria and fungus present in compost and exponentially increases them through aeration and sugars. These bacteria and fungus are critical in root establishment – and the more bacteria you have in your soil, the better. In fact, if you diversify your bacterias, you will make a healthier soil and compost tea is one of the easiest ways to do this.


Benefits of Compost Tea


  • Increases root development

  • Suppresses plant diseases

  • Creates a biodiverse soil food web

  • Encourages plant growth and vitality

  • Increases plant yield


The equipment you will need to make compost tea is as follows:


  • 5-gallon bucket

  • An aquarium pump large enough to run three bubblers or air stones

  • Several feet of tubing

  • A stick to stir the mixture

  • Something to strain the tea, like an old pillowcase or nylon stocking


Tess’s Compost Tea


Note: I will also add some earthworm tea that I have from my earthworms and this adds even more nutrients to the brew!


  1. Add water to a 5-gallon plastic bucket. If you are using tap water, allow water to sit for 24 hours in order for chlorine and other chemicals to dissipate.

  2. Add liqui ingredients to water in 5-gallon bucket and stir until incorporated.

  3. In pillowcase or nylon stocking, add dry ingredients (rock dust, inoculant, manure, worm castings, etc.) and tie onto stick and add to bucket.

  4. Turn on aquarium pump with hose attached and oxygenate water for 18-24 hours. This will help the beneficial bacterias, minerals and sugars activate.

  5. Periodically check on brew. There should be a nice foam at the top.

  6. After 24 hours, turn off pump and remove dry ingredients (add to compost pile). Use compost tea as a foliar spray or root drench.


Note: Do not over-brew your compost tea. Twenty four hours is all it needs to get the protozoa and fungi kickstarted into reproduction. 


You can use the tea as often as you wish. I used this tea once a month on my garden, or when I thought the plants needed a little extra TLC. In fact, you can also use compost tea to prevent plant shock by soaking new plants in compost tea to add beneficial soil microorganisms right before it gets planted. used it as a foliar spray and as a root drench and my plants thrived. After a three month period, I was very impressed with the soil. It was fluffy, retained moisture and I noticed more beneficial insects coming around more. Another highlight of using compost tea was when harvest time came, the vegetables tasted sweeter than usual. I’m not sure if this was a result for the compost tea or just a fluke, but I felt that it had to be mentioned. As well, I had no issues with molds or diseases this year and believe it to be a result of the compost tea I used. This is by far the easiest way to get essential nutrients quickly into the soil, and I love that it can also be used as a foliar spray. As well, the initial investment of compost tea ingredients will provide for many uses; so I can make compost tea all year with the ingredients that I purchased in May!


Once again, my grandfather was right about giving the soil what it needs to thrive and proved it by the bountiful harvests he had year after year. I highly recommend using this in preparation for your upcoming gardens. I have had nothing but success with this natural fertilizer method and look forward to my next harvest.


The post This Do-It-Yourself Garden Hack Is The Secret To An Abundant Garden appeared first on The Sleuth Journal.

Monday, December 18, 2017

Inexpensive Ways To Help Potted Plants Survive Winter

Inexpensive Ways To Help Potted Plants Survive Winter

Image source: Pixabay.com


Raise your hand if you’ve ever scored a massive deal at your local nursery at the end of the gardening season. Keep your hand up if those massive deals were on half-dead plants in plastic containers.


I did that once. I couldn’t resist all those dirt-cheap perennials that would keep me in strawberry rhubarb pies until my dotage. But I should have known better. I’m always in overwhelm mode in late summer and fall, trying to keep up with the plants that still need tending as well as with harvesting and preserving produce and getting ready for winter. Taking on another task, like figuring out where to plant perennials and actually getting them into the ground, was not a smart idea. And so, confession time: I didn’t plant any of them. They just sat there in their flimsy plastic pots all winter. In the spring, the peonies somehow, miraculously, sent out shoots and I got those into the ground. The rest looked beyond hope and I tossed them into the compost pile.


I’ve since learned that there are ways to overwinter plants in pots regardless of whether they’re geriatric escapees from the nursery or potted plants that you’ve had in your garden all season long.


Why Not Just Overwinter in Pots?


There are several reasons why plants have a hard time surviving the winter in containers–and most are related to the plant’s roots.


First, roots are typically hardy to two zones warmer than the plant. If, for instance, your plant is hardy to Zone 4, the roots are only hardy to Zone 6. Roots don’t have to be as tough because they’re protected by the soil. However, the small amount of soil in a pot doesn’t provide enough insulation to adequately protect roots.


Second, pots are more susceptible to freeze/thaw cycles because that small amount of soil can warm up very quickly. If you live in a colder zone, plant roots will freeze regardless of whether the plant is in the ground or in a pot. If the roots are hardy to your zone, frozen roots are part of the plant’s life cycle and nothing to worry about. However, while roots might freeze, they don’t go dormant. When the ground warms up enough, tender new roots will grow. But those young roots don’t have the ability to withstand colder temperatures; they will die when it gets cold again. This process of producing new roots that die off shortly afterward can seriously weaken the plant. It’s actually better for roots to remain consistently frozen (or at least consistently cold) all winter long.


Third, if your containers are left on a flat surface the frost, ice, and snow that accumulates on the pot’s soil can lead to root rot. As temperatures fluctuate, that frozen moisture thaws and saturates the pot. Once the temperatures dip again, the wet soil freezes. And the next time a thaw cycle hits, more ice and snow thaws and is added to the pot’s already saturated soil.


There’s no doubt that potted plants have it tough in the winter. But as the story of my peonies shows, they can pull through extended cold spells. Still, rather than just cross your fingers and hope for the best, there are things you can do to help your potted plants make through the winter.


Bring Them Inside


This seems like the most obvious suggestion, but you need to be careful about where exactly you move your plants to. Since most perennials require a period of dormancy, you can’t move them into a warm sunny window and treat them like houseplants (the exception here are geraniums). An unheated garage or shed is ideal, but a cool basement can also work. If you overwinter your perennials this way, you’ll need to water them whenever the soil gets completely dry.


Use a Sheltered Outdoor Spot


If you don’t have a suitable indoor spot, or if you have too many pots to find space for, another option is to move them to a sheltered outdoor location and cover them with mulch.


The best spot is on the north side of your house, garage, or shed. Lining up pots along a house (or heated garage) wall will provide them with some consistent warmth, while also blocking the sun on warmer days to minimize freeze/thaw cycles.


For extra protection, bury the pots in mulch–and at this time of year, it’s easy enough to find leaves for that job.


Wrap Them Up


While gardeners may wrap above-ground growth–like shrubs, hydrangeas, and rosebushes–in burlap over the winter, potted plants have a different issue. As explained earlier, it’s usually not the plant growth that needs protecting in a pot–it’s the roots. You can insulate and protect your roots by wrapping the pots in bubble wrap, burlap, or old sheets.


Bury Them, Pot and All


This is the most labor-intensive option, but it gives your plants the best chance of survival. And while it still involves some sort of planting, it doesn’t have to be as strategic as choosing a permanent place for the plant.


Depending on the number of plants you have, dig a hole or a trench in your garden or compost pile. The depth of the hole depends on how large your pots are. Ideally, the pots should be laid–or at least tilted–on their sides to prevent thawed moisture from accumulating on top. Once placed in the trench, the pots should be covered with mulch, or lightly covered up with soil. If you don’t have the space–or the time–to dig a big enough trench and need to leave the pots upright, bury only two-thirds of the container to improve drainage.


Potted plants do need a little bit of extra help to make it through the winter, but they’ll reward those efforts in the spring. What are your tried and true tricks for overwintering potted plants? Tell us in the comments below.


What advice would you add? Share it in the section below: 

Monday, December 11, 2017

5 Reasons To Apply Mulch Before The Snow Flies

5 Reasons To Apply Mulch Before The Snow Flies

Image source: Pixabay.com


Mulch? In the winter? You betcha.


Mulches — particularly organic ones — are gardening stars. But when mulches are touted, we usually hear about benefits that are specific to the growing season. Mulches, Wikipedia tells us, “retain moisture in the soil [which is particularly helpful during droughts], suppress weeds, keep the soil cool, and make the garden bed look more attractive.” Right. So what’s the point of mulching in the winter? There are actually five very worthwhile reasons to spread some mulch before the snow flies.


1. Extending the Growing Season


Mulching before the ground freezes helps keep the soil warmer, which prolongs your growing season. This is especially valuable for cool-weather root crops. When mulched, veggies like beets, parsnips, carrots, kohlrabi, radishes and turnips can survive hard frosts.


Need Non-GMO Garden Seeds? Get Them From A Company You Can Trust!


You can certainly fork up all your root vegetables before any frost, but it pays to leave them in the ground. These vegetables increase their sugar production as a natural response to the cold. Since sugar freezes at a lower temperature than water, the sugars act as a kind of natural antifreeze. As might be expected, the sugars also increase the sweetness and flavor of these vegetables, making a late harvest extremely worth your while. However, a word of caution: If you live in a cold zone where the ground freezes through, you should fork up your root vegetables before a serious cold spell. Otherwise, you’ll need a pickaxe out there!


2. Protecting Perennials


When I think about mulching perennials for the winter, my mind goes to flowers. But, of course, there are perennial herbs and vegetables, too. Artichokes, asparagus, horseradish, rhubarb and sunchokes would appreciate a toasty layer of mulch, as would any herbs that function as perennials in your hardiness zone. And don’t forget about your berries, especially the low-growing strawberries.


3. Minimizing Frost Heave Damage


While mulch protects perennials against extreme weather, it can also prevent root damage caused by frost heave. As unprotected soil goes through freeze/thaw cycles, it expands when its moisture freezes. This expansion can push the soil upwards and may push plant roots up at the same time. If the exposed root freezes, it can be damaged. Mulch moderates soil temperature so that the freeze/thaw cycles aren’t as marked or as frequent, minimizing heave.


4. Improving the soil


Any type of mulch can help protect soil from the heavy winter rains and excessive snowmelt that can cause soil erosion and compaction. And, of course, organic mulches improve the soil by releasing nutrients and organic matter as they break down. This is true regardless of whether the mulch is applied in late fall or during the growing season.


That said, certain types of mulches are more beneficial to both soil and plants if they’re applied in late fall or winter. As this article points out, woody mulches (wood chips, bark, or sawdust) need nitrogen in order to break down. When applied in the summer, woody mulches can tie up the soil’s nitrogen resources as they decompose, making that nitrogen unavailable to plants in the area. But if woody mulch is applied in late fall or winter, it will begin breaking down before plants need the soil’s nitrogen resources.


5. Suppressing weeds


One of the best things about mulch is its ability to suppress weeds. It may seem pointless to apply mulch in the winter for weed control. But come spring, that mulch will be covering the last season’s weed seeds, preventing them from sprouting.


Choosing Winter Mulch


The nifty thing about mulching for winter is that there’s plenty of free mulch for the taking. Leaves, of course, are naturally abundant at this time of year, but you can use other yard and garden debris too including grass clippings, pine needles, evergreen branches and boughs, and pulled vegetable plants that are destined for the compost bin. As an added benefit, garden debris provides a cozy habitat for crickets, which enjoy chowing down on weed seeds.


In addition to free mulches in your own yard, check with stores and businesses that use straw bales for fall decor. Once the cardboard turkey and maple leaf displays get the heave-ho, the straw bales will need to go somewhere, too. Why not pop them into your garden instead of into the trash? (Be wary of hay bales, though, which contain more weed seeds than straw bales.)


Applying Winter Mulch


As stated above, applying mulch before the ground freezes can extend your growing season and contribute to better tasting root vegetables. On the flip side, applying winter mulch before winter is here to stay can attract nesting rodents. When you apply winter mulch in your own garden comes down to personal choice. Consider what type of mulch you’re applying and what your primary reason is for mulching. If you mainly want to extend the growing season, then it makes sense to mulch before the ground freezes. But if you’re mulching to suppress weed growth in the spring, then waiting for the ground to freeze is the better option.


Once you actually start mulching, aim for a depth of about 6-12 inches. If you live in a blustery, wintry zone and you’re using lightweight mulch like shredded leaves or straw, it’s a good idea to cover that mulch to prevent it from blowing away. Use an old bed sheet or, if you use them, a fabric row cover, and anchor that fabric with bricks, logs, or ground staples.


Have you ever used mulch during winter? What advice would you add? Share it in the section below:


Thursday, November 2, 2017

Autumn Leaves: ‘Miracle Mulch’ For Your Spring Garden

How Autumn Leaves Can Become

Image source: Pixabay.com


As we enjoy the changing seasons and the vibrant colors that come with autumn, we prepare ourselves for cooler temperatures and the raking and gathering of fallen leaves. For gardeners, this doesn’t mean an added chore, but actually a beneficial moment for improving and preparing our gardens for winter. There are many uses for those discarded leaves, and below are a few common ones.


  • Compost: Mow the leaves and place in the compost pile. It is easy to shred the leaves with a mower.

  • Leaf mold: This is a pile of leaves and soil that sits for about a year, and then is added to the compost. It helps with nutrients and soil-building.

  • Storing: This is a method of keeping all the leaves in a pile and using them to add to the compost when brown material is needed.

  • Mulch: Mulch retains moisture, controls temperature of soil and limits weed growth. Leaves also add nutrients and brown material as time goes on.

Let’s take a look at using autumn leaves. Mulching is one of the easiest and most beneficial methods of using autumn leaves. It is also the most inexpensive way to deal with fallen leaves and takes as much, or even less, time than the usual raking and bagging. Mulch can be used in vegetable gardens, flowerbeds, shrubs and under trees. It looks attractive in any garden and is completely natural.


Tree leaves absorb about 50 percent of the nutrients that the tree gathers during the growing season. By using as mulch, they return these nutrients to the soil. They also encourage worms and micro-organisms to work the dirt. The end result will be a lighter soil which is easier to work and grow plants in.


Your Best Source For Non-GMO Seeds Is Right Here!


Mulch can also be used to insulate plants and protect them from the cold winter winds and temperatures. It helps prevent soil compaction.


Things to Remember


How Autumn Leaves Can Become

Image source: Pixabay.com


Almost any leaves will make good mulch, but not Black Walnut. Black Walnut leaves should never be used because there are plants that are sensitive to this particular leaves’ compounds. Use only healthy leaves, not any covered with mildew, rust or tar. If you collect from trees such as laurel, walnut and eucalyptus, compost them before turning into mulch as they contain growth-inhibitors.


Shred the leaves before using in the garden. Whole leaves can prevent water from reaching the ground and plants. When you shred leaves for mulch, you are ensuring micro-organisms have more room to do their work.


Mulch expands, so cover all the ground with an even distribution, but don’t put it right up on a plant’s stem or trunk. Otherwise, it will encourage rot.


This New All-Natural Fertilizer Doubles Garden Production!


Here are some essential tips:


  • To start mulching, use the lawnmower and run over the leaves a few times. This mowing will shred the leaves into acceptable sizes. Once mowed sufficiently, rake into piles, and place in bags, buckets or wheelbarrow to move to where you need to mulch.

  • Weed the area first, and then add mulch

  • Apply a two- or three-inch layer of leaf mulch around the vegetable garden and flower beds.

  • If you cover vegetables like kale, leeks, carrots and beets, you may be able to harvest them most of the winter.

  • For plants like leeks and other closely planted greens, use your hands and take fistfuls of mulch to place several inches between the vegetables.

  • Plants that love shade can be covered by leaf mulch. It’s natural for them to be covered at this time of year. Place less than two inches, or five centimeters, of mulch over them so they can push through with little issue in the spring.

  • If you are using mulch as insulation, use about six inches, or 15 centimeters, to protect the more tender plants.

So when you see the leaves begin to fall this year, do not worry. Use them to enhance and create healthy plants and soil for the next season. With a little work, you can have a top-notch, natural mulch all your neighbors will envy! Nature provided us with the best mulch material, so don’t waste it. Mow those leaves and create an awesome autumn leaf mulch.


Got any fall mulching tips? Share them in the section below:


Every Year Gardeners Make This Avoidable Mistake — But You Don’t Have To. Read More Here.

Wednesday, November 1, 2017

7 Steps To Growing Citrus Indoors … No Matter Where You Live

7 Steps To Growing Citrus Indoors ... No Matter Where You Live

Image source: Pixabay.com


When skies hang low and gray, few things brighten an indoor corner quite like a citrus tree. Laden with camouflaged limes or unignorable lemons, modern dwarf varieties mean that growing citrus is no longer the exclusive purview of the fortunate few who make their homes in places like Florida.


Of course, while it’s possible to grow citrus almost anywhere assuming you have a warm, well-lit, place for it, coaxing indoor versions of these outdoor staples to thrive and fruit requires special attention. Here are some helpful tips for growing citrus in containers.


1. Opt for acidic


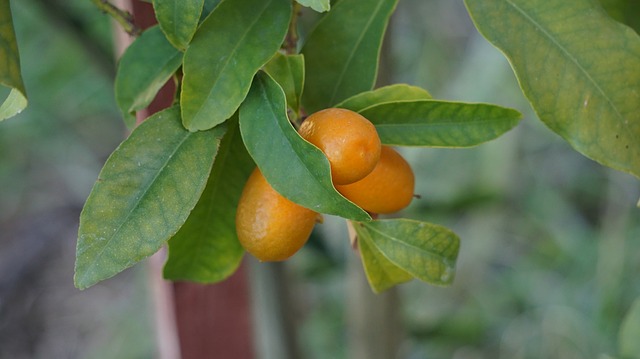
If your goal is to grow actual fruit, rather than simply a lovely flowering tree, then picking the right variety to start with will greatly improve your odds of success. For best results, stick with fruits that are decidedly acidic, such as improved Meyers lemons, kumquats, and ponderosa limes and avoid the sweeter citrus options like sweet oranges and grapefruits.


2. Pick the right pot


Even dwarf variety trees intended for growing in containers require a decent amount of room in order to thrive. Plants that are 2-3 years old will do OK in 12-inch diameter (5-gallon) pots. Four- to five-year-old plants will need something closer to a 24-inch diameter (15-gallon) pot.


Need Non-GMO Seeds? Get Them From A Company You Can Trust!


Although pots can be made of almost any material, note that plastic ones do tend to warm the roots more than other materials, potentially damaging them, while wood ones are more prone to rot.


3. Not all dirt is created equal


While at first glance soils may look similar, it’s important to give your new container-bound best friend a good place to put down roots by using quality potting soil. Potting soil is formulated to handle the increased demands of container plants, and it drains significantly better than even good caliber gardening soil.


When planting, keep the root crown just above the surface of the soil and the top of the leggy root mass just below the surface.


4. Keep dish soap around


7 Steps To Growing Citrus Indoors ... No Matter Where You Live

Image source: Pixabay.com


Few things are as important to your growing citrus tree as appropriate moisture. Make sure the bottom of the pot allows for good drainage, and then wait for the surface of the soil to dry out between watering. When watering, thoroughly soak the root ball.


Sometimes, you may notice that the water seems to go straight through the soil without actually soaking the root ball. This happens because, as it dries out, the root ball shrinks and pulls away from the edges of the container, allowing water to sneak through in the gaps. To remedy the situation, simply add a few drops of mild dish soap to the exposed root crowns before watering — it will help the water adhere enough to re-soak the root ball.


5. Fertilizer it, slow and steady


Citrus plants are strikingly susceptible to nutrient deficiencies, especially when it comes to iron, manganese and zinc. These deficiencies will cause leaves to yellow and the plant to suffer.


Get Out Of The Rat-Race And Make Money Off-Grid!


Potting increases the stress on citrus soils because the necessary amount of drainage can flush away soil nutrients even faster. To counteract these effects, select slow-release, chelated fertilizers to help keep your indoor citrus well-nourished.


6. Watch the lighting


Most homes are darker, warmer and drier (especially in the winter) when compared to a citrus tree’s natural surroundings. Keep your plant feeling right at home by upping the light levels and the humidity. Cool, well-lit spaces, like a partially heated sunroom, are especially well-suited for growing indoor citrus. Grow lights are another possible addition sure to be loved by lemons, limes and all their bright-flavored buddies.


7. Watch out for suckers!


Finally, keep an eye out for suckers. Most dwarf citrus varieties have been grafted onto borrowed root stock. Often, the root stock will try and send up growth of its own. Known as “suckers,” these little branches will steal away nutrients and energy from the rest of the tree and should be removed as soon as spotted. To preserve the health of the tree, carefully cut away any branches that appear below the graft scar, typically located just a few inches above the crown roots.


Few things taste better than fresh citrus, and a potted citrus tree is sure to add beauty and interest to any home. Use these tips to help get started growing container fruit that will make the grocer’s produce aisle jealous.


What advice would you add? Share your indoor growing tips in the section below:


Discover The Secret To Saving Thousands At The Grocery Store. Read More Here.


Saturday, October 21, 2017

So Many Zucchini, So Little Time! Tips To Use Up Your Zucchini Harvest

So Many Zucchini, So Little Time! Tips To Use Up Your Zucchini Harvest

Image source: Pixabay.com


We’ve all heard jokes about gardeners creeping up to their neighbors’ doorsteps in the dead of the night to “give away” extra zucchini squash. There are few garden plants that produce as prolifically as zucchini. Although there are many creative recipes for fresh zukes, it’s easy to get overwhelmed by the bounty. But, if you have more than you can eat right now, don’t give away all your extras. There are a bunch of things you can do with the squash so that you can enjoy it throughout the winter.


Picking and Storing Fresh Zucchini


Since zucchini is a summer squash, it has tender, thin skin. Unlike winter squash (including pumpkins and spaghetti squash) with their thick rinds, summer squash doesn’t store well. Even in the fridge, zucchini will keep for 7-10 days at best.


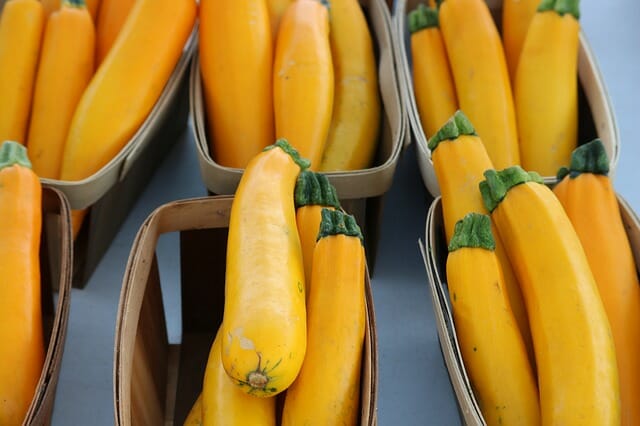
It’s best to pick zukes when they’re about 6-8 inches long. At that size, they’re tender and mild-tasting. As zucchini continues to grow, its flesh becomes stringier and less tasty.


Looking For Non-GMO Herb Seeds? Get Them From A Company You Can Trust!


Don’t bother washing them after picking. Just brush off any dirt and put the zukes in a paper bag, or in a plastic bag that is either perforated or left open. Once bagged, zucchini should be stored in the crisper of your fridge. Keep an eye on it — when zucchini starts becoming soft, it needs to be used up quickly.


Eating Fresh Zucchini


For a long time, all I did with fresh zucchini was throw it into stir-fries and chili. As you can imagine, that didn’t make much of a dent in my harvest. Not wanting to foist any more of my zukes on neighbors and coworkers, I searched online for recipes. If you’re not a foodie, you may be surprised at the incredible variety of zucchini dishes.


  • Sliced in thin, long slices, it can take the place of lasagna noodles.

  • Cut in half and hollowed out a bit, it becomes a “boat” that can be stuffed with pizza fillings or other toppings before roasting.

  • Cut into finger-size strips and coated with breadcrumbs, parmesan cheese and spices, it becomes “zucchini fries” for a yummy appetizer, snack or side dish.

  • Put through a spiralizer, it becomes high-fiber, low-carb, low-calorie noodles, which are a perfect base for Asian- and Italian-style dishes.

  • Used as an ingredient in all kinds of salads.

With so many different ways to prepare it, it’s easy to incorporate zucchini into meals every day without getting tired of it. Do a little Googling or look on Pinterest for recipes.


Baking With Zucchini


If you have the freezer space, you could whip up cakes, loaves and muffins to stash away for the winter. If you already bake with zucchini, you know that it adds nutrients and texture to baked goods, and helps keep them dense and moist. If you don’t already bake with zucchini, it’s time to give it a go. I’m partial to chocolate chip zucchini loaf, but there are recipes out there to suit every taste.


Freezing Zucchini


Frozen zucchini isn’t at its most attractive once thawed. It’s best used as an additive to things like soups, stews, pasta sauces or chili — or in baked goods.


How you prepare zucchini for the freezer depends on how you intend to use it later. If using for baking, it’s a terrific idea to shred it up and stuff 2 cups into a freezer bag, unless you have a go-to recipe that calls for a different amount. To use it later, thaw it, drain it, drain it again, and pat it dry with a paper towel before you add it to the batter.


An All-Natural Fertilizer That Can Double Garden Production!


While grated zucchini also works well in soups and stews, sometimes it’s nice to have chunkier pieces in your dish. If that’s the route you’d like to go, you can simply chop your zukes into bite-size pieces, stuff them into a freezer bag, and toss them in the freezer. However, if you blanch them for one minute in boiling water before freezing, the thawed pieces will stay firmer than if they hadn’t been blanched.


Dehydrating Zucchini


So Many Zucchini, So Little Time! Tips To Use Up Your Zucchini Harvest

Image source: Pixabay.com


If your freezer space is maxed out, dehydrating zucchini is a terrific option. Rachel at growagoodlife.com says that four pounds of fresh, sliced zukes shrink so much during drying that they will fit into a pint-size jar! If you have a dehydrator, it’s super easy to do this: Just clean the zucchini, slice it into ¼-inch rounds, spread the slices on the dehydrator trays, and run the dehydrator as instructed. If you don’t have a dehydrator, you can do this in an oven set to 175 degrees, too–just keep a close eye on the zucchini so that it doesn’t burn. It should take about two hours to dehydrate in the oven.


Preserving Zucchini


I remember the first time my mom grew zucchini. It was the ‘80s, and zucchini was absolutely exotic in our part of the world. Mom had no idea what to do with her bounty but heard about “Mock Pineapple.” It turns out that mock pineapple is still a thing. Nutshell version: Peel and cube zucchini; stuff it into jars; cover it with a mix of pineapple juice, sugar, and lemon juice; and process in a hot water bath. The zucchini takes on the flavor of the pineapple juice, but as this contemporary recipe points out, mock pineapple is best used in recipes that call for crushed pineapple, and not simply eaten out of the jar.


If mock pineapple is not your thing (confession: teenaged me refused to eat it), there are all kinds of other ways to can zucchini, including in relishes and salsas, and as pickles. That said, it’s not recommended to can plain zucchini. Because it’s a low-acid vegetable, it would need to be processed in a pressure canner, which is not recommended. Further, canned squash gets quite soft, and has limited uses.


There are so many ways to use and store this very versatile vegetable! What do you do with your extra zucchini? If we missed discussing a way to use it up, please let us know in the comments below.


Tuesday, October 17, 2017

Why Fall May Be The Best Time To Plant Your Onions

Why Fall May Be The Best Time To Plant Your Onions

Image source: Pixabay.com


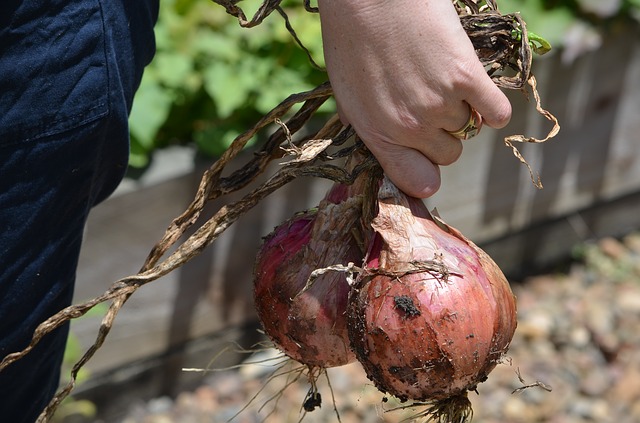
Onions may well have been among the first edible foods grown in domestic gardens, as the history of the domestic onion goes back thousands of years – seeds have been found in ancient Egyptian tombs — and they are still one of the most common vegetables found in modern kitchens.


Most people who grow their own onions plant them during spring, but did you know it is possible to get a head start on your harvest by planting in the fall, as well? There are several advantages of planting in the fall. First, it is a time when there a fewer garden chores that need done. Also, onions that have been planted this time of year are often more productive and reliable than their spring counterparts. They are less vulnerable to common pests that enjoy munching on them.


Like their garlic cousins, onions can be very hardy and cold tolerant. You simply have to keep a few things in mind if you choose to plant them during autumn.


Planting Your Onions


Fall onions tend to do well if planted between early September to late October (provided the ground is not frozen). It often works well to plant them following the harvest of a summer crop such as potatoes, as you already have ground that has been dug.


While it is possible to grow onions from seed, it is much more common (and easier!) for backyard gardeners to grow them from sets or immature bulbs. Over winter, these sets have the opportunity to establish a healthy root system before their green shoots emerge in the spring.


Looking For Onions For Your Garden? Get Them From A Family-Owned Company You Can Trust!


Choose a relatively weed-free area that gets full sun and that has firm, well-draining soil. To avoid possible disease, do not plant onions where you have grown other onions, carrots, beetroot or garlic during the previous season.


Sets of onions should be planted about one-inch deep, allowing the tip of the bulblet to slightly poke above ground level. If the tips are on the long side, you can trim them down to the shoulder of the bulb first. Space your onions 3-4 inches apart.


Caring for Onions


Why Fall May Be The Best Time To Plant Your Onions

Image source: Pixabay.com


One of the nice things about planting onions during the fall is that they don’t really require a great deal of care. Your sets will only grow for a few weeks before the colder temperatures send them into a kind of semi-hibernation mode.


Still, you need to ensure that the area in which they are planted has few weeds and that they do not get waterlogged.


Sets of onions may be watered once after they’ve been planted, and after that normal fall rain should be enough to give them the water that they need. If you live in an area that gets excessive fall rain, you may not find it worth it to plant during autumn.


Varieties to Plant


Planting onions during fall is not something that can be done with every variety. Many types simply will not survive freezing temperatures, so you have to choose carefully. For gardeners in zone 6 or colder, you should cover your plants with straw or mulch and use plastic sheeting or tunnels to help them survive the winter.


Among the best varieties of onions to plant during fall are:


  1. Senshyu yellow – this cold hardy onion produces a semi-flat, average-sized bulb with yellow skin.

  2. Radar – this type of onion has light-brown skin and boasts a mild to medium flavor. This type of onion also stores better than many other varieties of onion when harvested during June.

  3. Electric – a red-skinned onion that has red and white flesh. This variety has a medium to strong flavor and can be stored for up to four weeks.

  4. Valencia – these onions have a golden to brown skin and a mild, somewhat sweet flavor. They tend to do well in almost any region.

  5. Talon F1 – these form hard, uniformly shaped bulbs with golden brown skin and white flesh.

  6. Red baron – a very pretty variety that has deep red skin. The flesh is mostly white, but has red to purple inner rings.

  7. Evergreen hardy bunching onion – one of the most cold-tolerant varieties! Can be overwintered in even northern regions such as Vermont. Grows in dense, green clumps.

  8. Bandit leeks – produces nice blue-green flags and a thick white base with very little bulbing.

Your Spring Harvest


Overwintered onions are generally producing bulbs by May and reach their full size by June. Harvest your onions before or shortly after you see a scape appear.


These onions will not last in storage as long as other onions, so it is best to use them fresh — in the same way you would use scallions.


Do you have any fall-planting tips for onions? Share your tips in the section below: