Showing posts with label Off-Grid Foods. Show all posts

Tuesday, May 8, 2018

Morel Mushrooms: Tips For Hunting Them This Spring

The time for morel mushroom hunting is upon us. The temperatures are starting to rise, and signs of spring are popping up all around us. That means morel mushroom season is here as well.
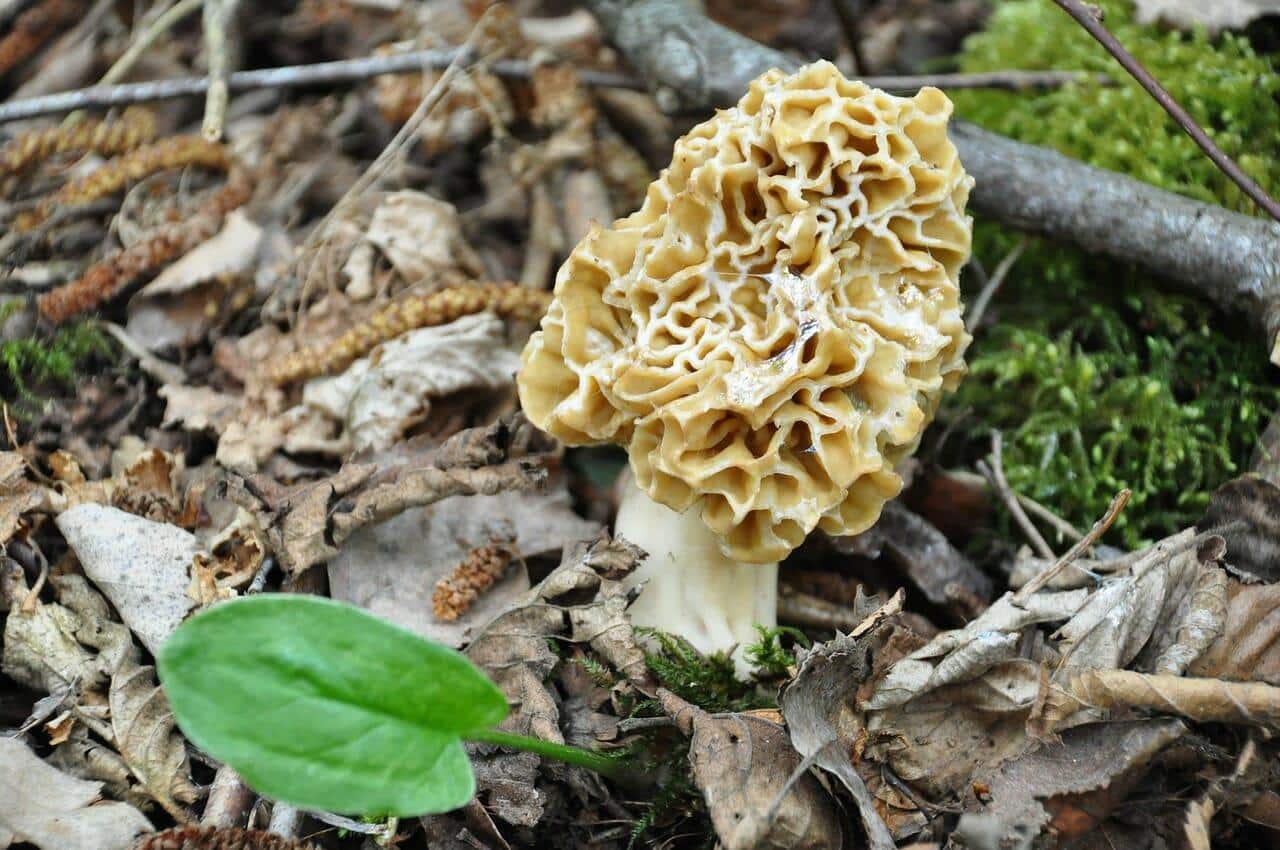

Morel mushrooms are a delicacy, selling for hundreds of dollars per pounds. They are a treat and only bloom once a year. You can’t walk to your local grocery store and purchase them. The only options are to find them yourself or buy them from someone else.


Luckily, those of us who live in the upper half of the United States can hunt for morel mushrooms in the spring. Here is what you need to know.


When Can I Hunt for Morel Mushrooms?


In most areas, morel mushrooms start to bloom in late April. Their growing season lasts throughout early June. The season will depend on your area.


  • If it is your first year hunting mushrooms, ask local, experienced hunters when they typically find them. Also, start hunting a month or so before you expect to see them to increase your chances.


The best time to find morel mushrooms is after heavy rainfall when the air is warm and humid. Keep an eye on the temperature. Morels tend to be a bit picky about the temperature.


They enjoy the weather when it gets around 60 degrees and above throughout the day. Night temperatures should hover around 40 degrees. Soil temperatures will be between 45 and 50 degrees when morels start to develop.


Where Should I Look for Morel Mushrooms?


In the early spring, southern-facing hills will be the ideal place to check for mushrooms. They receive more sunlight in this area. As the season gets closer to June, morel mushrooms grow more on northern-facing hills.


Here are some other tips for locations that morel mushrooms enjoy.


  • Morels love to grow near trees. Ash, poplar, apple and elm trees are favorite choices!

  • Dying and dead trees are common places as well.

  • Look for loamy soil, similar to what is at the bottom of creeks. Loamy soil drains well, is moist and has a good mixture of clay, sand and decaying matter.

  • Morels love burned sites. Research past wildfires in your area, or look in areas that have experienced wildfires years ago. The mushrooms love the nutrients that burned trees put back into the soil. These sites are more common towards the Western part of the United States. However, anywhere that has experienced a brush or forest fire might attract morel mushrooms.

  • Previously flooded areas also attract morel mushrooms. Check locally for areas that were recently disturbed by water, or even disturbed in the past! That means look near creeks, streams, and


You Found Morels, Now What?


Carry your findings in a mesh bag! As you walk through the woods, the mushrooms will release spores. The spores will increase the chances of mushrooms growing in that area in the future. You are encouraging future growth!


Remember to not pick all of the mushrooms in the area. You might want to, especially after searching for a few hours. However, leaving mushrooms means they will drop spores and allow you to enjoy morels in the following years.


Once you start to find morel mushrooms, it is a great idea to keep a record of where you found them. They tend to pop up in the same areas each year. You will have an idea where to look the following year. Thoroughly check the surrounding areas as well. Where there is one, there tends to be more!


Make sure they are morel mushrooms. Several different poisonous, false morel mushrooms can cause you to get sick if you make them for dinner. Make sure you identify correctly. Real morel mushrooms have these characteristics:


  • Two to four inches long

  • Full of ridges and pits

  • Looks like a sponge

  • Pale yellow to dark gray

  • Cap is attached to stem

  • Hollow from the bottom of the stem to the top of the cap. A true morel is always hollow!


Before you cook the morels, soak them in water. Morels are hollow, so bugs, sand, and debris tend to collect in their hollow stem. Soaking them for a few hours allows all of the nasties to come out. If you found your morels in a creek or riverbank, it is wise to cut them lengthwise and then soak to remove all of the sand.


Enjoy Your Time


Morel hunting is fun; don’t take it too seriously! It is an excellent activity for kids, making it a fantastic family activity. Determined kids, who are lower to the ground, might spot morels better than adults. When they do find them, their excitement will be contagious!


Now, head home and enjoy your morel snack. Sautee mushrooms lightly in butter or cover in a batter for a delicious meal. The earthy, meaty taste is appealing for adults and kids.


The post Morel Mushrooms: Tips For Hunting Them This Spring appeared first on Off The Grid News.

Monday, April 30, 2018

Eat Those Varmints: 3 Nuisance Animals that Make Tasty Meals

If you’re a homesteader or small-scale farmer, you’ve likely engaged in varmint battles over the years. How many times have you gone out to your chicken coop, only to find a bloody pile of feathers? Or went to check on your garden, and found your zucchini crop gone, plants and all? Have you watched as all the walnuts on your trees seemingly vanished right before your eyes?


Varmint animals are smart, sneaky and can do a number on your homestead. Protecting your livestock and crops, and keeping local varmint populations under control, is a crucial task for most homesteaders. But maybe you can beat them at their own game, too. Many of the most common varmints are edible themselves and make excellent table fare. Here are three nuisance animals that might be your next meal.


Woodchucks


Woodchucks are found throughout the Eastern United States and into Canada. They often wreak havoc on garden beds with their ravenous appetites. Their burrows are a hazard in fields, and they can even undermine earthen dams over time. People often pay exterminators good money to get rid of them. Fortunately, woodchucks are also delicious.


Woodchucks used to be eaten commonly a few decades ago. Their meat is tasty, and it can be prepared much like any other small game animals. Woodchuck pie is a hearty meal worth trying on an autumn day. Wash it down with a glass of fresh cider.  Woodchucks are also great in stew as well.


Dispatching woodchucks is not particularly hard. You can trap them, or use a small caliber rifle to shoot one. If you plan on hunting them, be prepared to shoot quick, and from a distance; they are never very far from a burrow entrance they can duck in to.  They are straightforward to butcher, too, although you need to remove their scent glands before cooking.


Squirrels


Chances are you have squirrels where you live and do battle with them from time to time. They can threaten fruit and nut crops, as well as garden beds. They sometimes gnaw their way into your home and nest in attics, making a real mess. And they’ll certainly take more than their fair share at your bird feeders if given half a chance. Fortunately, squirrels are easy to kill and tasty to eat.


Squirrels don’t fear humans too much, especially when they’re in trees. You can often shoot two or more with a small caliber rifle before they get the hint. They’re also quite easy to trap as well; a squirrel pole is simple to build, and one of the most effective traps out there.


It typically takes a few squirrels to make a good meal. Fortunately, they aren’t too hard to hunt or trap. Once you have killed a few, try serving your family some baked squirrel.  Squirrel is also terrific base meat to use in a slow cooker recipe as well.


Crows


Depending where you live, crows can be a real nuisance.  They can descend on your garden en masse and tear it apart. They will steal food from your poultry, and at times will even kill baby chicks. Fortunately, despite the old idiom about eating crow, they can be quite tasty.


Hunt crow in your fields like you would kill any small game bird. It’s best to use a 20 or .410 gauge shotgun. Crows are smart and often get out of range before you can shoot them. However, sometimes they get complacent when they’re living around humans for a while. Most crow recipes call for using breast meat, which is relatively small. Like squirrels, you’ll need to shoot a few crows to get enough for a meal.


Once you’ve shot and dressed a few crows, try cooking them up in a delicious blackbird pie. Alternatively, you could make a crow and mushroom stew as well. Pair either of these meals with a wine made from berries these crows would have eaten up in your garden had you given them the chance.


Parting Shots


Make sure you check your local hunting or trapping regulations before you go after these or any other nuisance animals; always be a safe, courteous hunter, too. Once you’ve ensured that you’re okay to hunt these varmints, have at it! It is quite satisfying to make a tasty meal out of nuisance animals that would have terrorized your crops or livestock if given half a chance. Happy hunting!


The post Eat Those Varmints: 3 Nuisance Animals that Make Tasty Meals appeared first on Off The Grid News.

Monday, March 19, 2018

30 Easy-Storage Garden Foods You Don’t Have To Preserve Or ‘Put Up’

30 Easy-Storage Garden Foods You Don’t Have To Preserve Or ‘Put Up’

Image source: Pixabay.com


Food preservation skills are an important part of homesteading. It’s wonderful to pop open a jar of home-canned tomatoes or enjoy your own frozen peaches when the garden and orchards are buried under two feet of snow. But let’s face it—there are only so many hours in a day, and food preservation is time-consuming!


Wouldn’t it be easier if you could grow foods that store themselves? You can. There are plenty of foods you can grow that store well without going to the trouble of canning or freezing or dehydrating. You might be growing many of them already! But just in case, here are a couple of handy lists to use when choosing crops that can help reduce the workload at harvesttime.


Here are some foods that store themselves right in the garden. Depending upon climate and specific cultivars, these vegetables can either overwinter or last partway into winter.


Kale. I leave mine in the garden until it is literally buried under snow. As winter encroaches, it becomes less appealing to eat fresh, but is still great for smoothies, soups, and calzones.


Collard greens. These are hardy in cold weather, but do not last as well as kale in my garden.


Brussels sprouts. The texture changes as the temperature drops, but they are still good to eat.


Cabbage. Like its cruciferous cousins—kale and Brussels sprouts—it loses texture appeal as it freezes, but is still edible cooked.


Parsnips. Around my homestead, April is peak parsnip season. I routinely leave them in the ground all winter and dig them as soon as the ground thaws, with excellent results.


Carrots. Many people leave carrots in the ground all winter. My own success with this method has been marginal, because underground animals—mice and voles, I presume—love to eat them. But for those whose local pests do not love carrots, this is a great option.


Other foods do well in cold storage, harvested and put into a climate-controlled cellar where, ideally, they are kept at just above freezing. As with the list of foods that store well without harvesting, individual success with cold storage techniques can vary depending upon cultivars and the conditions—temperature and humidity—of the storage area. Here’s the cold storage list:


Potatoes. One of the many advantages to potatoes is that they store well for many months in the right conditions.


Sweet potatoes. When well-cured, sweet potatoes last a long time as well.


Winter squashes. This is a category in which types and cultivars vary widely in their ability to last in cold storage. I grow an assortment of winter squashes, and try to eat up the poorer keepers first.


Pumpkins. As with squashes, depending up cultivar, pumpkin longevity in storage can vary.


Leeks. I’ve had great success with leeks lasting well into February, tossed root-down in a plastic storage tote in the coldest part of the cellar.


Onions. The secret to long-term onion storage is to keep them from touching each other. The best way I’ve found to do that is to hang them in old nylon stockings, with a knot tied between each onion.


Carrots. Root-down in a bucket of clean sand, and they’ll last well.


Parsnips. Store them the same way as carrots.


Brussels sprouts. These are easy to store, right on the stalks. Harvest, trim, and keep cold.


Cabbage. It’s a good idea to choose a cultivar developed for long storage, and then just pull them up by the roots and hang them upside down from the root cellar rafters.


Daikon radishes. Any large winter radishes do well in cold storage, much the same as carrots.


Beets. I’ve had good luck storing them in clean sand.


Celeriac. This is another good candidate for cold storage, either just in an open-air basket or in sand.


Garlic. I’ve had good luck keeping garlic for many months, often lasting until scapes begin to form on a fresh crop. The secrets seem to be proper field curing and keeping it in the dark.


Shallots. Like their allium cousins—onions, leeks, and garlic—these store well in open air.


Turnips and rutabagas. These, like most other root vegetables, do well in cold storage, and are not fussy about conditions.


Kohlrabi. Like many brassicas, kohlrabi stores nicely in baskets, totes, or on the shelf.


Popcorn. I have had success drying popcorn on the cob and storing it in a paper bag in the kitchen cabinet—pretty easy!


Apples. Some apples can last in cold storage all the way to March, April, and even beyond. Apples do well in cold humid conditions.


Pears. Many pears last well into winter when kept cold.


Certain herbs. I use cold-hardy herbs like sage and rosemary straight from the garden until they are buried under snow.


Dry beans. When it comes to return on investment, it doesn’t get much better than dry beans. Cheap, hardy, easy, and extremely long-lasting in storage. Beans are happy in cool dry conditions, in screw-top containers.


Many grains. While grains do not exactly store themselves almost straight from the garden like much of the food on this list does—grains do need a bit of processing between the field and storage—they still store without needing to be canned or frozen.


Most nuts. With the outer husks removed, nuts are a great choice for preservation-free food.


Food preservation is an irreplaceable component in the overall diets of most homesteaders. But it never hurts to grow some foods that preserve themselves with little or no effort.


What would you add to our list? Share your thoughts in the section below:

Monday, March 12, 2018

How To Make Pancake Syrup … From Birch Trees

How To Make Pancake Syrup … From Birch Trees

Image source: Pixabay.com


Birch syrup is an alternative to maple syrup that is commonly grown across the northern United States, Canada and in northern Europe. While other birch products such as birch beer might seem more commonplace, birch syrup is a hot commodity, fetching over $30 per 250ml bottle in some locations. It is high in vitamins and minerals, and even can be used as a tonic.


Best yet? Birch syrup can be easily produced on any homestead with an abundance of birch trees, and if you’re already tapping maples, you don’t need to give that up. The two can be tapped concurrently, and the equipment needed is identical for both.


Tapping


Birch tapping generally follows the maple sugar season, in mid-March to mid-April. This depends, of course, on the weather, as sap begins to run before the buds on the trees change to leaves. Nights must be below freezing while days must rise well above freezing, usually around 40 or 50 degrees. Although this freeze-thaw cycle is the same as what is required for maple trees, maples don’t require daytime temperatures to rise quite as much.


The best birch trees are ones that live in an isolated area. Try not to tap trees that have been exposed to pesticides or other contaminants, such as those that are growing alongside the road. These trees can carry unwanted toxins in their sap.


There is little equipment you need to get started making birch syrup, although, as with maple products, you can purchase more expensive and sophisticated materials as you gain experience. You will need some sort of spile, either handmade or commercial. Spiles used for maple sugaring can also be used on birch trees.


You will also need a cordless drill and a bit that matches the end of the spile. Additionally, you will need a collection container if you aren’t planning on setting up a more sophisticated tubing and vacuum system (again, not recommended until you gain experience after a few seasons). Make sure whatever you use for collection is sterile and has some sort of cover. If not covered, the sweet-smelling sap can attract unwanted insects and collect debris.


Place one tap per tree, ignoring trees that are less than eight inches but larger than 14 inches in diameter. One tap per tree ensures that the tree has adequate resources to heal. In addition, don’t plug the holes after the season has ended, as this can impede healing. If you want your trees to produce year after year, you must take good care of them and not overtax their resources!


The tap should be placed slightly below eye level, around four feet up from the base of the tree. Don’t tap an old tap hole on the tree, and try to stay six or seven inches away from old taps if possible. The best spot to tap is in a shady spot on the south side of the tree.


Make sure all of your surfaces and materials are sanitized before beginning to tap. Using a sharp drill bit, drill upwards into the tree at a 25 degree angle, about one inch into the tree. This will allow the sap to utilize gravity as it moves into your container.


Place your spile into the hole and tap gentle with a mallet or hammer. Sap should begin running from the sap in a light drip once it is placed. If you don’t see any sap, you might want to tap a different tree. Situate your collection container or bucket beneath the tap.


Generally, a birch tree will produce around a gallon of sap per day. Make sure your container has at least a one-gallon capacity, or you risk losing valuable sap as it seeps from an overfilled bucket. Don’t place your bucket on the ground, as this will be easily spilled.


While it may be tempting to collect sap only every few days when your spring chores get the better of you, you need to make this item a fixture on your daily to-do list. If left too long, sap begins to ferment and adopts a strange flavor.


Making Syrup


When you have about 25 gallons of sap, you’re ready to make syrup. This sap is less sweet than maple syrup, so it takes over twice the amount of sap to produce a gallon of birch syrup as it does maple syrup. Twenty-five gallons of birch sap will produce roughly one quart. Therefore, each tree will produce about one quart over a season.


Although sap accumulates somewhat slowly, you must evaporate sap as you collect it. Sugar in birch sap can be easily caramelized if you evaporate it too quickly. As a result, you must evaporate slowly, unlike maple sap which is boiled more intensely.


Unless you have a sugar shack — which you likely don’t, unless you’re already actively involved in making maple syrup — you can make birch syrup right on your stove top. Ten gallons of sap will process down to about two cups. Use a stock pot, and keep the sap cold until it’s ready to be processed (generally within 24 hours).


Filter the sap through a coffee filter before pouring it into a stock pot. Boil the syrup rapidly, but keep a watchful eye on it to prevent scorching. Once it’s reduced by about half, slow the evaporation to a simmer. Keep the temperature just below boiling, and when the sap has been reduced to about a quarter of its original volume, move it to a slow cooker. Leave it overnight on low to complete evaporation.


A hydrometer will help you determine the density of the syrup. While it won’t be quite as thick as maple syrup, it will register a 66 or 67 on the brix scale. If you are slightly off, that’s okay — it might have a slightly odd flavor but is still safe to eat. Filter the syrup through a coffee filter again, then bottle in sterilized mason jars. This can be stored at room temperature, but opened jars must be refrigerated.


Birch syrup is highly versatile and can be used in multiple recipes. It makes an excellent glaze or as an addition to coffee or dessert. You’ll quickly find yourself wishing that you had more birch trees on your property, because once your friends and family get a taste of this delicious nectar, you won’t have much left over for yourself!


What advice would you add? Have you ever tapped a tree? Leave your tips in the section below:

Monday, February 26, 2018

7 Ways The Old-Timers Knew It Was Time To Tap

7 Ways The Old-Timers Knew It Was Time To Tap

Image source: Pixabay.com


Tapping trees to make syrup is an annual late-winter-into-spring tradition for many homesteaders. One of the keys to a successful syruping season is timing, and as is true with many homesteading activities, timing is all about the weather.


Nowadays, we have weather satellite information readily available at the touch of a screen, and can easily find charts of predicted weather to determine the best time to set our taps.


But satellite weather reports have not always been available. Old-timers used alternative sources to determine when was the best time for tapping trees for sap.


Here are seven ways they did that:


1. Day length. For the first weeks after the solstice in December, the day length grows so slowly that it’s barely discernable. As the equinox approaches, daylight begins to increase dramatically. Rapidly lengthening days told early homesteaders that tapping season was around the corner.


2. Sun height in the sky. During winter in the north, the sun slides east to west across the southern horizon. As warmer months approach, the sun’s daily traverse reaches higher into the sky. Sunrise gradually occurs more toward the east than in the southeast, sunsets are more to the west than the southwest, and the sun is higher in the sky during the day.


3. Warm days and cold nights. Old-timers could follow the temperature trends with or without a thermometer. It goes without saying that they could tell how warm or cold it was by going outside and feeling the air on their skin, but they could probably also get a sense of the temperature just by looking out the window. They could get a feel for the weather by the way the wood stove and chimney smoke behaved, the way livestock’s breath fogged up (or didn’t fog up), frost on roofs of outbuildings and neighbor houses, and the amount of ice clinging to the branches of trees.


4. Snow texture. When the temperature rises and falls, the snow gets grainy. Some folks may have called it “corn snow” in their day. People who spend a lot of time on snow can easily discern a lot about atmospheric conditions by the feel and sound of the snow, and I suspect our ancestors were better at it than we were. The warmth of the sun on long sunny days turns the snowpack to mealy mush, which then becomes granular when the nighttime temperatures plummet.


5. Dripping branches. Branches that have broken off due to wind or ice, or lopped off by a snowplow blade, will begin to drip when the sap is starting to run. This can be so dramatic that it’s visible driving past in a car, but syrupers in years past probably saw more close-up evidence as they went about their regular chores on the homestead.


6. Sap-drenched tree trunks. Any break in the bark of a standing tree will allow sap to run out, sometimes so abundantly that it looks like someone left a faucet turned on up high on the tree. I’ve often admired the glistening trunks of late-winter maples while on my snowshoe travels, and I expect the old-timers must have, too.


7. Sappy sawblades. Cutting into a live tree while the sap is running will result in a wet sawblade, whether it’s a modern chainsaw or an old-fashioned two-man crosscut.


These are likely to be some of the ways that our forbears could tell it was time to think about setting taps in trees and preparing to make syrup, and might well be some of the sure signs of tapping season that many people still observe today.


For my own small-scale backyard syruping operation, I use a combination of convenient online predictions and old-fashioned observations. However, probably the method I use most is none of the above. When I see lines and buckets up and running in other people’s maple groves, I know the time has come to run home and dig out my tapping supplies! This might sound a little slapdash, but a day or two either way does not make that much difference. And since large-scale outfits often use vacuum equipment which allows them to begin harvesting sap earlier than those relying on gravity, leaving plenty of time for me to get my taps set after noticing commercial operations already up and running.


I always say that one of the best things about homesteading in the 21st century is that we have the luxury to having both old-time practices and cutting-edge technology available. When it comes to setting taps for backyard syrup operations, using wisdom from the old-timers is a great way to start.


What advice would you add? Share it in the section below:

Monday, February 19, 2018

10 Stockpiling Tricks That Will Make Your Food Last Longer

10 Stockpiling Tricks That Will Make Your Food Last Longer

U.S. Air Force photo by Senior Airman Zachary Hada


You would think that stockpiling food would be easy, right? Just buy a bunch of food, stash it away somewhere where it won’t be eaten, and you’re good, right? Uh, wrong. Building a stockpile and making it last is a lot harder than it looks.


The basic problem is that food, as it grows naturally, isn’t intended to be stored for years. For that matter, food the way it’s package at the grocery store isn’t intended to last for years. The manufacturers of that food assume that you are going to eat their products within a few months — and they pack it accordingly. So, if you want to keep your food around longer than that, you’re going to have to do something with it yourself and not trust their packaging.


The good news is that people have been hoarding food for millennia. Preserved food has been found in the various tombs of the pharaohs, demonstrating that mankind has been preserving and storing food for much longer than we would expect.


Fortunately, you and I don’t need to make our food stockpile last for thousands of years. It behooves us, though, to make sure that we store our food as well as possible, ensuring that we will have something to eat when everything suddenly goes wrong.


Here’s 10 ways to make your food last as long as possible:


1. Rotate Your Stock


One of the easiest ways to ensure that your food stocks last is to borrow a page from the stores you buy your food in. They have a rule called “first in, first out.” This merely means that they sell the oldest first. You should use the oldest first. If you are stockpiling a year’s worth of food and you always use the oldest can, box or bag of a certain item, you’ll never have anything in your stockpile that’s more than a year old.


This is especially useful for things you use all the time, like spaghetti sauce. To ensure that you’re actually using the oldest first, make a habit of marking the month and year of purchase right on the label. That way, you have a quick reference and don’t have to try and remember which style label is older than which.


2. If It’s Wet, Can It


Canning is one of the most effective and long-lasting means of food preservation out there. So make good use of it. The basic rule of thumb is that if a food item is wet, it can be canned. So, start canning meat loaf, extra produce from your garden and the fish from your latest fishing trip. If canned, it can stay usable in your survival stockpile for years. Some canned foods that are over a century old are still edible and nutritious.


3. Salt Does More than Flavor


Salt is nature’s preservative. So is sugar for that matter, although we use salt for preserving more than sugar. Other than fruit, just about anything you are trying to preserve probably needs salt added. It doesn’t matter if we’re talking about canning food, dehydrating it, making your own cold cuts or smoking a ham; salt is the key to ensuring that bacteria don’t spoil your food.


4. Overdo it With Oxygen Absorbers


If you’ve heard about packing dry food in aluminized Mylar bags and five-gallon buckets, then you’ve probably heard about oxygen absorbers, too. These are added to prevent food from oxygenating and losing its freshness. But oxygen absorbers also make an inhospitable environment for bacteria and insects, both of which need oxygen. So, when adding oxygen absorbers to dry foods that you’re packaging for your stockpile, go for a bit of overkill. Don’t just use the minimum recommended; step it up a bit and ensure that the oxygen has really been absorbed.


More than anything, this is about ensuring that insect eggs can’t hatch, creating a population of insects inside your preserved food. Any insects which did manage to hatch from their eggs won’t be able to survive without oxygen.


5. Don’t Forget the Silica Gel


Few people mention it, but adding a packet of silica gel to dry foods when packaging them for long-term storage can help ensure that they stay fresh. These foods turn stale when they absorb moisture. While you probably already try to make sure that there is no moisture in the container, when packaging those foods, things can happen. The addition of a silica gel package can ensure that any moisture which does get into the package is absorbed by something other than the food.


6. Keep Track of it All


Make sure that you develop and keep a good spreadsheet of everything you’ve got in your stockpile. This should mention package size, quantity and the location or locations you have it stored. Always be sure to update your list. Don’t just have that spreadsheet on your computer, either. Print a hard copy and keep it in a notebook.


7. If You Use it, Replace it


This is one I have to keep after my wife about. It’s easy to just dig into your stockpile if you need something and pick an item without realizing it’s the last one. Make a note so that the next time you’re shopping, you can pick up a replacement and put it in your stockpile.


8. Keep it Cool


Heat will cause many foods to alter while stored. It speeds up chemical reactions and in extreme cases can slow-cook the food. Always try to keep your food stored in cool, dry places rather than in hot ones. The attic really isn’t a good place for food storage for this reason. You’re better off hiding it under the bed or putting it in the basement.


9. The Tougher the Better


When it comes to packaging, the tougher the better. Never settle for “just good enough.” Go for something that’s overkill. I can show you five-gallon bucket lids which have been gnawed through by rodents. Bacteria and insects aren’t the only things that want to eat your food stockpile; there are plenty of mice and rats in the world that would love to have a picnic at your expense, too.


10. Spread it Out


Whatever you do, don’t store all your food stockpile in one place, or even all of one type of item in one place. Let’s say that your basement is your main food storage area. That’s probably pretty good. But if your basement floods, you aren’t going to have access to that food. So, make sure that some of it is stored under the bed or in the upstairs hall closest.


For that matter, you should have one or two food caches off-site, as well. You never know what could happen. The people of Southeast Houston probably weren’t expecting to have to abandon their homes before Hurricane Harvey came along.


What advice would you add? Share it in the section below:

Monday, November 27, 2017

28 Survival Foods The ‘Mountain Men’ Ate

28 Survival Foods The


The American Mountain Men of the early 19th century are one of our country’s enduring heroes. Men like Jim Bridger, Hugh Glass, Jedediah Smith, Andrew Henry and Kit Carson were the first people of European descent to explore our western regions.


They drew maps, discovered travel routes, and offered input on economic activities settlers should pursue in different regions. Clad in buckskin clothing of their own manufacturing, they traversed the continent using only the store-bought goods they obtained once a year. Everything they couldn’t obtain at a rendezvous came aux aliments du pays, or from “the nourishment of the land.” These days, we would say they were living off the land.


One fascinating area of the mountain men life is their diet. Obviously, finding food was a major issue these men faced each day. They couldn’t just amble down to the supermarket and pick up what they needed. These weathered men generally had to glean their sustenance from natural sources they found in the wild.


At times, the land offered periods of abundance, and at others it would appear to be a wasteland. Today we have grown accustomed to three meals a day. We likely would have a hard time adjusting to this cycle of feast and famine. This cycle was a way of life for the trappers.


One Mountain Man worth studying is Rufus Sage. Rufus Sage was a Mountain Man who headed west in the early 1840s. For three years, he crisscrossed the American West on a grand adventure certainly deserving a place in history. After his journey was complete, he compiled his deeds, experiences and thoughts into a journal titled “Rocky Mountain Life.” This journal provides us with a great insight into his life.


One area Sage detailed was his diet. Although the journal doesn’t dedicate tremendous energy to the topic, he is thorough enough to give us some insight into his diet. He records many of the wild foods he enjoyed as a Mountain Man.


Learn The Tricks Of The Word’s Top Survivalists!


The following list is a record of the foods eaten by Rufus Sage, as noted in his journal. They are listed in the order they appear in the journal.


Buffalo. This was a mainstay, as the large majority of his meals consisted of this grand prairie grazer. As tradition teaches, when time permitted, the men ate all parts of the buffalo, including the meat, tongue, liver and intestines.


Dog. He noted the taste was not inferior to pork.


Elk. During his time, many elk were still living on prairie regions.


Pomme Blanc (White Apple): This root was eaten by the men. He mentioned that at times the root gatherers were better at providing sustenance than the meat hunters.


Commote: Another root they gathered.


Wild Cherry Bark Tea: Very common drink by the sound of the journal. He noted the positive effect the drink had on health.


Deer: Another common meat eaten. Deer were speedily consumed by a band of hungry hunters.


Prairie Dog: This small rodent also made the journal and was described as tender and palatable.


Serviceberry: Gathered when ripe.


Box-Elder Sap: Noted as “not inferior to that of maple.”


Bear: Mentioned several times. Bear also provided men with fat which they rendered.


Mountain Sheep: Seemed to be a favorite of certain mountain men.


Mountain Fowl: Difficult to discern from the description, but possibly a ptarmigan.


Bilters: Juice made from the gut juice of a buffalo. Sage described it as “exhilarating.” He also mentions that the drink caused vomiting, but after a few attempts the stomach would accept it.


Bald Eagle Fledgling: Noted they made “a fine meal.”


Waterfowl Eggs: Enjoyed while on a river.


Antelope: Another bountiful prairie meat supply.


Greens: Although not much description is given, the notation of greens is another indication of how much gathering the Mountain Men did.


Prickly Pear Cactus: He described the practice of eating boiled prickly pear as not uncommon.


Turkey: On several occasions Sage noted they hunted turkey on the roost. In this manner, they shot them by the dozens.


Salmon: One of the few fish he notes having eaten. These were consumed while spending time in Oregon.


Wolf: A man named “Chance” threw Sage and his companions a wolf while they were starving. The writing makes it seem like predator meat was saved for extreme situations.


Horse/Mule: It was not uncommon for Mountain Men to eat their pack, or riding, animals when faced with starvation.


Crow’s Eggs: He gathered and ate six to 10 dozen!


Catfish: On one occasion Sage notes having caught many catfish. Besides for this, and the one entry about salmon, fish do not have appeared to have been regularly eaten.


Prairie Potato: Better known today as the prairie turnip.


Nothing: One item too often on the menu for Sage was nothing at all. Throughout his journal he notes stretches of three, four and five days without food. Hunger was an enemy he was certainly familiar with.


As you can see from this list of wild foods, the Mountain Men would have had a very diverse diet. They not only consumed huge quantities of meat, but also gathered wild roots and berries along the way. In order to survive, they had to take what Mother Nature threw their way. At times, that was a hearty meal of buffalo ribs, and at others it was a straggling wolf.


It is tempting to view these American heroes clad in clean buckskins and riding into the sunset. However, we shouldn’t over-romanticize their lives if we are to truly appreciate their accomplishments. Their hardships paved the way for waves of settlers that were to come. It was the nourishment of the land that kept them going – and that can keep us alive, too.


What is your reaction? Share it in the section below:

Wednesday, November 15, 2017

The Simple, Traditional, Off-Grid Way To Ferment Vegetables

The Simple, Traditional, Off-Grid Way To Ferment Vegetables

Photo by Steve Nubie


The fermentation of foods likely was accidentally discovered by our ancient ancestors. Certain foods that were left unattended or ignored actually developed unique properties that not only accented their flavor, but lent them unique preservation properties.


In this article, we will cover some basic foods that can be preserved by fermentation and a bit about the science of fermentation.


Fermentation 101


Fermentation occurs in a variety of ways. The most common is alcohol fermentation and lactic acid fermentation. Alcohol fermentation is common in beverages like beer, wine and spirits. It’s when sugar and yeasts interact to convert glucose into alcohol. The other primary type of fermentation (and there are others) is lactic acid fermentation. This is a common fermentation method with vegetables and certain dairy products like cheese, sour cream, cottage cheese and yogurt.


Vegetable Fermentation


We will focus on vegetable fermentation and review some standard recipes. This includes:


  • Cabbage fermentation resulting in “sauerkraut.”

  • Fermented garlic.

  • Fermented radishes, which are very popular and common in Japan,

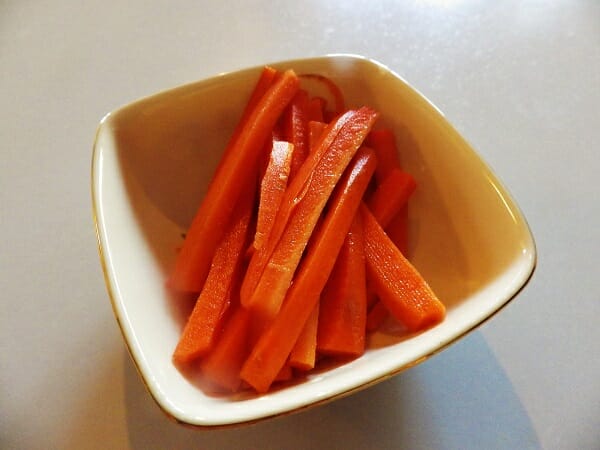
  • Fermented carrot sticks,

  • Korean Kimchi

The Concept


While alcohol production from fermentation depends largely on sugar, vegetable fermentation or lactose fermentation is often triggered by salt. Sea salt is the salt of choice, and it naturally draws liquid or water from vegetables to trigger the fermentation process.


One of the key steps in fermenting vegetables is to keep them submerged in their own juices, with sometimes the addition of a little water. Typically, a plate is placed over the immersed vegetables and a weight like a canning jar filled with water is placed on the plate to make sure everything stays submerged. This creates an anaerobic or no-oxygen environment which causes good bacteria to grow and ferment the food. The result is a release of carbon dioxide, which is often visible in the jar as the food ferments.


Make ‘Off-The-Grid’ Super Foods Just Like Grandma Made!


Once the process is complete, it’s best to put the fermented vegetables into cold storage, either in a root cellar or refrigerator, or you can process them in a hot water bath and store them in the pantry. I prefer the root cellar or refrigerator. I like my fermented vegetables cold.


Don’t Forget to Burp the Baby


When you ferment food in a sealed jar, the release of carbon dioxide will build up pressure. This will eventually cause the jar to leak or could even crack it. You should gently release the lid to allow the gas to escape at least once a day. I would suggest you take the jar outside, because in addition to the carbon dioxide there will be a strong aroma. This is particularly true for more aromatic vegetables like cabbage, garlic and radishes. I actually like the aroma, but my wife has told me otherwise on many occasions. Most fermented vegetables take about two weeks to ferment, so don’t forget to burp the jars or you might have a mess.


Basic Equipment


You really don’t need much to ferment vegetables. A cutting board and knife plus some Mason jars or a small crock. Most of the recipes call for 1-quart jars. If you use a crock you might need some plastic wrap to tightly cover the top to create an anaerobic environment (oxygen-free) in addition to the plate and weight to keep the vegetables submerged. The standard ingredients include sea salt and the vegetable you’re going to ferment. You can also mix vegetables if you like, just make sure they’re washed and cut up as the recipes indicate.


You also can add some seasonings. This is especially true with Kimchi, but caraway seeds are often an accompaniment to sauerkraut and I always add them during the fermentation process. Other accompaniments could include turmeric for fermented radishes and mustard seed or coriander for fermented carrots. That’s up to you. I’ve added peppercorns to fermented garlic cloves and they give the cloves a nice bite and finish.


Let’s Get Started


Here are some traditional fermented vegetable recipes that are easy to make with ingredients that are easy to grow, or bought at the grocery store.


Sauerkraut


A traditional recipe popular across Europe, sauerkraut is fermented strips of cabbage.


INGREDIENTS


  • 1 head of cabbage

  • 3 tablespoons of salt

  • 1/2 tablespoon of caraway seeds (optional)

  • 1-quart Mason jar

DIRECTIONS


Chop the cabbage into thin shreds and place into a large bowl. Sprinkle with the salt, and using your hands incorporate the salt into the cabbage shreds. If you’re going to add caraway seeds, add them before you mix and blend the salt into the shreds. Press down and squeeze the cabbage as you go for about 10 minutes. I’ll often use a potato masher to really compress the cabbage. Slowly, the cabbage will release liquid. Press the cabbage down firmly into the jar and if you don’t see enough liquid covering the top, add a little water until the cabbage is immersed. You obviously don’t need a plate on top when using a canning jar, but make sure the lid is sealed tightly and that the jars have been sterilized.


Let the cabbage shreds sit at 60 to 70 degrees Fahrenheit for two weeks. If it’s cooler, it could take another week or two. Burp it every day and after two weeks, give it a taste. If it’s too salty you can always rinse it, but not too much or you’ll lose some of the flavor. When it’s done you can either process it in a boiling water bath for 10 minutes or keep it refrigerated or stored in a root cellar. Fermentation will help preserve the food, but processing or refrigeration is a good cautionary step.


Fermented Radishes


The Simple, Traditional, Off-Grid Way To Ferment Vegetables

Photo by Steve Nubie


Fermented radishes are very popular in Japan and are often used as a palate cleanser between courses or a bite of particularly pungent fish like Mackerel.


INGREDIENTS


  • 2 bunches of radishes

  • 3 tablespoons of salt

  • 4 cups of water

  • Small crock or 1-quart Mason jar

  • ½ teaspoon of turmeric and/or dill, mustard seeds, peppercorns (optional)

DIRECTIONS


Slice the radishes into thin slices and toss in a bowl with the salt and optional seasonings until they are thoroughly covered.  Add the water and stir until salt is dissolved, and put into the jar or weigh down with a plate in the crock. If using a crock, cover the top with self-cling plastic wrap.


Ferment at 60 to 70 degrees Fahrenheit for 2 weeks. Taste to evaluate flavor and either process, cellar or refrigerate.


Fermented Garlic


Another personal favorite, this is a great way to have instant garlic on hand for recipes or you can chomp on them until someone tells you to stop.


INGREDIENTS


  • One dozen heads of garlic

  • Brine made from 1 quart of water and 2 tablespoons of sea salt

  • 1-quart mason jar

  • Herbs or seasoning of your choice. I like peppercorns but you can improvise

DIRECTIONS


Break the heads into cloves and peel. Fill a 1-quart Mason jar with the cloves up to 1 inch from the top. Add the seasonings and/or herbs and pour the brine into the jar. Ferment 3 to 4 weeks at 60 to 70 degrees Fahrenheit before processing or cellaring or refrigerating. As they sit in cold storage, the flavor will increase, so don’t eat them all at once.


Fermented Carrots


The Simple, Traditional, Off-Grid Way To Ferment Vegetables

Photo by Steve Nubie


I have carrots coming out of my garden for months, and fermenting them is a great way to preserve them. They’re great as a garnish or on a relish tray and make a tasty snack as well.


INGREDIENTS


  • 1 quart canning jar

  • 1 quart of water

  • 3 tablespoons of sea salt

  • 3 pounds of carrots julienned into sticks

DIRECTIONS


Dissolve the salt in the quart of water. Julienne the carrots into thin sticks about 3 inches long. If you want to add any herbs or spices, put them into the bottom of the jar. Place the carrots in the Mason jar and pour the liquid over the top.  Make sure you leave some headspace in the jar so the carrots are totally submerged. Ferment for 2 to 4 weeks at 60 to 70 degrees Fahrenheit. Taste as you go and when they suit your taste, put into cold storage. They’ll continue to develop their flavor while in storage.


Kimchi


Kimchi is the national dish of Korea, but variations are found across Asia. I lived and worked across Asia for two years studying Asian language, culture and cuisine. It was while I was in Seoul, Korea, that I discovered my unending love for Kimchi. This is a hot and spicy fermented dish made with Chinese or Napa Cabbage and slathered in a rich and robust mix of garlic, hot Chile peppers and other ingredients to create an inferno of flavor.


INGREDIENTS


Step 1


  • 2 heads of Napa or Chinese cabbage

  • 1 ¼ cups of sea salt

Step 2


  • 1 tablespoon of fish sauce

  • 6 green onions chopped

  • Small onion minced very fine

  • 3 cloves of garlic minced or mashed

  • 2 tablespoons of sugar

  • 1 teaspoon of ground or finely grated ginger

  • 5 tablespoons of red pepper flakes

DIRECTIONS


This is a two-step process. The first thing you must do is cut the Napa cabbage into 2-inch squares. You then toss it with the 1 and ¼ cup of sea salt and place it into plastic bags or a large plastic bowl or crock and let it rest for 6 hours. This will tenderize the cabbage and soften it. You then rinse the cabbage and put it into a large plastic bowl.


You then combine all the ingredients left on the ingredient list and toss them together to blend. I wear rubber gloves from here on out for the rest of the process and jam it all into canning jars or your crock.


Make sure you crock is covered. Burp daily and in 2 weeks at 60 to 70 degrees Fahrenheit you’ll have wonderful Kimchi. Reduce the pepper flakes or increase depending on your tolerance for spice and heat. Store in cold storage and don’t eat it all at one sitting like I have sometimes done.


Fermenting Doesn’t Stop There


There are numerous recipes on the Internet for fermenting everything, from fruits to vegetables. The important thing is to understand and respect the concept and experiment as you go. Our ancient ancestors figured this out long ago, and it’s nice to know we can enjoy a taste of the distant past with something growing in our gardens today.


What advice would you add? Share it in the section below:

Monday, November 13, 2017

10 Wild, Off-Grid Foods You Can Forage For Each Fall

10 Wild, Off-Grid Foods You Can Forage For Each Fall

Image source: Pixabay.com


From backyard gardens to large-scale farms, fall is often viewed as harvest time. But “nature’s garden” is in full yield in the autumn, too, as the trees begin to lose their leaves and heavy frosts set in.


Following are a few of the highest-yielding, nutritious wild foods that are ready for harvest in the fall. You will need a good plant ID book to make sure you get the right plant. As with foraging at any time, do NOT eat anything you are not 100 percent certain is the correct plant.


Root Crops


Many plants begin to bring their energy into their roots in the fall to wait out the winter underground, in preparation for a growth explosion in the spring. Most root crops can either be dug up with a shovel, or pulled up after loosening the soil around them with the garden fork.


1. Burdock (Arctium species): a variety of burdock has been eaten in Japan for centuries, and with a delicious sweet flavor and a delightful crunchy texture, it’s well worth trying. Burdock should be harvested the fall of their first year (before they produce along central stock with flowers) and can be dried or eaten right away.


2. Chicory (Cichorium intybus): known as an excellent coffee substitute, chicory is best harvested once the top of the plant mostly dies, sending its energy to the roots. It can be roasted and ground into a powder for a delightful tea high in nutrients.


3. Dandelion (Taraxacum species): another potential coffee substitute, dandelion roots are known as a powerful medicine and can be roasted much the same way as chicory. Be careful not to confuse them with chicory, since the leaves look similar.


Nuts


Many nuts are available in the fall, and they are available from year to year under two categories: mast year nut producers, and annual producers. Mast year nuts produce nuts irregularly from year to year, with some years being “mast years” of high production, and other years yielding few or no nuts at all. Many nuts can be harvested simply by waiting until they fall to the ground, particularly after strong winds around the time they are ripe. One can put a tarp under the tree to catch the nuts during windy periods, knock the branches with a long stick, climb a ladder and shake the branches (or shake the whole tree if small enough), or get a good, solid throwing stick and chuck it at the nuts to dislodge them. Nuts keep longer once dried for two weeks either in a cotton sack (e.g. old pillow case), or on screens, and then roasted. You may also choose to purchase specialized “pickers” for your nuts to pick them up off the ground, which can be purchased online.


4. Acorns (Quercus species): With mast years every 2-3 years, acorns fall when they are ripe in early- to mid-fall, especially during wind events.


5. Walnuts (Juglans species): Irregular mast producers, walnuts may still produce at least some nuts during low-production years. They are both delectable and nutritious, though some species such as black walnut (Juglans nigra) are more difficult to shell, with relatively little nut meat, while others, such as English walnut (Juglans regia) have much bigger nuts with thinner shells. Depending on the species, they ripen throughout the fall. The hulls can be removed by stomping on them and rolling them with your feet, or they can be cut off with a knife by cutting a line around their diameter and removing by hand with a good, thick set of gloves (the hulls will stain your hands). You can then put them in a bucket with a lid, some gravel, and a bit of water, and shake the bucket vigorously to remove hull remnants, followed by a good rinse before drying (old pillow cases hung indoors away from sun work well). Dispose of the hulls by spreading them across the landscape away from gardens, as black walnuts especially can damage soil life and inhibit plant growth.


6. Hickories (Carya ovata, Carya laciniosa, Carya palida, Carya tomentosa, and Carya ovalis): Closely related to pecans, but often sweeter tasting, most hickories produce annually, ripening in the early fall, or late summer. Once dry, husks are easy to remove.


7. Pecans (Carya illinoinensis): Another irregular mast producer, they are usually ready in November, when they fall consistently from the trees. Some trees may have very small nuts that are difficult to remove from shells, though as with other hickories, husks are fairly easy to remove.


8. Hazelnuts (Corylus species): Ripening from late August through September, as with all nuts, you’ll have to beat the squirrels to hazels. Nuts can be found during mast years under the leaves and are easy to remove from the shell.


Other Fall Forage Crops


9. Apples (Malus domestica): There are many wild or untended apple trees growing throughout North America and elsewhere. Once you start looking in the fall, they shouldn’t be hard to spot in a good year. Similar to nuts, many apple trees don’t produce a heavy crop every year. Lower quality apples can be used to make apple chips (simply by cutting and dehydrating), or apple cider.


10. Hackberry / Sugarberry (Celtis species): There are several species of hackberry, many of them containing a delectable and sweet date flavored dark, light brown or orangish berry ready in mid to late fall. One way to harvest them is to wait until the leaves fall from the tree, put a tarp under the tree and shake the tree or branches vigorously. Due to their low moisture and high sugar content, the berries keep quite well without any processing and can be stored in paper bags or simply in a bowl or container that allows excess moisture to escape.


Although there are many other wild foods available for harvest in the fall, this list of higher-yielding foods is a good place to start. Other wild foods to look out for in the fall include rosehips, elderberries, watercress, amaranth seed, ground nut and many others. Fortunately, most plant ID books give a good indication as to the season that a given crop is available, so hopefully this will only be the start of your journey to find the best foods nature has to offer in your area.


If you have your own favorite fall forage crops you like to harvest in the fall, please share in the comments below!

Wednesday, November 8, 2017

8 Wild Nuts You Can Forage For Each Fall

8 Wild Nuts You Can Forage For Each Fall

Hazelnuts. Image source: Pixabay.com


If you enjoy foraging, nuts are one of the easiest ways to harvest a lot of protein in a very short time. Many other foraged foods contain mostly sugars and complex carbohydrates, which provide good fuel, but are not enough to sustain us in the long run.


Unlike meat, foraged nuts will keep at room temperature for months without deteriorating. In a survival situation, knowing which nuts are available in your area could help keep you nourished through the winter months.


1. Black walnuts


Notoriously difficult to crack, black walnuts hide a valuable prize. You can literally harvest them by the bucket full in the fall. (But wear gloves!) Start by de-hulling the nuts either by hand, or by driving over the nuts to pulp the hull off the outside. Nuts tend to hull easier when they’re a few days old, so if you can’t get them off, take a break for a few days.


Once the hull is removed, wash the nuts with a hose and pressure nozzle and allow them to dry in the sun for a few days. Black walnuts, like most nuts, store best in their shell to prevent oxidation. Keep them in a cool, dark place or if you have the space, they can be stored in bags in the freezer.


Properly prepared, black walnuts can be just as tasty as commercial walnuts. Try them fresh out of hand, or get creative and bake them into a black walnut pie.


2. Beechnuts


Though they produce every year, once every 3 to 5 years is known as a mast year for beech nuts and they’ll produce extraordinary harvests. Individual nut masts are inside a husk that cracks itself open when they’re ripe and fall from the tree.


It’s difficult to husk beechnuts when they’re fresh, but they easily come from the shell once they’ve been roasted. Roast them in a low oven or over a fire until they’re toasted and then rub them between two towels until the husk comes free.


3. Acorns


If you know a thing or two about history, you know that acorns were a staple food source for Native Americans for centuries. They’ve fallen out of favor as European nuts and grains came to America, but acorns are still plentiful if you know where to look. They’re especially high in omega fats, and they’re commonly touted as a survival grain for making tasty cookies in the absence of modern grains.


Learn Unordinary Uses For Ordinary Stuff In “The Big Book Of Off The Grid Secrets”!


8 Wild Nuts You Can Forage For Each FallAs any squirrel will tell you, acorns keep well all on their own. Just keep undamaged acorns in a cool dry place until you’re ready to process them.


But before you eat acorns, you must remove the tannic acid. The fundamental process involves either a boiling water bath or cold-water bath (perhaps multiple times). This process can take a couple of days up to a week or more, depending on the amount of tannins in the acorns.


4. Hop hornbeam


Often overlooked as a food source, hop hornbeam tree produce hop-like catkins that contain edible nutlets that are about the size of a sunflower seed. Though each individual seed is small, they’re produced in papery husks containing many seeds in a group. In heavy production years, trees produce large amounts, meaning that they can be a meaningful food source.


Hornbeam tends to grow in the understory, and in areas with wet soil that are not suitable for oak trees. If you don’t have acorns in your area, you may have hornbeam. When foraging hop hornbeam, look for the green hop-like seed clusters anytime during the summer. They’ll be ready for harvest around October.


Store the dried catkins in a cool dark place until you’re ready to husk them and eat.


5. Butternuts


Buttery and mild, they’re the perfect substitute for pine nuts in a pesto or eaten straight out of hand. The butternut canker is causing the trees to decline, but tolerant trees and resistant hybrids still linger on in the wild throughout the northern latitudes.


They’re easier to crack than black walnuts, and well worth the effort to find. They keep best in the shell in a cool dark place all winter long.


6. Hickory nuts


The nuts of shagbark hickory and smooth bark hickory (pignuts) are tasty and sweet. The trees are common throughout the northeast, and bear heavily, especially when they’re along roadsides in full sun.


As foraged nuts go, hickories are relatively easy to crack. Leave them out in the sun for a few days to allow them to dry a bit so that the nut meat pulls away from the shell easier, and then they should come apart with a nutcracker, or lacking that, a moderate blow from a rock.


7. Hazelnuts


Growing in dense thickets in many parts of the country, hazelnuts provide a readily accessible food source. They’re easy to pick, and they naturally store longer than any other nut. Hazelnuts can be good for 9-12 months after harvest if stored in a cool place. Pick them by the bucketload, and remember that your biggest risk is an invasion of your stock by rodents, so protect your harvest accordingly.


8. Sweet chestnut


If you’ve ever tried to pick up a chestnut husk, you’ll remember your mistake. They’re exceptionally spiky inside the husk, but those spikes are guarding a delicious high calorie prize.  Immature nuts fall early, but the fully ripe fruit won’t be ready until sometime in mid to late fall.


Score the shells to open them, then blanch or roast them before you peel them.


What would you add to our list? Share your tips in the section below:

Tuesday, October 31, 2017

7 Reasons Canning Food Is Better Than Freezing Food

7 Reasons Canning Food Is Better Than Freezing Food

Image source: Pixabay.com


There are plenty of reasons why people prefer one food preservation method over. But individual choices aside, here are some compelling arguments why canning is better than freezing and other methods, followed by a few notable exceptions.


1. Flexible storage space. When you freeze your harvest, you are essentially using a big box to store your food. And when the box is full, it’s full. The sides won’t stretch and you can’t—or at least shouldn’t—sit on the top and squeeze it shut like an overfull suitcase. When your food is canned, however, you can almost always find a space to store a few more jars … and then a few more. When the pantry is full, there’s probably room for a row of jelly jars behind the cereal boxes or in the cabinet over top of the refrigerator. And when there’s no more room in the kitchen, jars can be tucked into a box under the bed in the guest room or even on temporary shelves behind a living room chair.


2. Storage without power.  Canning food is an obvious first choice for people living off-grid. While freezers are do-able off-grid, the cost and hassle is often higher and space is therefore at a premium. Even homes which are hooked to the grid know that it’s not 100 percent certain all the time. Outages due to storms or accidents can happen anywhere and anytime. Although full chest freezers can maintain integrity without power for many hours, outages are still cause for concern. When a homestead harvest is preserved in jars, there’s no worry about losing food when the lights go out. And either way, buying and running a freezer costs money — and pantry shelves don’t.


3. Ease of use. We’ve all been there, realizing at the last minute that we forgot to take a crucial ingredient out of the freezer in time for it to thaw. Or remembering to retrieve the item and finding ourselves pawing through dozens of packages of what we don’t want to find the one thing we need.


Be Prepared. Get The ULTIMATE Food Protection Plan


Rehydrating dried foods takes some time and effort, too. And even when food comes whole from the root cellar, it still usually needs to be peeled, trimmed and seeded. When food is canned, none of that is an issue. Grab a jar, pop the top, and done.


4. Better quality and taste. Certain canned foods are superior to their frozen counterparts. Many people prefer the taste and texture of canned green beans to any other. Others are swept off their feet by the intense smell of canned meats. And some homemade foods—such as potatoes, chutney, ketchup or jam—just do not freeze with results that satisfy everyone. Dehydrated vegetables often lack palatability compared to canned ones. For those times when canning yields the best results, it’s the only way to go.


5. Less waste. Many people use zip-top freezer bags to freeze foods. Bags are often my go-to because they use less space than freezer containers. I wash mine out and reuse them, but the zip-tops wear out quickly. Canning jars last for years and can be reused dozens of times.


6. Processed without electricity. Canning is not the only option when it comes to off-grid processing, but it is easily done on a gas burner. Depending upon the climate where you live, creating dried foods can be limited without an electric dehydrator.


7. Keeps well. Technically, home-canned goods should be consumed within a year. But that can be fudged a little, or a lot, depending upon how picky you are. One drawback for root-cellar storage is that their useable lifespan is shorter than other methods. Frozen and dehydrated foods can deteriorate quickly, too. But food in jars has a good shelf life.


It is true that certain foods yield a better result when preserved in a way other than canning. Broccoli and cauliflower are not considered can-able. Bread, cake and cheese are not safe for canning. Neither are pureed foods such as squash or pesto. Foods such as greens and corn can be canned, but they are so labor- and time-intensive that many folks opt for freezing. Firm berries can nicely but yield a different end-result than freezing or drying, so the ideal way to preserve a bountiful berry harvest would ideally use some of each method.


Overall, canning is a great option for preserving the harvest. It can be done without electricity, yields high-quality and long-lasting results, and minimizes material waste.


Do you agree or disagree? Share your thoughts in the section below:

Monday, October 23, 2017

No, Canning Is Not Always The Best Answer

No, Canning Is Not Always The Best Answer

Image source: Pixabay.com


Remember the last time you heard someone ask for another serving of that delicious home-canned eggplant or Brussels sprouts? Not likely. There are some foods which are better off being preserved by a method other than canning, and a few that are not conducive to any kind of preservation and are best simply enjoyed in season and let go until next year.


The reasons for choosing an alternative to canning are almost always centered around food quality, ease of processing, or safety.


Quality


Canning can cause some foods to lose flavor, texture, color or a combination. Vegetables such as turnip, parsnips, most greens and perhaps sweet peppers are able to be canned but are less appealing that way than when frozen. Most cruciferous vegetables such as cauliflower, broccoli, Brussels sprouts, and cabbage do not do well canned—with one important exception being in pickled mixtures. The reason nobody cans straight cauliflower but many people make cauliflower pickles is probably due to the canning process required: as a low-acid vegetable, adequate pressure-canning to ensure a safe product would probably result in mushy cauliflower. But added vinegar allows a quick process in regular boiling water and turns out a tasty crisp-tender product. By themselves, the best way to preserve the texture of these crunchy vegetables is to freeze them, but they are also good dehydrated.


Dehydrating and drying are good techniques for many vegetables. Broccoli, corn, carrots and cabbage dehydrate well, store easily, and taste great in soups and stews. Vegetable chips make fun snacks. Dry beans, of course, are an excellent choice. Some foods are almost always preserved by some kind of drying procedure, such as garlic and ginger.


Finally, A Backup Generator That Doesn’t Require Gasoline!


Many fruits take well to canning, but not all. Strawberries lose color and flavor when canned, causing many people to prefer them frozen or dried. Soft berries such as raspberries and blackberries are often too delicate to survive the canning process. Other fruits such as melons do not can well—except, as with some vegetables, if pickled.


Ease of Processing


Sure, you can spend hours preparing peeling and cubing and parboiling potatoes and pumpkin if you want to—and sometimes it is truly worth it—but it often makes more sense to simply store them in the root cellar.


Storing appropriate vegetables—carrots, beets, rutabaga, onions, leeks, winter squash and cabbage—in a cold dark cellar is one of the easiest ways to store them, and root-cellaring can be combined with other methods for a great alternative to canning. My freezer is usually packed completely full by October, at around the same time my cellar gets cold enough to store vegetables. When the food in the root cellar approaches the end of its shelf life, enough food has been eaten out of the freezer to make room for root cellar refugees.


I do enjoy the convenience and delicious flavor and aroma of canned potatoes, which makes it worth the effort of at least one batch every season before putting the remainder into cold storage. Canned meats are wonderful, too, but labor-intensive canning is a matter of personal preference. People spend their valuable homesteading time on what they consider most important, and canned potatoes or meat may not make the cut for everyone.


Freezing is a relatively easy process for many foods. I keep items like meat stock and applesauce in the freezer as well as on the pantry shelves. If I have just a couple pints, it’s hardly worth running the canner for, and I put them in the freezer instead if I have room. For larger batches, I can process a canner-full and freeze anything left over or the contents of any jars that didn’t seal.


Dehydrating is easy, too, once you get the hang of it. It’s a bit of a learning curve at first, knowing how to dry vegetables until they are dry enough to impede growth of bacteria but not so dry as to lose appeal. But a little practice can produce excellent results.


Safety


Some foods are not safe to be canned. One of the most important things to remember is that adequate heat needs to reach the center of the jar and stay hot for enough time to make the canning procedure safe. For this reason, pureed foods such as mashed squash and pesto should not be processed using home canning equipment. While it is possible that these foods might heat sufficiently to kill pathogens, it is not a sure enough bet to risk your health on.


Cheese and butter should not be canned, either. These and other low-acid foods can provide an environment in which botulism can develop unless tested guidelines are followed. Dairy foods and novelty items such as cake and bread are strongly discouraged by official testing entities, and no reliable guidelines are available.


Just Eat and Enjoy


Sometimes the best thing to do is savor the flavor of the season and let it go when it’s gone by.  Foods like zucchini and summer squash, for example, are foods for which the only tested guidelines call for adding pineapple juice and diluting that wonderful taste of summer we seek to preserve. I sometimes freeze a few bags of zucchini—in slices for sautéing, chunks for ratatouille, and grated for cakes and muffins—but it isn’t part of my vegetable staples for winter.


Cherry tomatoes can be frozen whole for winter soups and stews, but they’ll never be as good as they are straight off the vine. For these and a few other vegetables, it makes sense to preserve only a minimal amount and share any harvest surplus with neighbors, livestock or wildlife—provided, of course, that household food security is not a potential concern.


Should it Be Canned?


Using home canning to preserve the harvest is many people’s go-to, and with good reason. But it is always valuable to first evaluate whether canning is the best option. For a variety of reasons, some foods are better frozen, dried, root-cellared or not preserved at all.


What foods do you NEVER can? Are there any unique foods that you DO can? Share your advice in the section below:

Saturday, October 21, 2017

So Many Zucchini, So Little Time! Tips To Use Up Your Zucchini Harvest

So Many Zucchini, So Little Time! Tips To Use Up Your Zucchini Harvest

Image source: Pixabay.com


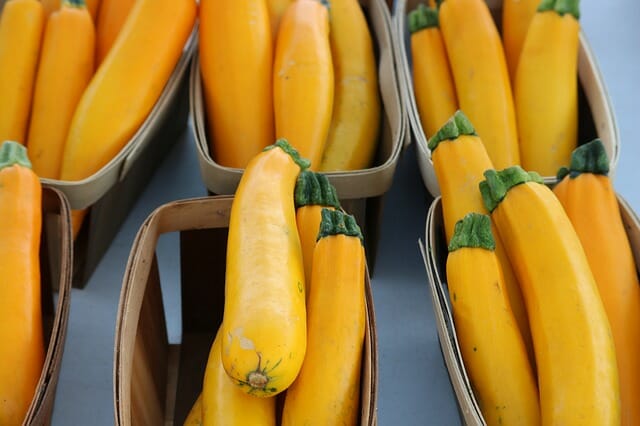
We’ve all heard jokes about gardeners creeping up to their neighbors’ doorsteps in the dead of the night to “give away” extra zucchini squash. There are few garden plants that produce as prolifically as zucchini. Although there are many creative recipes for fresh zukes, it’s easy to get overwhelmed by the bounty. But, if you have more than you can eat right now, don’t give away all your extras. There are a bunch of things you can do with the squash so that you can enjoy it throughout the winter.


Picking and Storing Fresh Zucchini


Since zucchini is a summer squash, it has tender, thin skin. Unlike winter squash (including pumpkins and spaghetti squash) with their thick rinds, summer squash doesn’t store well. Even in the fridge, zucchini will keep for 7-10 days at best.


It’s best to pick zukes when they’re about 6-8 inches long. At that size, they’re tender and mild-tasting. As zucchini continues to grow, its flesh becomes stringier and less tasty.


Looking For Non-GMO Herb Seeds? Get Them From A Company You Can Trust!


Don’t bother washing them after picking. Just brush off any dirt and put the zukes in a paper bag, or in a plastic bag that is either perforated or left open. Once bagged, zucchini should be stored in the crisper of your fridge. Keep an eye on it — when zucchini starts becoming soft, it needs to be used up quickly.


Eating Fresh Zucchini


For a long time, all I did with fresh zucchini was throw it into stir-fries and chili. As you can imagine, that didn’t make much of a dent in my harvest. Not wanting to foist any more of my zukes on neighbors and coworkers, I searched online for recipes. If you’re not a foodie, you may be surprised at the incredible variety of zucchini dishes.


  • Sliced in thin, long slices, it can take the place of lasagna noodles.

  • Cut in half and hollowed out a bit, it becomes a “boat” that can be stuffed with pizza fillings or other toppings before roasting.

  • Cut into finger-size strips and coated with breadcrumbs, parmesan cheese and spices, it becomes “zucchini fries” for a yummy appetizer, snack or side dish.

  • Put through a spiralizer, it becomes high-fiber, low-carb, low-calorie noodles, which are a perfect base for Asian- and Italian-style dishes.

  • Used as an ingredient in all kinds of salads.

With so many different ways to prepare it, it’s easy to incorporate zucchini into meals every day without getting tired of it. Do a little Googling or look on Pinterest for recipes.


Baking With Zucchini


If you have the freezer space, you could whip up cakes, loaves and muffins to stash away for the winter. If you already bake with zucchini, you know that it adds nutrients and texture to baked goods, and helps keep them dense and moist. If you don’t already bake with zucchini, it’s time to give it a go. I’m partial to chocolate chip zucchini loaf, but there are recipes out there to suit every taste.


Freezing Zucchini


Frozen zucchini isn’t at its most attractive once thawed. It’s best used as an additive to things like soups, stews, pasta sauces or chili — or in baked goods.


How you prepare zucchini for the freezer depends on how you intend to use it later. If using for baking, it’s a terrific idea to shred it up and stuff 2 cups into a freezer bag, unless you have a go-to recipe that calls for a different amount. To use it later, thaw it, drain it, drain it again, and pat it dry with a paper towel before you add it to the batter.


An All-Natural Fertilizer That Can Double Garden Production!


While grated zucchini also works well in soups and stews, sometimes it’s nice to have chunkier pieces in your dish. If that’s the route you’d like to go, you can simply chop your zukes into bite-size pieces, stuff them into a freezer bag, and toss them in the freezer. However, if you blanch them for one minute in boiling water before freezing, the thawed pieces will stay firmer than if they hadn’t been blanched.


Dehydrating Zucchini


So Many Zucchini, So Little Time! Tips To Use Up Your Zucchini Harvest

Image source: Pixabay.com


If your freezer space is maxed out, dehydrating zucchini is a terrific option. Rachel at growagoodlife.com says that four pounds of fresh, sliced zukes shrink so much during drying that they will fit into a pint-size jar! If you have a dehydrator, it’s super easy to do this: Just clean the zucchini, slice it into ¼-inch rounds, spread the slices on the dehydrator trays, and run the dehydrator as instructed. If you don’t have a dehydrator, you can do this in an oven set to 175 degrees, too–just keep a close eye on the zucchini so that it doesn’t burn. It should take about two hours to dehydrate in the oven.


Preserving Zucchini


I remember the first time my mom grew zucchini. It was the ‘80s, and zucchini was absolutely exotic in our part of the world. Mom had no idea what to do with her bounty but heard about “Mock Pineapple.” It turns out that mock pineapple is still a thing. Nutshell version: Peel and cube zucchini; stuff it into jars; cover it with a mix of pineapple juice, sugar, and lemon juice; and process in a hot water bath. The zucchini takes on the flavor of the pineapple juice, but as this contemporary recipe points out, mock pineapple is best used in recipes that call for crushed pineapple, and not simply eaten out of the jar.


If mock pineapple is not your thing (confession: teenaged me refused to eat it), there are all kinds of other ways to can zucchini, including in relishes and salsas, and as pickles. That said, it’s not recommended to can plain zucchini. Because it’s a low-acid vegetable, it would need to be processed in a pressure canner, which is not recommended. Further, canned squash gets quite soft, and has limited uses.


There are so many ways to use and store this very versatile vegetable! What do you do with your extra zucchini? If we missed discussing a way to use it up, please let us know in the comments below.