Showing posts with label trees. Show all posts

Thursday, November 2, 2017

Autumn Leaves: ‘Miracle Mulch’ For Your Spring Garden

How Autumn Leaves Can Become

Image source: Pixabay.com


As we enjoy the changing seasons and the vibrant colors that come with autumn, we prepare ourselves for cooler temperatures and the raking and gathering of fallen leaves. For gardeners, this doesn’t mean an added chore, but actually a beneficial moment for improving and preparing our gardens for winter. There are many uses for those discarded leaves, and below are a few common ones.


  • Compost: Mow the leaves and place in the compost pile. It is easy to shred the leaves with a mower.

  • Leaf mold: This is a pile of leaves and soil that sits for about a year, and then is added to the compost. It helps with nutrients and soil-building.

  • Storing: This is a method of keeping all the leaves in a pile and using them to add to the compost when brown material is needed.

  • Mulch: Mulch retains moisture, controls temperature of soil and limits weed growth. Leaves also add nutrients and brown material as time goes on.

Let’s take a look at using autumn leaves. Mulching is one of the easiest and most beneficial methods of using autumn leaves. It is also the most inexpensive way to deal with fallen leaves and takes as much, or even less, time than the usual raking and bagging. Mulch can be used in vegetable gardens, flowerbeds, shrubs and under trees. It looks attractive in any garden and is completely natural.


Tree leaves absorb about 50 percent of the nutrients that the tree gathers during the growing season. By using as mulch, they return these nutrients to the soil. They also encourage worms and micro-organisms to work the dirt. The end result will be a lighter soil which is easier to work and grow plants in.


Your Best Source For Non-GMO Seeds Is Right Here!


Mulch can also be used to insulate plants and protect them from the cold winter winds and temperatures. It helps prevent soil compaction.


Things to Remember
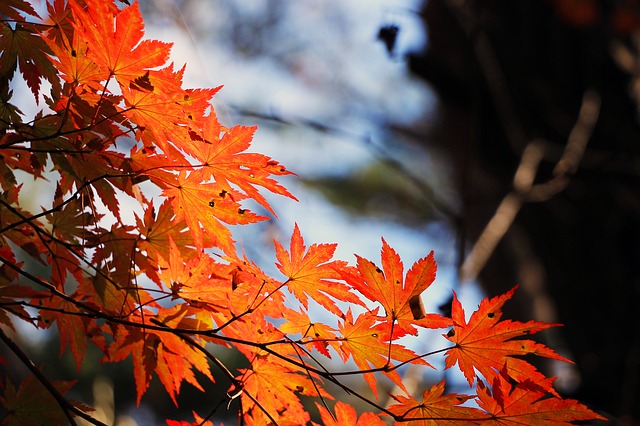

How Autumn Leaves Can Become

Image source: Pixabay.com


Almost any leaves will make good mulch, but not Black Walnut. Black Walnut leaves should never be used because there are plants that are sensitive to this particular leaves’ compounds. Use only healthy leaves, not any covered with mildew, rust or tar. If you collect from trees such as laurel, walnut and eucalyptus, compost them before turning into mulch as they contain growth-inhibitors.


Shred the leaves before using in the garden. Whole leaves can prevent water from reaching the ground and plants. When you shred leaves for mulch, you are ensuring micro-organisms have more room to do their work.


Mulch expands, so cover all the ground with an even distribution, but don’t put it right up on a plant’s stem or trunk. Otherwise, it will encourage rot.


This New All-Natural Fertilizer Doubles Garden Production!


Here are some essential tips:


  • To start mulching, use the lawnmower and run over the leaves a few times. This mowing will shred the leaves into acceptable sizes. Once mowed sufficiently, rake into piles, and place in bags, buckets or wheelbarrow to move to where you need to mulch.

  • Weed the area first, and then add mulch

  • Apply a two- or three-inch layer of leaf mulch around the vegetable garden and flower beds.

  • If you cover vegetables like kale, leeks, carrots and beets, you may be able to harvest them most of the winter.

  • For plants like leeks and other closely planted greens, use your hands and take fistfuls of mulch to place several inches between the vegetables.

  • Plants that love shade can be covered by leaf mulch. It’s natural for them to be covered at this time of year. Place less than two inches, or five centimeters, of mulch over them so they can push through with little issue in the spring.

  • If you are using mulch as insulation, use about six inches, or 15 centimeters, to protect the more tender plants.

So when you see the leaves begin to fall this year, do not worry. Use them to enhance and create healthy plants and soil for the next season. With a little work, you can have a top-notch, natural mulch all your neighbors will envy! Nature provided us with the best mulch material, so don’t waste it. Mow those leaves and create an awesome autumn leaf mulch.


Got any fall mulching tips? Share them in the section below:


Every Year Gardeners Make This Avoidable Mistake — But You Don’t Have To. Read More Here.

Thursday, August 31, 2017

7 Incredible Tools The Native Americans Crafted From Tree Bark

7 Survival Items The Native Americans Made From Tree Bark


Most of us see little use for bark. We peel it before we build with it, we trim it off before smoking fish or game, and we generally don’t see much value in it as firewood or a dependable heat source.


Native people, though, had a much different viewpoint. They used bark from many trees as a resource for numerous solutions, but there’s a trick to working with this material.


Paper birch is the bark of choice for bark crafters, and the Ojibway took barkcraft to a new level thanks to the fact that birch grew everywhere they lived. Other tribes had to make-do with stiffer and less pliable resources, although slippery elm, willow and aspen offered workable solutions.


Harvesting Bark


Be careful with living, green trees. If you remove too much bark, you will potentially kill the tree. In fact, if you cut the bark from a tree around its circumference, it will be dead in weeks, if not months. Native peoples would sometime “girdle” a tree. This involved removing bark around the full circumference of the tree; this was a designed action and they knew that the following year the tree would be dead. Often, a large fire was started at the base and stone axes were used to cut into the weakened and charred wood until repeated fires and chopping felled the tree.


Discover The Secrets Of The Word’s Top Survivalists!


Even a dead birch tree will provide a strong and pliable source of bark. If you come across a dead-fall birch, harvest the bark to your heart’s content. If you’re desperate and only have access to live trees, limit your cuts and stripping to half of the tree if you can. That will at least give it a fighting chance for recovery.


You may be wondering: Why is bark so important to a tree? The inner bark or “xylem” is essentially the circulatory system for any tree. Water and nutrients are delivered to the tree from the roots to its leaves by this circulation. That’s why a “girdled” tree will soon die. When its only source of water and nutrients is cut off, the tree has no options for survival.


Pre-Treating Bark


There are a few steps to making any bark more workable. Some tree bark, like the slippery elm, requires a bit of scraping of the outer bark to make the piece more pliable. Birch is naturally flexible, but it will be curved when first harvested. Native Americans flattened the birch bark on the ground with the curved side down and weighted it with stones. The moisture in the ground and the weight of the stones eventually flattened the bark.


Another key step is to soak the bark in hot water before working with it. This also adds some flexibility, and it helps to keep the bark from splitting when it’s folded or shaped.


Many bark creations were sewn at the seams with cordage or strips of leather to re-enforce items like baskets and bowls. If the object needed to hold water, the seams were sealed with pine pitch.


Let’s take a look at items the Native Americans made from bark:


1. Cup


One of the easiest and most common uses for bark was for a ladle or drinking cup.  A circle of birch bark was cut and a triangular fold was made from the center to the edge. This fold was then overlapped to form a cone. The creased bark was held in place with a stick with a split in it, and the fact that the bark was not cut made it water tight to either scoop water from a spring, or to simply drink it as a cup.


2. Bowl


This same approach was used with a wider circle of birch bark or slippery elm to make bowls supported by rocks around the side, or a hat that would shade you from the sun or protect you from the rain.


Story continues below video


3. Pot


The bowl concept also can allow you to cook with a bark cooking pot. Hot stones were picked from a fire with two sticks much like chop sticks, and the stones were swirled in the water until the water actually started to boil.


But be careful with hot rocks. A rock from a river may appear nice and smooth, but many of them contain moisture in their cracks and crevices and can explode and shatter in the fire. Igneous rocks like granite or basalt are the best because they are less likely to be porous and allow water to seep in.


4. Sunglasses


“Sunglasses” are another option, with a piece of bark cut about six inches wide and two inches in height. You may doubt the need for sunglasses, but in winter, snow-blindness is a serious problem, as sunlight reflects off forests and fields of snow. These sunglasses, though, did not contain any glass or plastic. A couple of sticks were used to support the bark strip over the ears like a regular pair of sunglasses, and two crosses in the shape of a plus sign (+) were cut into the bark at eye level.


Ultra-Compact Water Filter Fits In Your POCKET !


A semi-circular cut was made to fit over the bridge of the nose. The size of the crosses was usually a half-inch long both up and across, and the slit was about an eighth of an inch wide. You look at the world through the slit, which allows less light and protects your eyes. This was actually an Eskimo invention.


5. Backpack


A backpack is also easy to make with a long piece of bark about three feet in length and a foot and a half wide. The bark was folded over, and the seams on either side were sown together with cordage or long strips of leather. Holes were poked first and the cordage or leather simply woven through. Straps from cordage or leather were attached and reinforced with more lacing. and everything from personal items to harvested plants, fruits and vegetables could be carried with ease.


6. Candle lantern


A curved piece of birch bark, wrapped and held in place at the base around a circle of sawn wood creates a wind block and reflector for a candle lantern in a fixed camp. Be careful using this indoors. Birch bark is highly flammable, which makes it great tinder, but not something you want to burst into flames in a cabin.


7. Torch


A simple torch is easy to improvise, with strips of birch bark held in place by a slit in a long branch. Additional strips of bark can be added as the birch burns; it actually gives off a good amount of light for a long time.


Final thoughts


All Native American tribes crafted canoes from birch, but that’s something that’s a bit beyond my expertise, although I’ve had success making small-scale toy canoes from birch bark, and my kids and grandkids still play with them. Maybe someday I’ll see if I can scale it up and actually make a birch bark canoe, but I’ll definitely be testing it in very shallow water.


What advice would you add on making tools and utensils from bark? Share your tips in the section below:


Every Year, Gardeners Make This Stupid Mistake — But You Don’t Have To. Read More Here.

Monday, May 15, 2017

5 ‘Survival Insurance’ Trees Every Homesteader Should Plant

5 ‘Survival Insurance’ Trees Every Homesteader Should Plant

Honey Locust. Image source: Pixabay.com


There is an old saying that goes, “The best time to plant a tree is 10 years ago.” This holds especially true for trees that someday may save your life in the event of a crisis or disaster.


The next best time to plant a tree, of course, is right now.


But, what should you plant?


Below is a list of trees that are especially important for food and other survival uses, based on the amount of calories they can supply, how well they store, and how long they take to produce.


1. Hazelnut (Corylus species)


Uses: Nuts are one of the most nutrient-dense, long-term storage crops you can grow, and hazelnuts top the list of best nuts to plant. This is because of their exceptional nutritional value as well as their ability to produce quickly, within 4-5 years. Keep the nut shell on and store in a cool, dry place, and it should store for at least 12 months. An edible oil can be extracted from the seed.


Propagation: The seeds should be planted fresh during autumn in a cold frame if possible, or stratified (kept moist, but not soggy in soil or soilless mix) over the winter. Stored seed can be pre-soaked in warm water for 48 hours and then given 2 weeks of warm moist treatment, followed by 3-4 months of cold moist treatment (i.e. warm stratification, followed by cold stratification). It should then germinate in 1-6 months. As with all trees, particularly when first planted, mulch aggressively, and consider putting a weed barrier around them (e.g. cardboard) as they establish, and then mulch with 4-6 inches of mulch to or beyond their drip line (recommended for all trees). All trees benefit from mycorrhizal inoculant, as well.


2. Walnut (Juglans species)


Uses: Black walnut (Juglans nigra) and California walnut (Juglans californica) are both good choices, as is the English walnut (Juglans regia). The nuts are high in calories and nutrients, with a sweet, rich flavor. They can be stored like other nuts (dried, kept cool and dark) and will keep for up to 6 months, though roasting extends storage times.


Get The Essential Secrets Of The Top Survivalists In The World!


A brown dye can be extracted from the husks, bark, leaves and stems, and the husks also can be made into a high-quality coal once removed from the nut (burn at low oxygen), which can be used to create a water filter. All parts of the tree contain juglone, which can be used as an insecticide and herbicide (use only in an emergency, as it will kill soil life and could affect health of soil, while making the soil unsuitable for most plants). Sap also can be tapped and used in moderation for hydration, or boiled into a syrup.


5 ‘Survival Insurance’ Trees Every Homesteader Should Plant

Image source: Pixabay.com


Propagation: There are cultivars of walnut that are much better for eating (larger nuts, thinner shells), so if possible, obtain these trees, or seeds, from nurseries. Growing wild walnuts from seed is certainly not a bad idea, however. You can get nuts from a tree from seed in as little as 10 years, although they take some time to produce in quantity. You also can graft cultivars onto root stock that you grow from seed. To grow from seed, either plant the seeds in their permanent location in the fall after removing them from the husk, and protect them from rodents by putting chicken wire over the planting area, or stratify them in a bucket of soil or soilless mix outdoors over the winter (if planting a winter hardy species of walnut in a cold climate), followed by planting in the spring, potentially even individually as you check for sprouting nuts. They require deep, well-drained soil as they have a tap root, and should be planted into their permanent position immediately, or within a year if you can keep them in a deep pot (4 inch PVC pipes 2 inches long with mesh holding the soil in will work, and will prevent roots from tangling).


3. Shagbark Hickory (Carya ovata)


Uses: Much the same as walnut, particularly the edible nut. Hickory nuts store better than walnuts, however, keep for up to 2 years. The seed also can be ground into a meal and used as a thickener, while it is also sweet and delicious on its own.


Propagation: The same as walnuts, but they cannot be stored as long and should be sown as soon as possible. Store seeds in moist soil or soilless mix until planting. Like walnuts, look for improved eating cultivars.


4. Mulberry (Morus species)


Uses: Mulberry has a sweet and delicious edible berry that is usually produced in abundance, and can be eaten fresh (although it doesn’t keep well), made into preserves, or dried. Unfurling leaves and young shoots are also edible (raw or cooked) in most if not all species, including Morus alba and Morus rubra. Young leaves are better. Mulberry is also an excellent fodder crop for livestock (this is, the leaves and berries), and you can get decent fiber from the bark and young stems, which is traditionally used for cloth and paper making.


Propagation: A fast-growing tree, it is best grown from seed. (Seed-grown plants are much more vigorous than those from cuttings.) Seed requires 2-3 months of cold stratification. Red mulberry (Morus rubra) is said to be among the best species for eating, although it is endangered and can be difficult to find. Seeds can be sprouted in their stratification container and then pricked out into individual pots, or planted densely in pots before sprouting, and then thinned or transplanted as soon as they germinate. Trees develop a tap root, so are best planted into their permanent position within 1 year, and should be kept in deep pots until then.


5. Honey Locust (Gleditsia triacanthos)


Uses: Seeds are edible raw or cooked, with a taste similar to peas, and they are high in carbs and protein. Seed pulp is sweet and can be eaten or used as a sugar substitute. Pods also are great livestock fodder, and the tender young seedpods are edible cooked. The tree fixes nitrogen so is a good companion plant for many other plants, and can be used to make a “living fence” by planting them densely in rows and then keeping them trimmed. Wood is very rot-resistant and can be useful for making tools or fence posts (although living fences are much smarter since they never rot).


Propagation: Seeds can be “scarified” by soaking in water that is boiled and then letting them sit in the water for 5 minutes. Soak for 24 hours. This will break down the tough seed coating, and the seed should then “imbibe,” meaning it will engorge with water. Seeds that do not engorge should be re-soaked in hot water until they do. Viable seed has a high germination rate, and the tree will then grow quickly. To get thornless honey locust, find a larger tree and cut a thornless grafting scion from the top (the tops of trees often do not grow thorns) to graft onto planted root stock.


These are, of course, only a few of the excellent choices for trees to grow for survival insurance. Others include honeyberry (a.k.a. haskap, a fast-growing berry shrub), elderberry, white/paper birch (fast growing, excellent sap for hydration), yellow horn, chestnut, and many others. Given that nothing in life is certain, it’s best to prepare ourselves by planting our own low-maintenance food trees around our homes. Your future self may thank you.


What trees would you add to our list? Share your tips in the section below:

Friday, February 24, 2017

The Livestock Feed That Grows Even During Droughts

The Livestock Feed That Grows Even During Droughts

Image source: Pixabay.com


When you think of natural livestock feeding, what do you picture? A smooth, green pasture with animals grazing on grass and clover? That provides a large part of what’s needed. But trees and brush also can be valuable livestock feed. They have several uses.


Woody plants provide extra fiber/roughage and can help to settle digestions upset by too much rich food. Their deep roots bring vitamins and minerals up from lower levels of the soil and make them accessible to livestock. In dry years, these deep roots are especially valuable. During the long rainless summer of 2016, when my family ran drip irrigation on the gardens 24/7 and watched the pastures turning brown, the deep-rooted trees and bushes remained green and growing, giving us something fresh to feed our livestock.


Who Wants Brush?


Goats are champion brush-eaters, and they naturally prefer browsing to grazing. Sometimes, ours get diarrhea when they’re turned out on lush spring pasture. Feeding lots of branches gets enough fiber into their systems to settle their digestions. Sheep also enjoy a certain amount of browse. Some farmers report that heritage breeds of sheep are much more willing to eat browse than recently developed breeds. Horses and cows are primarily adapted for grazing, but some browse can be a useful fiber/vitamin supplement for them, as well. Rabbits should have some woody plants to add fiber to their diets and to keep their teeth from overgrowing.


What Can You Feed?


Willow (Salix spp) and mulberry (Morus spp) are particularly nutritious high-protein feeds. They can grow very rapidly in favorable conditions, which makes them easy to coppice for continual growth (mulberry is even considered invasive in some areas). Willow is also pain-relieving and anti-inflammatory; salicylic acid, the active ingredient in aspirin, was derived from willow bark. We feed plenty of this to our goats after kidding. Siberian peashrub (Caragana arborescens) is a hardy legume with protein-rich leaves and seedpods. It’s supposed to cope well with drought, poor sandy soil and other challenging conditions.


Diatomaceous Earth: The All-Natural Livestock De-Wormer


The Livestock Feed That Grows Even During Droughts

Image source: Pixabay.com


Other palatable trees and shrubs include apple, birch (Betula spp — which also has mild de-worming properties), staghorn sumac (Rhus typhina — do not ever feed your animals poison sumac, Toxicodendron vernix), rose (another mild de-wormer), blackberry (also has some disinfectant and digestion-settling properties) and raspberry (beneficial to animals during pregnancy and soon after birth, and will do no harm at other times). Do not feed branches from stone fruit trees (peach, plum, cherry, apricot nectarine), yew, poison sumac, mountain laurel, or any type of laurel or rhododendron.


This is by no means a comprehensive list. Check with your local Cooperative Extension and with your neighbors about what grows and what is palatable in your area. Be prepared for conflicting answers. There’s controversy over whether or not to feed some types of trees and brush. Some sources list maple as toxic; our goats sometimes eat dried sugar maple leaves as a treat alongside their hay and come to no harm. Some sources say to avoid feeding any kind of evergreens, but we give our goats small amounts of white pine branches when they suffer from worms, though we don’t feed pine regularly.


How Can You Offer Browse?


This depends very much on your animals and your land. Goats usually will eat any browse included in their pastures, so enthusiastically that they kill the plants — they’ll completely defoliate low shrubs, and girdle the bark of trees so they die. That can be useful if you have goats and you want a wooded/brushy area cleared; you can just remove toxic plants, fence the area and turn the goats loose in it. The other choice is to keep your goats on grass pasture, cut branches elsewhere and throw them in.


Browse, as well as grass, can be stored for winter. My family cuts willow early, when the leaves have just reached their full size and their nutritive peak. We then bundle the branches and hang them high in the barn rafters. After several months, they’re thoroughly dry and ready to go into a bin for winter feeding. We also bundle and dry raspberry plants.


For obvious reasons, browse for rabbits needs to be cut and put into their enclosures.


I haven’t raised cows or horses. Some sources say they won’t eat browse if they have access to plenty of graze. Others report that they will eat cut branches that are offered them and will nibble on trees or shrubs in their pasture without killing them. So far as I can tell from reading, sheep’s willingness to browse depends on the breed and the particular flock. In a dry year when fresh graze is less available, most natural grazers may show more enthusiasm for branches. I hope that some of you who raise horses, sheep and cattle will comment on this post and tell us about your herd’s eating habits.


Have you ever fed your livestock trees and bush? Share your tips for doing it in the section below:


If You Like All-Natural Home Remedies, You Need To Read Everything That Hydrogen Peroxide Can Do. Find Out More Here.

Thursday, January 26, 2017

6 Tricks To Ensure Your Fruit Trees Survive The Winter

6 Ways To Ensure Your Fruit Trees Survive The Winter

Image source: Pixabay.com


Experienced homesteaders know that just because the trees go dormant, the hens take a break from laying, and the garden goes fallow it doesn’t mean that you can go into hibernation from December to March.


Among the many wintertime tasks on the farm, you can’t forget to include tending to your fruit trees. Proper overwintering of fruit trees helps them to survive the cold months and can get rid of any hidden fungal spores, bacteria, and insect eggs that can wreck havoc come summertime. The three simple steps include: insulation, pruning and spraying.


1. Prioritize autumn clean-up. Start winter preparation by cleaning up your orchard during autumn. Remove fallen, rotting fruit from the ground and rake up fallen leaves. This debris can harbor hidden fungal spores, insects and their eggs. Rotting fruit is also an invitation to animal invaders to move in. Be sure also to remove any dead fruit from the tree. After the leaves have fallen, give your fruit trees a thorough inspection for signs of disease or damage. Look for any cracks, discolorations, unusual growths or other signs of damage. Remove or treat any wood that shows signs of disease.


2. Prevent sunscald. Before the cold really sets in is the time to protect your trees from sunscald. Sunscald occurs in the winter when the sunlight heats the bark during the day, waking it from dormancy, and then freezes again at night, causing an open scar. The scar can become an inviting opening for insects and disease. To protect your trees from sunscald you can use a commercial tree wrap — like crinkled paper or spiral plastic wrap — to wrap the trunks of young trees. Older trees can be treated with a 1:1 solution of water and white latex paint.


3. Guard against animal invaders. If you have a busy wildlife presence in your area, you also may need to protect your fruit trees from deer, rabbits, mice and other animals that are looking for an easy wintertime meal.


“The Big Book Of Off The Grid Secrets” — Every Homesteader Needs One!


For trees less than 5-7 years old, use tree wraps or wire mesh to protect trunks from mice and voles, making sure they are partially buried. Though nothing short of an 8-foot fence is guaranteed to keep deer at bay, a barrier of poultry netting or woven wire can help protect your trees. Scent repellants also may work, including liquid repellents like coyote urine or hanging a highly scented bath soap from the tree’s branches.


6 Ways To Ensure Your Fruit Trees Survive The Winter

Image source: Pixabay.com


4. Insulate the roots. When it comes to winter prevention, insulating your roots is the most important task. A nice, thick layer of mulch is the best way to keep roots warm. Mulch should be a few inches thick all year long and even thicker in the winter (4-6 inches for young trees). You can use a variety of organic materials as mulch, including bark mulch, leaves, pine straw, wood chips and straw. Snow works, too! For the very best protection, cover your mulch with an insulated barrier like black landscape fabric or a black trash bag.


5. Prune the trees. Prune from December to February when the trees are dormant. Weak branches are an easy target for bacteria or insects to lay eggs, so weed them out now before it’s too late. First remove those dead, dying or diseased branches you noticed back in the fall. For diseased branches, be sure to cut the next juncture down to be sure of removing all the affected wood. Next, remove branches that are rubbing or at risk of growing into one another, branches that grow straight out, and root suckers. When pruning fruit trees be sure to sterilize your shears between cuts to prevent disease transfer. This can be done by rubbing them with denatured alcohol or a 1:99 solution of bleach and water. Tea tree oil is also a natural choice.


6. Wash the trees. The dormant season is prime time to “wash” fruit trees. Washing, or spraying, is the most successful way to kill off any bacteria, fungal spores, insects or insect larvae that may be hiding in your tree. Spraying should only be done in the winter when trees are deeply dormant, before any new buds have begun to show. Dormant oil sprays are available online or in most gardening and home improvement stores. These usually contain some type copper and/or lime, fish oil, or plant-based oil and can be found in organic forms, as well. Do your spraying when temperatures will be consistently above freezing for a few days. Make sure to wet all surfaces thoroughly, especially bark fissures. Since these sprays work as a contact insecticide, getting into all the nooks and crannies — especially around the base of the trunk — they ensure that you will kill off all of those hidden aphids, mites and other harmful bugs.


What advice would you add? Share your tips in the section below:


Every Year, Gardeners Make This Stupid Mistake — But You Don’t Have To. Read More Here.

Wednesday, January 11, 2017

DASH CAM FOOTAGE: How This Driver Escaped “The Moment He Was Caught In A Flash Flood”

screen-shot-2017-01-11-at-11-43-48-am


Severe flooding hit the West Coast, and drivers everywhere were caught in life-threatening flash floods. The loss of life and property damage are already significant.


What would you do if caught driving in flash flood conditions, and rising water was headed for your vehicle?


According to the Daily Mail:


Mark Chagaris uploaded video to YouTube of the terrifying flash flood – and while it’s unclear if he was the driver who captured the chilling scene on the dashboard cam – what is clear is that the surge of water was definitely dangerous.


The canny driver manages to reverse course and back quickly away from the muddy surge, which flush wave after wave of water over the road as his windshield wipers go full blast.


‘Mother Nature Speaks Loudly’ Chagaris captioned the video, which has so far received almost 250,000 views. This year’s California El Niño is so intense that it’s been nicknamed ‘Darth Niño.’


This man got away without incident after facing an epic force of nature. And thanks to his dash cam, he captured video of it while driving north of Los Angeles.


After waters rushed over the highway, he man backed up, reversing course down the road as the flood threatened to subsume his vehicle, before turning around and heading for higher ground…


Evacuations and orders to move to higher ground are driving the temporary relocation of thousands of people, and the episodes of flooding could take place in other places as well. As


Some 3,000 people in Sonoma County are under evacuation orders, and at least seven homes are seriously damaged.


“Our biggest concern is possible trees coming down, power outages,” said John Gulserian of the Nevada County Office of Emergency Services.


In the town of San Anselmo, police ordered people out of the downtown area because of rising flood waters, telling them to either evacuate or move to higher floors. A mudslide pushed a tree into a house in the town of Fairfax, California, trapping four people including two children. (source)


Unfortunately, an uptick of extreme weather has put millions of people, particularly in coastal urban areas at risk of encounter with flooded waterways or property damage in homes and buildings.


If you are caught in flooding, or compelled to evacuate in your vehicle during an emergency and must pass through or near flooded roads, keep in mind the overwhelming force that this water holds when up against any vehicle. Crossings that appear safe enough could end up sweeping a driver away to his death. Hundreds of people die this way in the average year.


As Tess Pennington notes, you must keep these factors remember during a flash flood:


Driving Flood Facts


The following are important points to remember when driving in flood conditions:


Six inches of water will reach the bottom of most passenger cars causing loss of control and possible stalling.
A foot of water will float many vehicles.
Two feet of rushing water can carry away most vehicles including sport utility vehicles (SUV’s) and pick-ups.


In the event that you end up stranded, unable to cross over a necessary roadway, or you crash into an embankment without knowing when help will arrive, it would be prudent to keep some basic supplies in a 72-hour kit, etc. to help keep you sustained if conditions put you in a bad spot.


Additionally, supplies to deal with getting out of your car – busting windows, cutting seatbelt straps, flares and radios to signal for help and other items could be invaluable if you are trapped in a car during a flodo, or disabled by a crash.


As Daisy Luther explains:


Your car kit should see you through at least 48 hours.  Do you have enough water and food that doesn’t require cooking to get your family through an event like this? Do you have a way to keep small children entertained? Go here to see what I keep in my car kit. Yes, it’s extensive, but in a situation like this one, we could last for days without waiting for a helicopter to drop supplies to us.


Whenever possible, evacuate before things get this bad.  Timing is everything when it comes to an evacuation. If you get out early, you won’t get stuck in traffic and are less likely to encounter insurmountable hazards. Of course, you can’t always make it out ahead of the crowd, especially in a situation with conditions that strike suddenly, like wildfire (check out the videos here to see how fast it can happen) or flash floods.


Keep your gas tank above 3/4 full.  If you get stranded, you may need to run your vehicle for warmth, to keep the cell phone battery charged, and to listen to news updates. You’ll be glad you kept the tank topped up.


If you were stranded in your car, would you have to wait for supplies to be dropped?


Other videos from California show the high water levels and dangerous flooding conditions:


Read more:


Floods? Watch This Prepper Save His Home From Encroaching Water


Could You Escape Your Vehicle In a Disaster? “The Potential Is All Too Real”


Louisiana Officials Demand That Self-Reliant Locals Stop Surviving the Flood Without Permission


Are You “Ready to Be Stranded” On the Road?


Massive West Coast Atmospheric River Storm “Inevitable”; Emergency Response Would Be Lacking