Showing posts with label soil. Show all posts

Saturday, April 14, 2018

Create a No-Till Garden and Retire Your Tiller Forever

Create a No-Till Garden and Retire Your Tiller Forever | 1-No-Till-Garden-Soil-Front-Lawn-Vegetable-Garden-Design-Custom | Agriculture & Farming Organics Special Interests


By Garden Therapy | 


It is a wonderful feeling to discover a gardening hack that saves you time and effort without decreasing the health of your garden. Imagine the extra time you would have if you never tilled your garden again. Guess what? Not only can you save time with a no-till garden, you can improve the quality of your soil that way too!


My friend Shawna Coronado is a talented gardener, promoter of green lifestyles, and garden-hack pro. Shawna joins us today to share the details on how to create a no-till garden from her wonderful book 101 Organic Gardening Hacks. If you like this time-saving, soil-improving, organic gardening hack, you’ll love the other 100!


Retire Your Tiller


By Shawna Coronado


If you love your soil, stop flipping it over.


Sometimes the best way to improve something is to let it be. A no-till garden is a perfect example. And creating one also means less work for you. Imagine building a large garden without having to turn the soil over in your garden beds.


Turning soil kills the microbes living beneath the ground that contribute to a healthier root system by living symbiotically with your roots. There are billions of bacteria, millions of fungi, thousands of protozoa, and scores of other nematodes and organisms found in one small tablespoon of healthy soil. Hacking your garden soil with a few simple no-till tips can make for hugely successful growing because you keep those vital creatures alive and happy in your garden beds.


A no-till garden has other benefits. Because you are consistently smothering weeds with mulch or compost, they struggle to grow there, and an undisturbed, enriched soil requires far less fertilizer in order to support successful plants. The no-till technique works in almost any garden space and can help grow extremely healthy organic vegetables and herbs.


How to Create a No-Till Garden


Create a No-Till Garden and Retire Your Tiller Forever | 1a-No-Till-Garden-Soil-soil-addition-Custom | Agriculture & Farming Organics Special Interests


Instead of turning your soil over for a garden, start by removing all of the grass, either by stripping the sod or smothering the grass (see Hack 79: “Kill Grass by Smothering It”).


  1. Put down a 2-inch layer of rotted manure or compost on top of the bare soil. Do not turn the soil over.

  2. Dig holes to plant your plants.

  3. Mulch the garden the first year with wood chips or another natural mulch, such as pine needles, rotted leaves, or straw.

  4. After the harvest at the end of the season, do not pull out the vegetable or herb plants by the root; cut their stems at the base of the soil and leave the roots in the ground to overwinter and eventually rot. Compost the cut plant matter.

  5. Next planting year, cover the garden with another 2-inch layer of compost.

  6. When planting new vegetables and herbs, only pull out roots from the previous year if they block an area for a new plant. Be sure to rotate the crop so that no plant from the previous season is planted in the same location in the current year.

    Create a No-Till Garden and Retire Your Tiller Forever | 1-No-Till-Garden-Soil-Front-Lawn-Vegetable-Garden-Design-Custom | Agriculture & Farming Organics Special Interests

  7. In your third planting year, follow the same practices, but add a layer of mulch instead of a layer of compost.

  8. In your fourth planting year, follow the same practices, but add a layer of soil instead of a layer of mulch.

  9. In the fifth planting year, follow the same practices, but add a layer of rotted manure instead of a layer of soil.

  10. In the sixth planting year, follow the same practices, but add a layer of compost instead of rotted manure.

  11. Continue every season layering up the compost, mulch, soil, and rotted manure without ever turning over the soil.


Create a No-Till Garden and Retire Your Tiller Forever | Shawna-Coronado-Author-of-Grow-a-Living-Wall-shares-How-to-Build-a-Vertical-Garden-600x563 | Agriculture & Farming Organics Special Interests


Shawna Coronado is an author, columnist, blogger, photographer, and spokesperson for organic gardening, green lifestyle living, and culinary preparation who campaigns for social good. Shawna’s goal in authoring gardening and green lifestyle books is to promote a world initiative to encourage healthy and sustainable living. She was featured as a Chicago Tribune “Remarkable Woman” and speaks internationally on building community, simple urban garden living, and green lifestyle tips for the everyday person. Shawna lives in the western suburbs of Chicago where she has a famous front lawn vegetable garden. You can learn more about her at www.shawnacoronado.com.


The post Create a No-Till Garden and Retire Your Tiller Forever appeared first on The Sleuth Journal.

Tuesday, March 20, 2018

Let Them Eat Dirt!

Let Them Eat Dirt! | gardening-soil | General Health Special Interests


Dr. Maya Shetreat-Klein’s son suffered a severe episode of asthma on his first birthday. Conventional treatments failed to reverse his condition and he hit a developmental plateau.


That personal experience led the pediatric neurologist down an investigative path that led her to the conclusion that food was to blame for her son’s illness.


The solution, she discovered, was simple: Heal the food, heal the gut, heal the brain . . . and heal the child.


In her book, “The Dirt Cure,” Shetreat-Klein argues for a dirt-filled chemical-free life. She shares success stories from her practice, and from her experience as a mother. She also provides tips for stocking up on healing foods, deciphering labels and getting even the pickiest of eaters to try a new menu.


Shetreat-Klein’s research and advice isn’t just for kids. Her book explains why so much food today contains arsenic and lead, the real reason milk is pasteurized, and why salmon is no longer the miracle fish.


She even includes recipes for healing “from the inside out.”


Read ‘‘The Dirt Cure:’ Why Human Health Depends on Soil Health


h/t: Organic Consumers Association


The post Let Them Eat Dirt! appeared first on The Sleuth Journal.

Friday, February 23, 2018

This Do-It-Yourself Garden Hack Is The Secret To An Abundant Garden

This Do-It-Yourself Garden Hack Is The Secret To An Abundant Garden | vegetable-garden-soil | Agriculture & Farming Organic Market Classifieds Organics Special Interests


My grandfather always had a robust garden filled with vegetables. His secret was rich, nutrient dense soil. He taught me that the plants we grow and soil have a symbiotic relationship. If the soil has nutrients, the plants will thrive. That said, many gardeners forget this vital tip and tend to lean towards chemical fertilizers as a way to quickly replenish their soil and grow their plants. Overtime, this can can cause the soil to become depleted of vital nutrients because the fertilizers kill or leaches out the nutritional aspects of the soil. As well, chemical fertilizers are not welcoming to microorganisms that live in the soil. You want to ensure the fertilizer method you use is biodynamic and efficient in the amount of materials used versus the amount of coverage area.


Why is Soil So Important?


Foremost, it is important to understand what soil actually is. According to the Soil Science Society of America, “Soil is not dirt.  It is a complex mix of ingredients: minerals, air, water, and organic matter – countless organisms and the decaying remains of once living things.  Soil is made of life.  Soil makes life.  And soil is life.” In order for plants to grow to their optimum capacity, they need nine different nutrients present in the soil.  While most of these elements and nutrients are naturally found in soil, sometimes they can become depleted and need to be added to keep the soil healthy.


  • Carbon – found in air and water

  • Hydrogen – found in air and water

  • Oxygen – found in air and water

  • Nitrogen – blood meal, fish emulsion, manure

  • Phosphorus – bone meal, rock phosphate, superphosphate

  • Potassium – greensand, mutriate or sulfate of potash, seaweed, wood ashes

  • Calcium – gypsum, limestone, oyster shells, slag

  • Magnesium – dolomite, magnesium sulfate (Epsom salt)

  • Sulfur – sulfur, superphosphate


Creating a no-till garden or utilizing the sheet mulching method can add these vital elements and nutrients back to the soil. This is a type of whole-system approach to gardening that helps feed the soil while vegetables and crops are growing. Another way to do so is by using an old-fashioned compost tea will help restore many of these essential nutrients, microorganisms and vital minerals naturally.


It should be stated that the elements listed above are not the only things that should be present in the soil. Microbes such as protozoa, fungi, algae and bacterias should also be present, as they affect soil structure and fertility. In fact, millions upon millions of microbes are present in healthy soil and it is important to ensure they make your soil their home. Ensuring that you have a lot of biomass present in your soil will keep them thriving.


Compost Tea


Compost tea takes the beneficial bacteria and fungus present in compost and exponentially increases them through aeration and sugars. These bacteria and fungus are critical in root establishment – and the more bacteria you have in your soil, the better. In fact, if you diversify your bacterias, you will make a healthier soil and compost tea is one of the easiest ways to do this.


Benefits of Compost Tea


  • Increases root development

  • Suppresses plant diseases

  • Creates a biodiverse soil food web

  • Encourages plant growth and vitality

  • Increases plant yield


The equipment you will need to make compost tea is as follows:


  • 5-gallon bucket

  • An aquarium pump large enough to run three bubblers or air stones

  • Several feet of tubing

  • A stick to stir the mixture

  • Something to strain the tea, like an old pillowcase or nylon stocking


Tess’s Compost Tea


Note: I will also add some earthworm tea that I have from my earthworms and this adds even more nutrients to the brew!


  1. Add water to a 5-gallon plastic bucket. If you are using tap water, allow water to sit for 24 hours in order for chlorine and other chemicals to dissipate.

  2. Add liqui ingredients to water in 5-gallon bucket and stir until incorporated.

  3. In pillowcase or nylon stocking, add dry ingredients (rock dust, inoculant, manure, worm castings, etc.) and tie onto stick and add to bucket.

  4. Turn on aquarium pump with hose attached and oxygenate water for 18-24 hours. This will help the beneficial bacterias, minerals and sugars activate.

  5. Periodically check on brew. There should be a nice foam at the top.

  6. After 24 hours, turn off pump and remove dry ingredients (add to compost pile). Use compost tea as a foliar spray or root drench.


Note: Do not over-brew your compost tea. Twenty four hours is all it needs to get the protozoa and fungi kickstarted into reproduction. 


You can use the tea as often as you wish. I used this tea once a month on my garden, or when I thought the plants needed a little extra TLC. In fact, you can also use compost tea to prevent plant shock by soaking new plants in compost tea to add beneficial soil microorganisms right before it gets planted. used it as a foliar spray and as a root drench and my plants thrived. After a three month period, I was very impressed with the soil. It was fluffy, retained moisture and I noticed more beneficial insects coming around more. Another highlight of using compost tea was when harvest time came, the vegetables tasted sweeter than usual. I’m not sure if this was a result for the compost tea or just a fluke, but I felt that it had to be mentioned. As well, I had no issues with molds or diseases this year and believe it to be a result of the compost tea I used. This is by far the easiest way to get essential nutrients quickly into the soil, and I love that it can also be used as a foliar spray. As well, the initial investment of compost tea ingredients will provide for many uses; so I can make compost tea all year with the ingredients that I purchased in May!


Once again, my grandfather was right about giving the soil what it needs to thrive and proved it by the bountiful harvests he had year after year. I highly recommend using this in preparation for your upcoming gardens. I have had nothing but success with this natural fertilizer method and look forward to my next harvest.


The post This Do-It-Yourself Garden Hack Is The Secret To An Abundant Garden appeared first on The Sleuth Journal.
Saturday, November 18, 2017

The Dirt-Free, Space-Saving Way To Grow Indoor Tomatoes

The Dirt-Free, Space-Saving Way To Grow Indoor Tomatoes

Image source: Amber Bogdanowicz


Growing herbs and vegetables in the home sounds like a great idea until you think about all the mess, dirt and constant watering that must be done to grow and keep them alive.


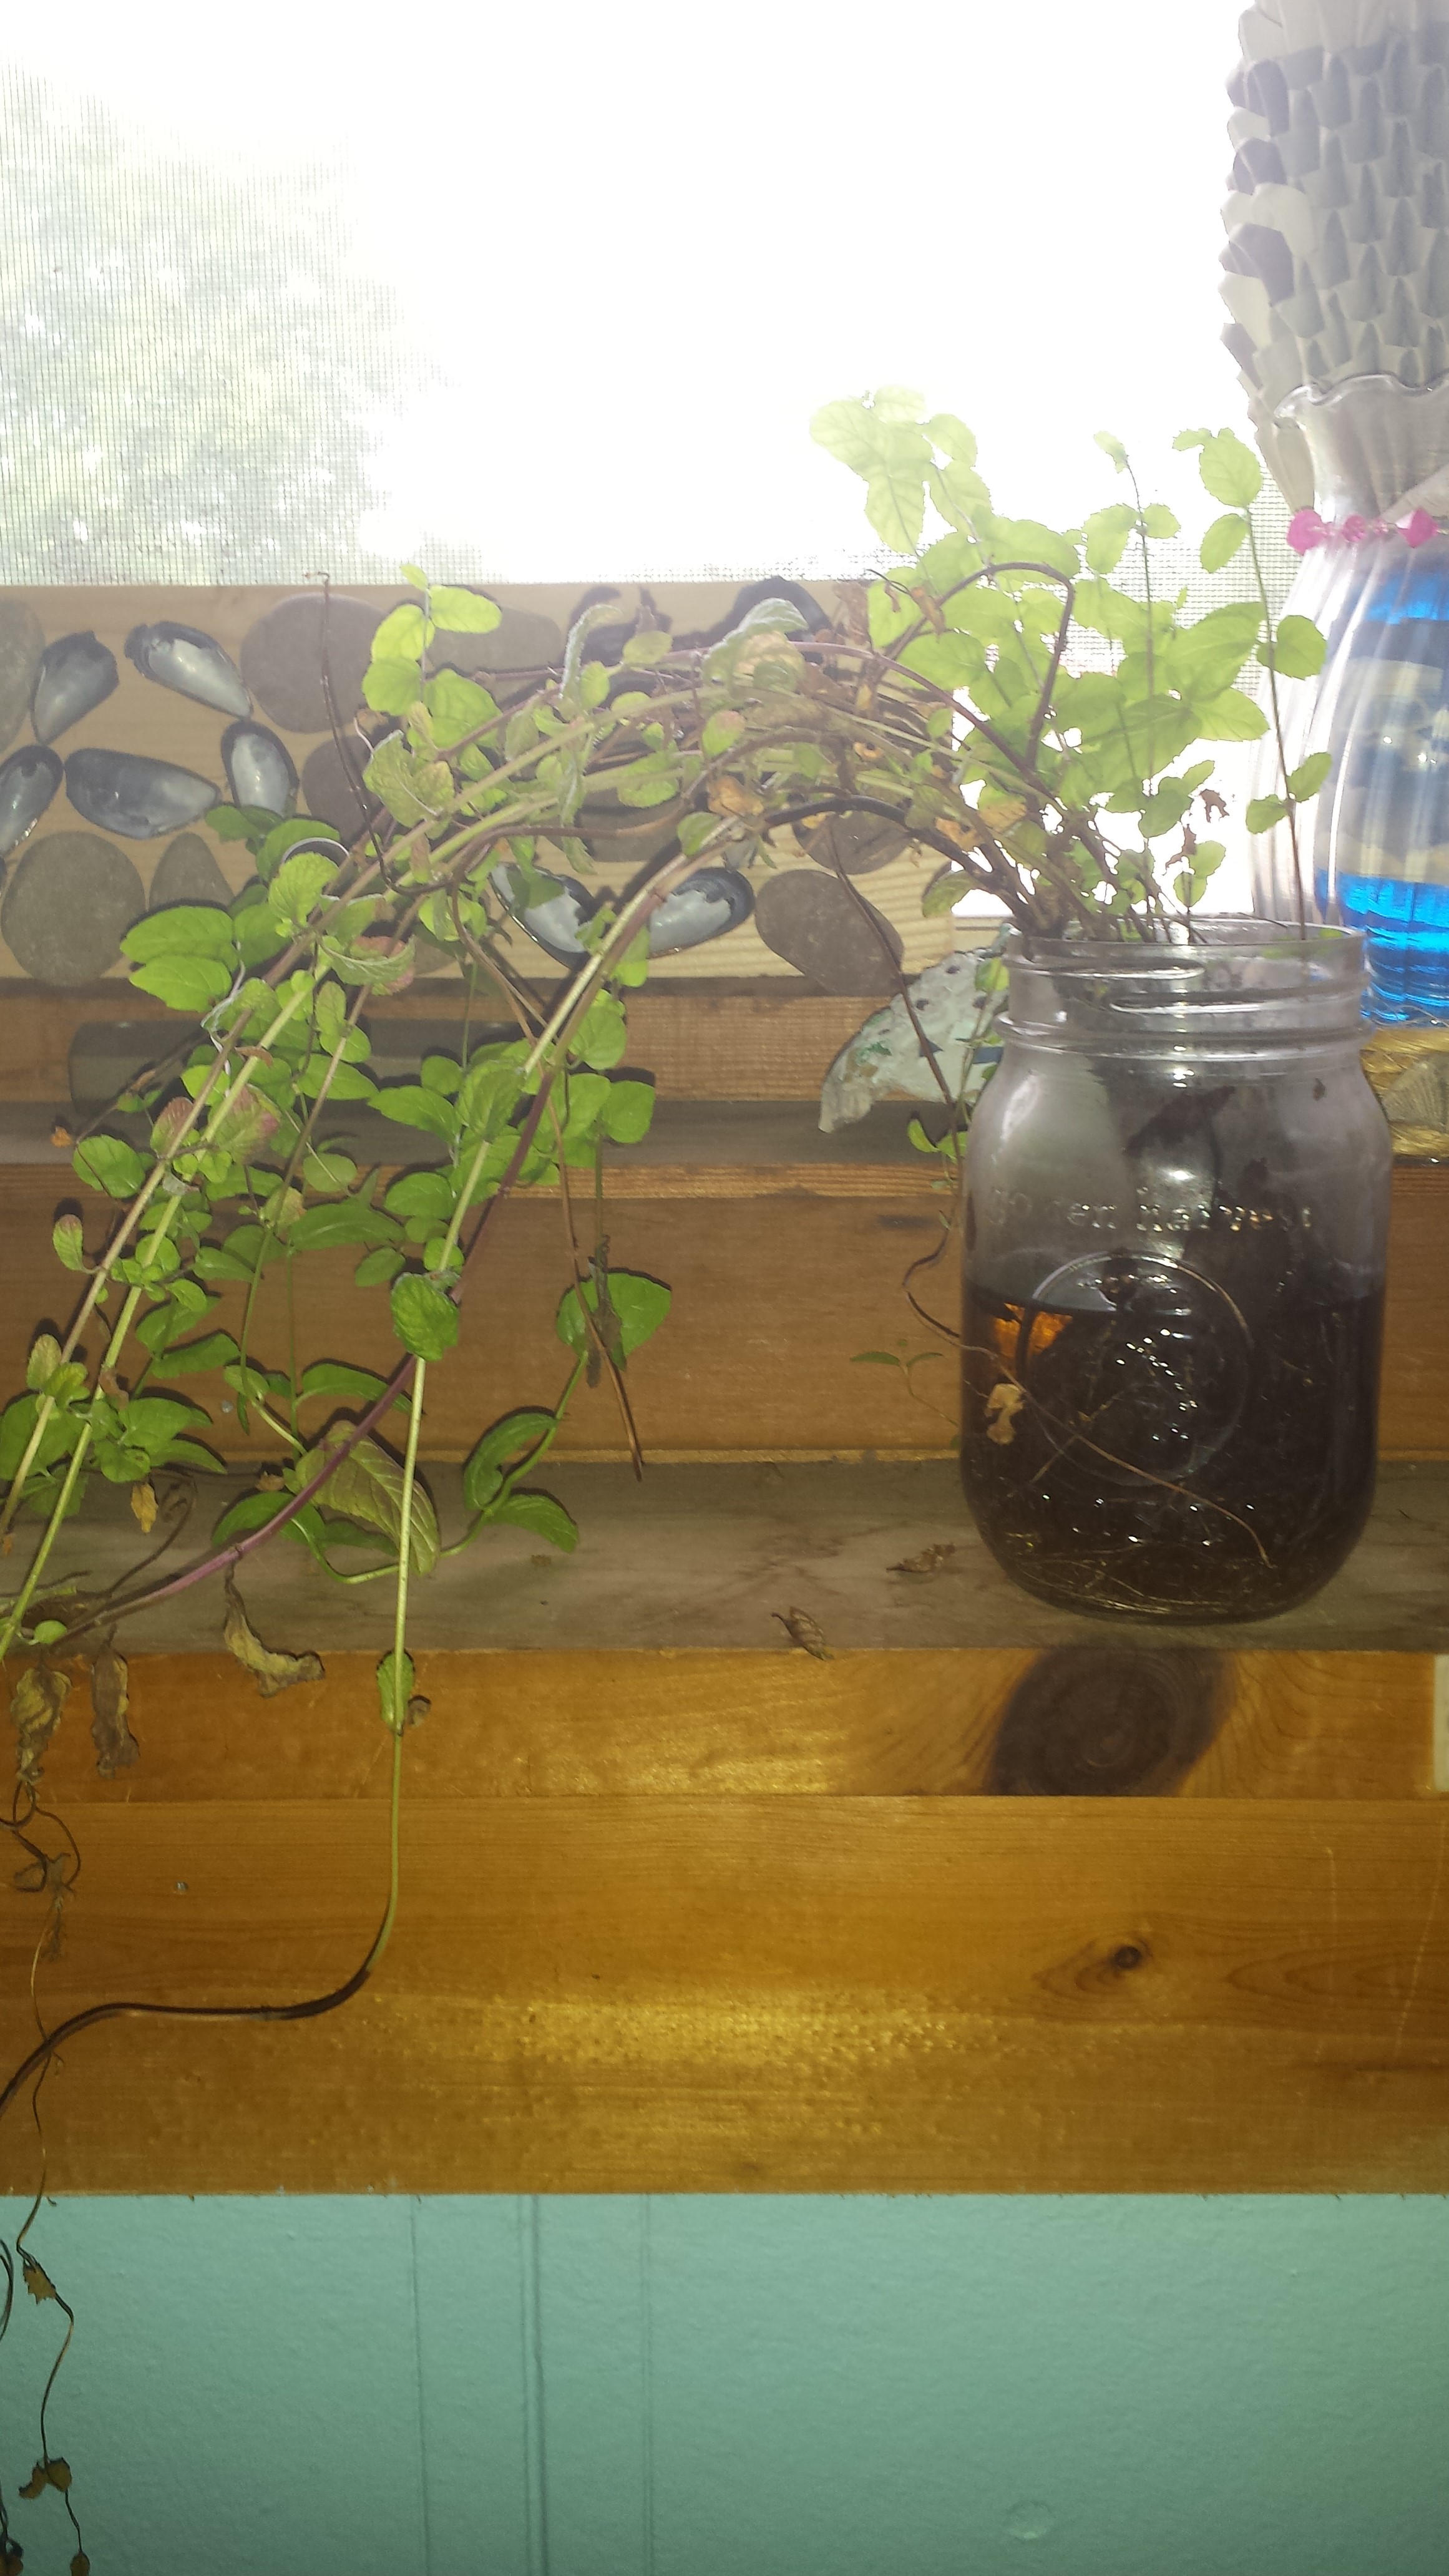
Avoid all of this by growing them in a jar of water – without dirt! This process is a more convenient set-up that takes up little space in comparison to growing in soil. You even can grow tomatoes.


Growing vegetables and herbs in a jar has a number of benefits:


  • Enhanced aesthetic quality.

  • Can observe the roots growing.

  • Preserved flavor.

  • Less mess.

  • Saves space.

  • Easy to grow.

  • Little watering.

  • You start with cuttings, not seeds.

You will need a few things to start your plants in a jar:


  1. Water (rainwater or tap water left to air overnight — not chlorinated water).

  2. Containers (Mason jars, any glass bottles, plastic bottles). Narrow-mouthed containers are great for support.

  3. Plant cuttings (6-inch tips).

  4. Organic fertilizer

Step 1: Prep plant cuttings.


Start by removing the lower leaves from cuttings and trim the lower tips close to where the roots arise. Rinse.


Step 2: Prep container.


Clean your container well, making sure there are no chemicals in there or anything dangerous.


Step 3: Get some water.


Get some clean, fresh water. Tap water isn’t good for plants because of the trace metals and other chemicals found in it. In general, the plants will respond to it negatively. Fresh rainwater is preferred. Add organic fertilizer.


The Dirt-Free, Space-Saving Way To Grow Indoor Tomatoes

Image source: Amber Bogdanowicz


Step 4: Assemble.


  1. Add your cuttings to your container.

  2. Take your container and add your freshwater up to around the neck of the jar. The main idea is to fill it up to cover most of the stem, but you do not want to fill it up so much that it soaks the leaves. Your cuttings will rot if the leaves sit stagnant in water.

  3. Sit your jar in an area that either receives sun or doesn’t, depending on the sun requirements unique to your plant. Example: If you are growing mint in a jar with water, make sure to place it somewhere that receives plenty of sun!

Step 5: Maintenance.


Once you’ve assembled your plant in a jar, change the water once a week without disturbing the cuttings too much.


Looking For Non-GMO Seeds? Get Them From A Company You Can Trust!


Within 2-6 weeks, the cuttings will generally begin to grow; however, woody plants do take longer.


Herbs and Vegetables to Grow in the Water


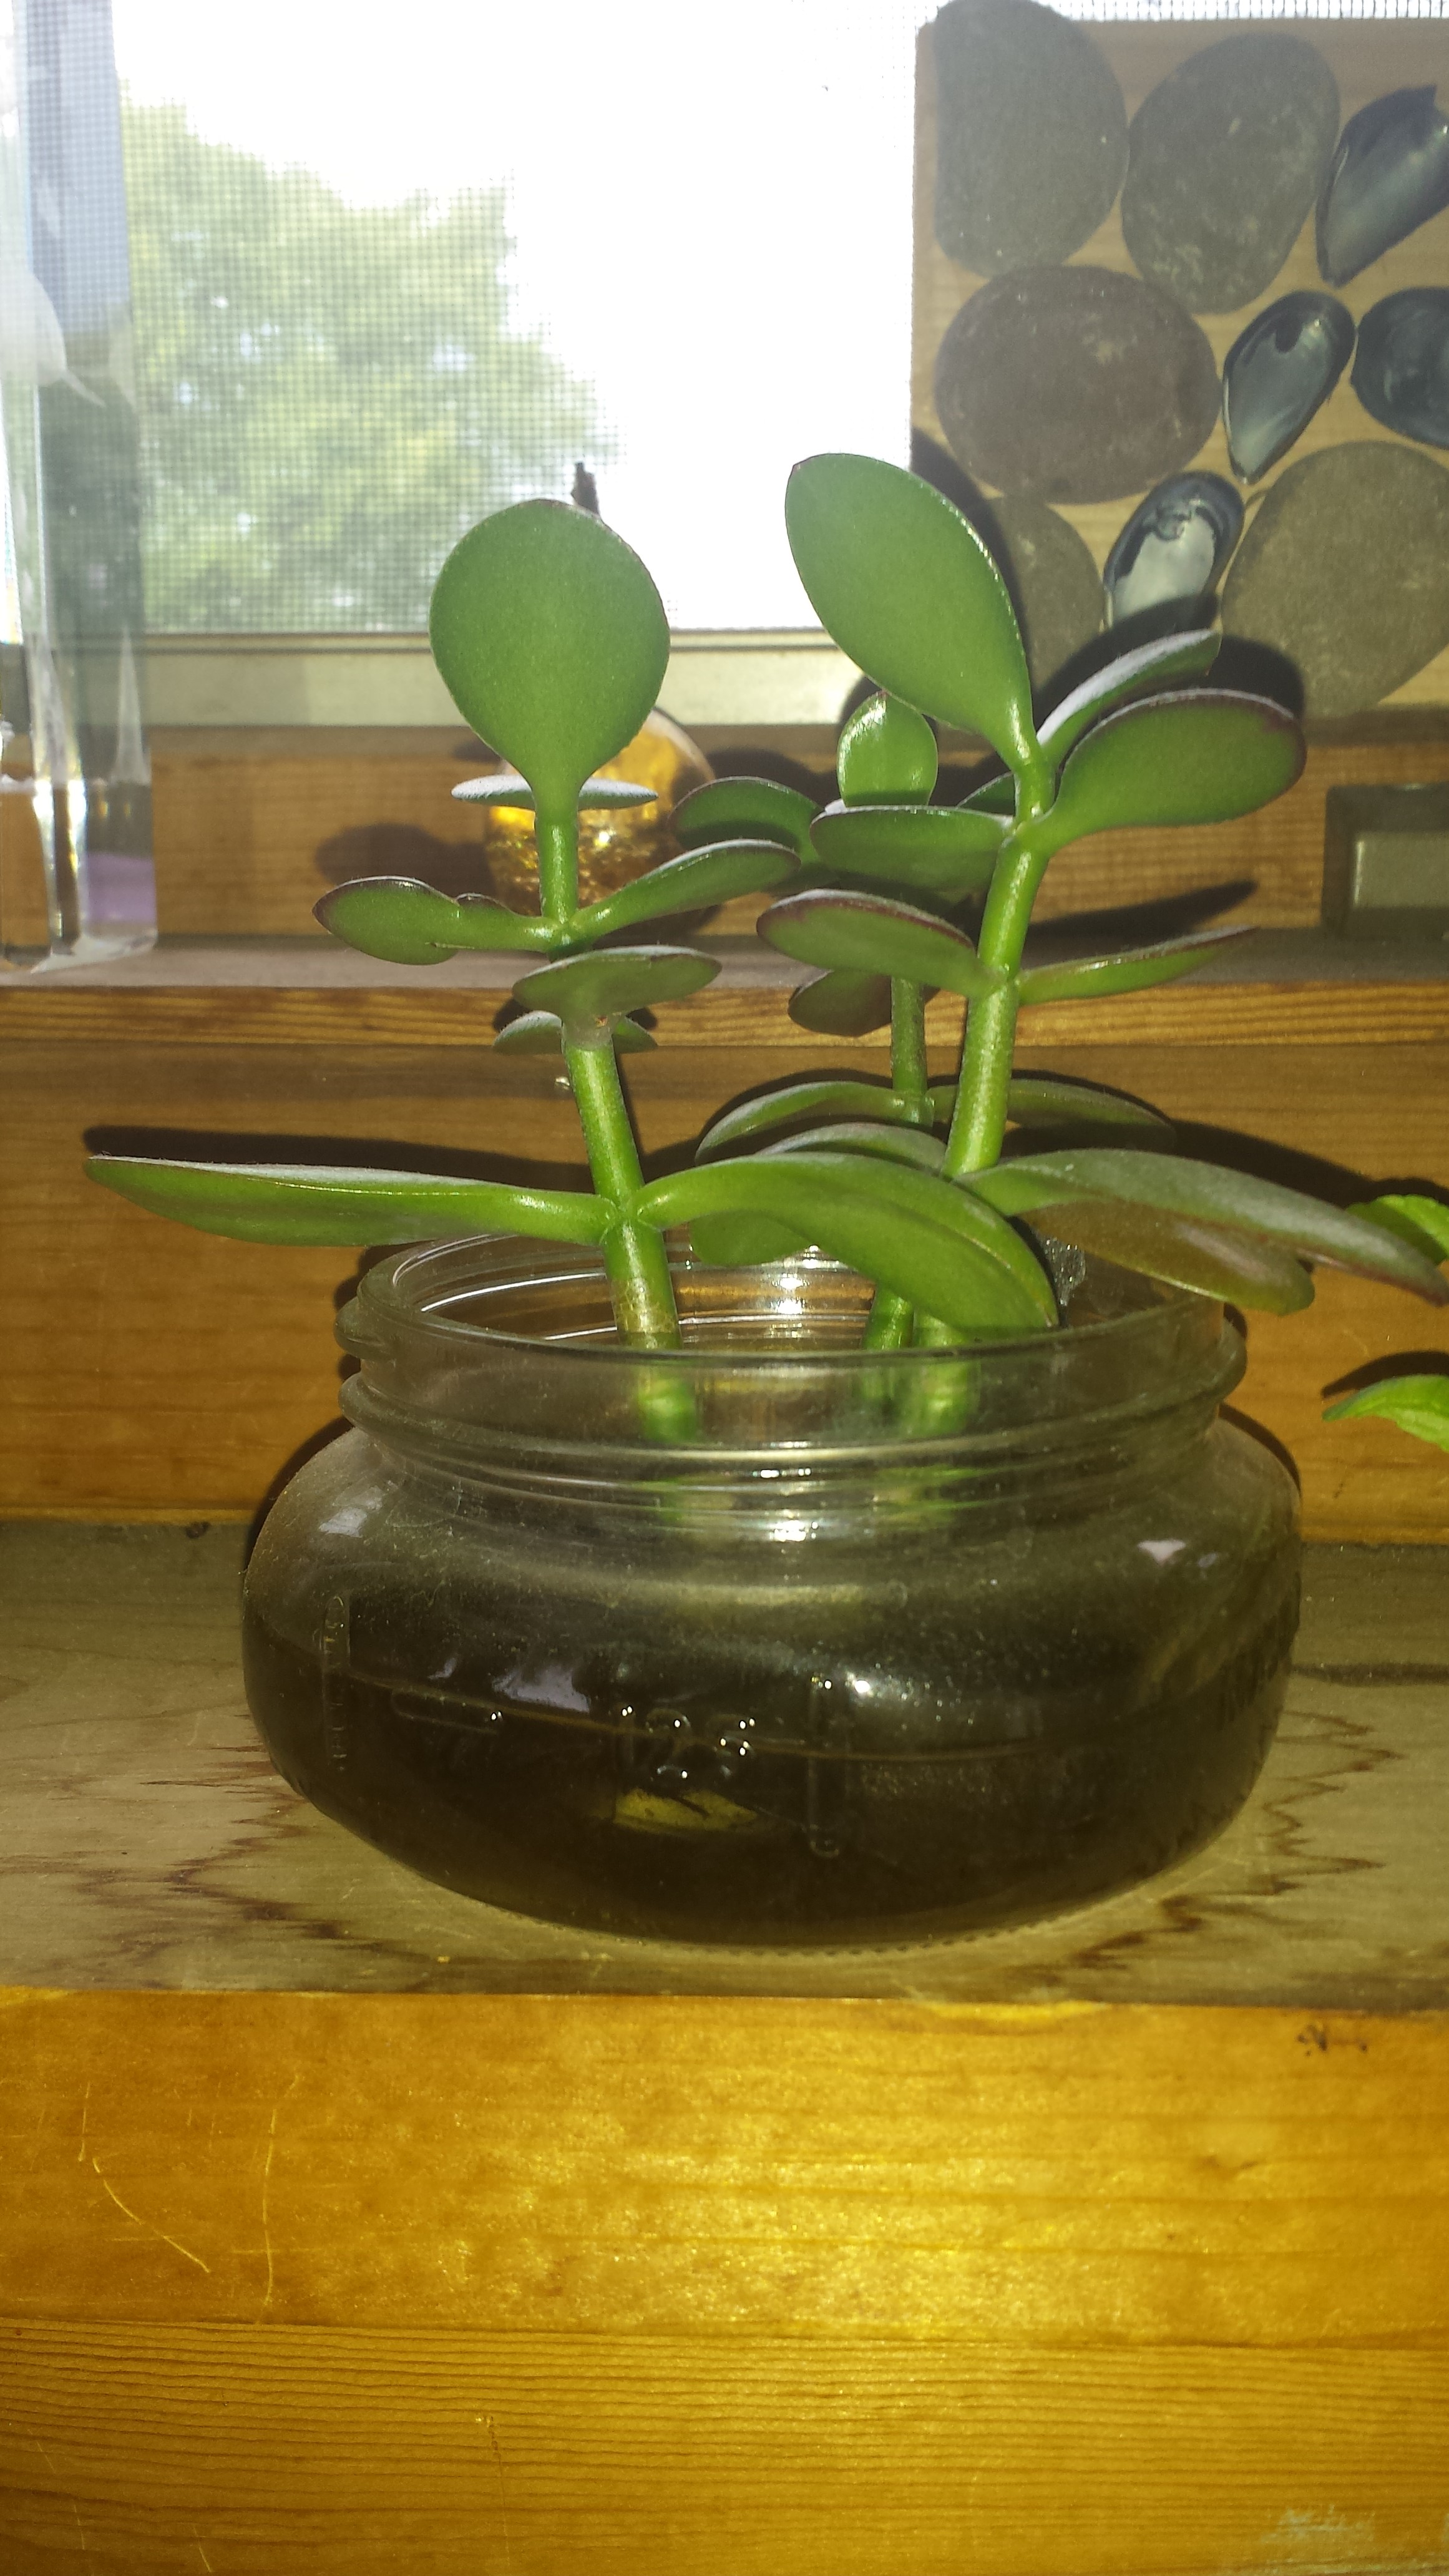
I would argue that you can grow almost anything this way. I have even grown a succulent plant successfully in water from a tip that fell off one of my larger plants. However, you can expect higher success rates from these vegetables and herbs below.


  1. Mint

  2. Oregano

  3. Basil

  4. Sage

  5. Stevia

  6. Lemon Balm

  7. Thyme

  8. Rosemary

  9. Tarragon

  10. Lettuce

  11. Spinach

  12. Tomatoes

  13. Peppers

  14. Cucumbers

  15. Celery

It is so easy to grow herbs and vegetables in a simple jar of water.  It’s cheap, attractive for any household, and a great source of year-round produce!


What advice would you add? What it in the section below:


Every Year, Gardeners Make This Stupid Mistake — But You Don’t Have To. Read More Here.

Thursday, October 26, 2017

Glyphosate: Persistently Toxic

Glyphosate: Persistently Toxic | roundup_carcinogenic_potential1 | Agriculture & Farming Special Interests Toxins


For decades, Monsanto has claimed that the glyphosate in its Roundup herbicide breaks down so quickly that we shouldn’t worry about the chemical’s impact on soils. Independent scientists (i.e., scientists not funded by the chemical industry) have disagreed.


Now, a new study by the European Commission’s Joint Research Centre and two Dutch laboratories confirms:


Contrary to manufacturers’ claims, glyphosate persists in soils, not only affecting soil fertility and crop quality, but also posing risks to human and environmental health.


According to the study, 45 percent of Europe’s topsoil contains glyphosate residues. The study was conducted in six crop systems in 11 EU member states on soils in different geographical and climatic conditions.


According to 2015 figures, 440 million acres of farmland are planted in GMO crops, worldwide.


Given that the quality and health of soil is directly related to the quality of our own health, isn’t it time to get glyphosate out of our soils?


Full study here


Learn more


The post Glyphosate: Persistently Toxic appeared first on The Sleuth Journal.
Thursday, September 28, 2017

The Crazy, Lazy Gardener’s ‘Fall Trick’ That Will Eliminate Spring Weeds

The Clever, Lazy Gardener

Image source: BackyardBountyFarming.blogspot.com


For many gardeners, growing a bounty of fresh fruit and vegetables for their family and friends to enjoy is a labor of love – but nevertheless still a labor. And when other activities and responsibilities start to mount up, it can be easy to let the garden suffer.


Wouldn’t it be great if there were a way to make gardening easier, with less work and perhaps an even greater bounty? If this sounds like fiction or wishful thinking to you, you may not have heard of lasagna gardening. But to do it right and reap the rewards come spring, you need to start on it during the fall.


When we talk about lasagna gardening (also known as sheet mulching or sheet composting), we are not talking about planting tomatoes, eggplant and zucchini – ingredients of lasagna (although you may certainly plant these and other vegetables in your lasagna garden). We are talking about a style of composting that can result in beautiful black soil, without tilling, very few weeds, and less need for fertilizer.


How to Start


Starting a lasagna garden is very easy. In fact, it doesn’t even require the use of a shovel or the removal of existing weeds. Start with some simple brown corrugated cardboard or some newspaper (use three layers if you decide to go with newspaper) and lay them down right on top of the area that you’ve selected for your garden – right over the top of grass and weeds!


Looking For Non-GMO Seeds? Get Them From A Company You Can Trust!


Keep this layer moist so that it provides a nice cover that earthworms will be attracted to; that will allow them shelter to loosen up the earth below.


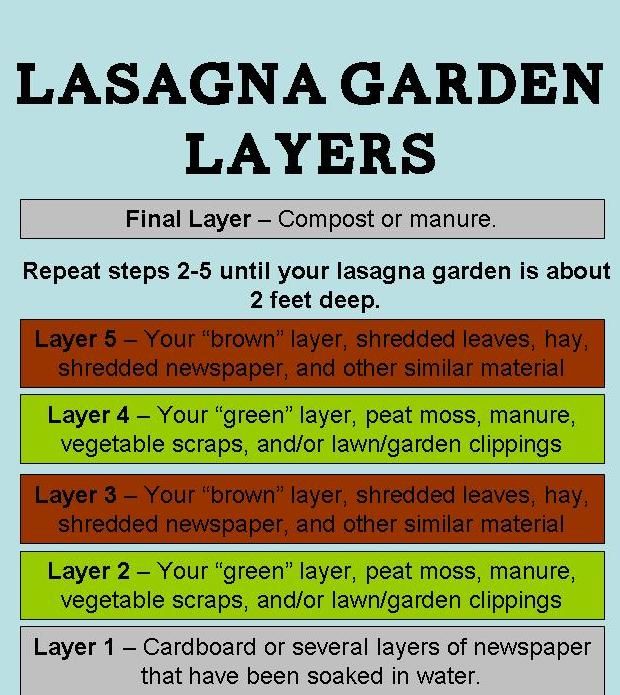
Just like the kind of lasagna that you eat, a lasagna garden consists of multiple layers. In the case of a garden, the layers consist of alternating between brown and green compost. Brown compost can be made up of items such as cardboard, shredded newspaper and dead leaves. Green compost may be items such as fruit and vegetable scraps, trimmings from the garden, etc.


As a general rule, you should make your brown layers about double the thickness of your green layers. Doing this by sight is fine, though, – there is no need to break out the tape measure. Keep building your layers until they reach about two-feet tall. This may sound like a lot, but remember that this is going to shrink down considerably over the next few weeks.


When to Start


You can start the process of building your lasagna garden any time of year, but fall is the most ideal time. This is for a number of reasons:


  • There is an abundance of dead leaves and other “brown” compost material available during the fall.

  • Autumn rain and winter snow will help to keep your garden materials moist, allowing rich workable soil to develop.

  • Your garden will be ready for planting by spring.

Lasagna Gardening: The Clever, Lazy ‘Fall Trick’ That Will Eliminate Spring WeedsPlanting in your lasagna garden is easy and quite similar to planting in a traditional garden. Just dig down with your spade or shovel as you normally would. If you used cardboard for your first layer, you may have to cut through it, but you should find nice workable soil underneath. If you used newspaper as your first layers, you’ll likely dig right through it without even noticing.


This New All-Natural Fertilizer Doubles Garden Production!


Plant whatever you like. Just be sure to follow the normal guidelines for each fruit and vegetable that you introduce to your garden.


It is also a good idea to add mulch to this garden once it is complete. This may be in the form of chopped leaves, straw, bark mulch, etc.


From that point on, you’ll care for your lasagna garden much like you would any other garden by watering, weeding, rotating crops and finally enjoying bountiful harvests at the end of the season.


Lasagna gardening has many advantages over traditional gardening, including:


  • Less weeds. Because of the newspaper or cardboard layer at the bottom, fewer weeds will be able to make their way to the surface.

  • Improved water retention. The layers of compost will be better at retaining water than plain garden soil. This is a great way to give new plants a strong and healthy start in your garden.

  • Nutrient-rich soil. Again, because of the layers of compost, your garden’s soil will be rich in nutrients. This means that there will be less need for fertilization.

  • Easy-to-work soil. Lasagna gardening results in soil that is soft and workable. This eliminates the need for tilling.

If you love gardening but are looking for a way to reduce your workload next season, then lasagna gardening may be just the answer you’ve been looking for. Why not give it a try this fall and see how much less work your garden can be next year?


What advice would you add for lasagna gardening? Share your tips in the section below:


Bust Inflation With A Low-Cost, High-Production Garden. Read More Here.