Showing posts with label tomatoes. Show all posts

Thursday, March 29, 2018

Tomato-Growing Tricks That Will Revolutionize Your Garden


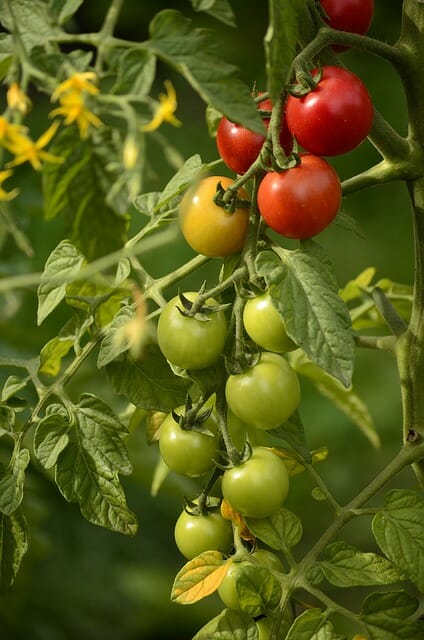
Every gardener enjoys growing tomatoes, but not every gardener is good at it. That’s because tomatoes are one of nature’s more finicky plants. Without the right amount of heat, sunlight and fertilizer, they won’t produce fruit when summer arrives.


The good news is that there are steps you can take right now – during spring — to give you your best tomato crop ever!


On this week’s episode of Off The Grid Radio we talk to Craig LeHoullier, the author of Epic Tomatoes: How to Select And Grow The Best Varieties of All Time.


Craig tells us that the months of March, April and May are critical for a tomato crop. He also tells us:


  • Which seed-starting mistakes often doom tomato plants.

  • How to transplant tomatoes to ensure they flourish.

  • Why it’s essential to use mulch.

  • How much spacing between tomato plants is truly

  • Which type of fertilizers he recommends.


We also discuss watering, frost and more! Don’t miss this amazing show that will revolutionize how you grow tomatoes!


Friday, February 16, 2018

10 Delicious Ideas For Preserving Tomatoes

10 Delicious Ideas For Preserving Tomatoes | 10-Delicious-Ideas-for-Preserving-Tomatoes | General Health Organic Market Classifieds Organics Special Interests


Once you’ve eaten all of the BLTs that you can hold, it’s time to start preserving tomatoes for later.  Here are 10 delicious ways to prolong that taste of summer throughout the year.


Dried Tomatoes Packed in Oil


To dry tomatoes, slice them to about 1/4 inch thick and lay them on dehydrator sheets. (If you have a different type of dehydrator, you can buy netting by the roll and cut sheets to fit your unit.) If you want, you can sprinkle them with Italian herbs. like basil and oregano. Dry them for about 8 hours at 140 degrees. Place them in a dry, sanitized jar and cover them with olive oil. Food safety experts recommend that this be stored in the refrigerator.


Dried Tomato Powder


Follow the directions above, but dehydrate the slices until they are crisp and brittle. Allow the dried tomatoes to cool, then, using a food processor (I use my Ninja kitchen system) turn them into a powder.  This stores a lot of tomato nutrition in a very small space. Tomato powder can be added to soups and sauces for a bump in flavor and vitamins.


Freezing Tomatoes


Tomatoes can be frozen whole, in the skin.  Wash the tomatoes in a sink full of baking soda and water, then rinse them well. Place them in a gallon sized freezer bag, and then place the bags on a cookie sheet in the freezer to allow them to freeze nice and flat for ease of storage. When it’s time to use them, place the bag in a bowl on the counter to thaw. The skins will come right off with a gentle pull and your tomatoes are ready to use.


Prepping Tomatoes for Canning or Cooking


This article gives you the how-to for prepping tomatoes for canning. Below, find a few quick recipes for canning your tomatoes and some links to other, more involved recipes.


Canning a Simple Tomato Sauce


This thin puree is as simple as running your tomatoes through the blender, and possibly adding some garlic, onions, and salt to them.  It can be used as a base for soup, chili, spaghetti sauce, enchilada sauce, or any other purpose that requires crushed tomatoes.  I like to can this because it’s pretty neutral and can be used in so many different recipes throughout the year.


I didn’t give measurements because this simple sauce can be made from any amount of tomatoes that you happen to lay hands upon. It is also a great way to use up soft or overripe tomatoes quickly.


Ingredients:


  • Peeled tomatoes (any variety)

  • 1/2 a small onion per jar

  • 1 clove of garlic per jar

  • Sea salt or canning salt to taste

  • 1 tsp. of lemon juice per quart jar


Directions:


  1. Peel tomatoes and place them directly into the bowl of your food processor or pitcher of your blender. Approximately 3 cups of unprocessed tomato will fill a quart jar. If you’re using onions and garlic, add those to the food processor at the same time.

  2. Use the pulse option on your processor until the mixture reaches your desired consistency.

  3. Pour this into a sanitized quart jar.

  4. Repeat until you have a canner load of sauce.

  5. Add a dash of salt to each jar. If you are water bath canning, add 2 tbsp of lemon juice to each jar. If you are pressure canning, the lemon juice is not necessary.

  6. In a water bath canner, process your sauce for 40 minutes at sea level, adjusting for altitude.  Alternatively, you can process the sauce in your pressure canner for 25 minutes at 10 pounds of pressure, adjusting for altitude.


Straining Tomatoes for Less Waste


Instead of cooking tomatoes down for hours and letting all of that goodness just evaporate, I decided to use the same method that I use for pectin-free jam-making with some of my tomato products.


When processing tomatoes for marinara, salsa, and ketchup, cut down the cooking time and preserve the extra liquid for a vegetable broth base for soup or cooking rice.


Puree your tomatoes, then pour the puree into a lined colander that is resting over a large stockpot. (I use a flour sack towel for lining the colander.)


Let it drain anywhere from 2 hours to overnight. The longer it drains, of course, the less liquid will remain in the sauce.  The liquid that drains off can then be processed as a tomato broth for soup.


You’ll be left with thick tomato-ey goodness that doesn’t require a half-day of cooking to reach the proper consistency.


Canning Tomato Broth


  1. Strain your liquid as described above.

  2. Pour this into a sanitized quart jar.

  3. Add a dash of salt to each jar. If you are water bath canning, add 2 tbsp of lemon juice to each jar. If you are pressure canning, the lemon juice is not necessary.

  4. In a water bath canner, process your broth for 40 minutes at sea level, adjusting for altitude.  Alternatively, you can process the broth in your pressure canner for 20 minutes at 10 pounds of pressure, adjusting for altitude.


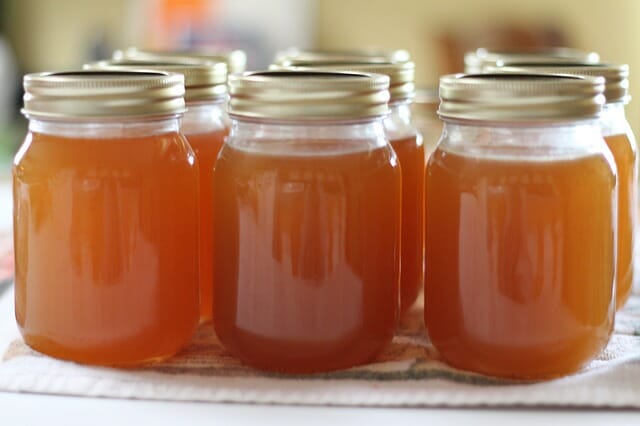
10 Delicious Ideas For Preserving Tomatoes | tomato-broth-300x300-300x300 | General Health Organic Market Classifieds Organics Special Interests


The liquid will separate and you will have tomato “sediment” at the bottom. (See the photo) This is perfectly normal. Just shake the jar before using it to mix the liquid and the pulp. This broth can be used as a base for soup, in place of liquid for cooking meat in the crock pot, or for cooking rice.


More Tomato Canning Recipes


Marinara Sauce


Barbecue Sauce


Taco Sauce


Salsa


Ketchup


For even more recipes, check out my canning website and my canning cookbook.


Recommended products


I use the following products when preserving tomatoes. (You probably already have many of these in your kitchen!)


The Organic Canner


Excelsteel 16 Quart Stainless Steel Stockpot


Ninja Mega Kitchen System


Presto 23-Quart Pressure Canner


Roma Food Mill


Granite Ware Water Bath Canner10 Delicious Ideas For Preserving Tomatoes | ir?t=howtoarticle-20&l=as2&o=1&a=B002KHN602 | General Health Organic Market Classifieds Organics Special Interests


Flour Sack Towels10 Delicious Ideas For Preserving Tomatoes | ir?t=howtoarticle-20&l=as2&o=1&a=B00DCWN1HW | General Health Organic Market Classifieds Organics Special Interests


Stainless Steel Colander10 Delicious Ideas For Preserving Tomatoes | ir?t=howtoarticle-20&l=as2&o=1&a=B00555ETXY | General Health Organic Market Classifieds Organics Special Interests


Excalibur Dehydrator


How do you preserve tomatoes?


What is your favorite way to preserve tomatoes? Share in the comments below!


The post 10 Delicious Ideas For Preserving Tomatoes appeared first on The Sleuth Journal.

Friday, September 29, 2017

12 Common Canning Mistakes That Even Experts Make

12 Common Canning Mistakes That Even Experts Make

Image source: Pixabay.com


It’s the time of year when gardeners and homesteaders are scrambling to preserve our harvest in order to enjoy the literal fruits of our labors as close to year-round as possible. For a lot of us, that means canning. Most of us know our way around the kitchen when it comes to putting up food, but there are some mistakes that beginners—and sometimes even experienced canners—make.


1. Using untested recipes. Trying new methods from unreliable sources might be fine for some things, but not for canning. If it hasn’t come from a rock-solid source that has tested the recipe for safety, it’s not worth the risk.


2. Doubling batches of pectin-added jam. It says on the package not to do it, but newbies often try it anyway. It just seems so counter-intuitive—I mean, if you double everything exactly, why wouldn’t it work? Trust me. It doesn’t. Your jam will look pretty and taste delicious, but there is a very high likelihood that it won’t set. You can still use it to pour over ice cream, but it won’t be jam.


3. Reducing or replacing sugar in jam with regular pectin. This is another one that seems like it should work, but it doesn’t. The jam recipes on regular pectin packages call for a LOT of sugar, which is understandably off-putting. But if you want to use less sugar or a sugar substitute, buy the special pectin for low sugar for successful jamming.


4. Canning low-quality product. Always remember that canning food will in no way improve its flavor and texture. If it is picked too long ago, overripe, or substandard in any other way, it’s not a good candidate for canning. Can the best and eat the rest.


Discover More Than 1,100 Secrets That Every Homesteader Should Know!


I should note that this is advice intended for a scenario of plenty. If hardship or disaster prevents you from having enough high-quality food to can, it may be necessary to can what you have available, whether it is the most desirable or not.


5. Tightening jar rings after processing and leaving them in place during storage. The function of jar rings is to keep the lids on during processing, and nothing more. After processing and cooling, the rings should be loose. Retightening them could compromise your seal, and storing the jars with the rings on will cause the rings to rust and will provide a space for food particles to grow mold and bacteria under the ring. Remove the rings and wash them for use on your next batch, and rinse off the outside of the jar before storing.


12 Common Canning Mistakes That Even Experts Make

Image source: Pixabay.com


6. Fudging the processing time. When canning, precision is key. Use a timer and don’t cut corners when it comes to processing time. And be careful to use the time for the size jar you are using—many recipes give different times for quarts and pints. A note of caution: If you’re using those new 24-ounce canning jars, you won’t find any canning times for them. Don’t try splitting the difference, because unless you’ve tested the process in a food laboratory, you can’t know exactly how long it takes to get adequate heat to the center of that 24-ounce jar. If your recipe gives different times for pints and quarts and you’re using pint-and-a-halfs, use the time for the quarts.


7. Using alternative processing methods. We’ve all seen them—cute tricks for canning in your microwave or dishwasher or oven. And we’ve heard stories about how back in the day they used wax for jam or just inverted the jars on the counter and allowed them to heat-seal. Sure, people did it and lived through it, but why take the risk? None of these methods meet current safety recommendations, and some have made people sick.


8. Not taking headspace seriously. That space between the top of the product and the top of the jar is a key component to canning success. Too little space can cause product to squirt out during processing and get stuck on the rim, which could prevent the lid from sealing. Too much space can also prevent a tight seal, because larger headspaces take longer processing times to push out all the air and create the necessary vacuum. All good recipes give a head space measurement, and they are worth heeding.


9. Getting the temperatures wrong. Use hot jars, and place them into simmering water in the canner. Placing cold jars into hot water can cause breakage. And starting with cool water in the canner can take extra time to bring it up to boil, resulting in overcooked end results.


10. Not using the correct amount of water in the canner. It’s important that your water level is right. Too little water can expose the lids during a vigorous boil, and they may not can properly, and too much will take a long time to reach boiling. For a boiling-water-bath canner, you need at least 1 inch over top of the jars, but no more than 2 inches. It can be hard to judge ahead of time, so keep a kettle full of simmering water on standby when you load the canner, and add more if you need it. Have a long-handled scoop handy for bailing out excess water, too. Pressure canners are easier in this instance—follow the manufacturer’s directions, which will tell you either to use the fill line on the canner itself or to measure a certain depth of water.


11. Removing jars immediately after processing. It’s recommended to leave the jars in the water for a bit. In a boiling-water-bath canner, turn off the heat and remove the lid and let the jars set for five minutes before removing. In a pressure canner, allow it to completely depressurize, remove the weight or open the petcock, and let the jars set for 10 minutes before lifting the lid and removing the jars. This is not crucial, but it contributes to a better sealing rate. Then, let your jars set untouched for 12-24 hours. As much as you want to pick them up to show them off, or to put them away to make room for the next batch, or even to just press down on the lid to see if it sealed, try to leave them alone. This will improve your odds of a good solid seal for the best possible end result.


12. Pouring water off the lid. Oh, I know. This one is so hard to resist! It is super tempting to tilt the jar to pour off the excess water on the top, but don’t do it. Doing so can disrupt the seal you worked so hard to achieve. Remove the jars from the canner, set them on a towel or rack, and let the water evaporate naturally.


If you don’t get every single one of these items right every time, do not worry. Most of us don’t achieve perfection. I would encourage you to focus on product safety first, and continue to work on other possible mistakes which may affect the quality and success of your canning endeavors. And when you enjoy a jar of home-canned chutney or jam next winter, you’ll be glad you went to the trouble of doing your best.


What common mistakes would you add to our list? Share your tips in the section below:  

Monday, September 4, 2017

Kitchen Secrets That Extend The Life Of Fresh Tomatoes

Kitchen Secrets That Extend The Life Of Fresh Tomatoes

Image source: Pixabay.com


You may have heard that it’s not a good idea to store tomatoes in the fridge. And, in fact, the optimal storage temperature for tomatoes is 55-70 degrees Fahrenheit. Colder temps damage both the aroma molecules and the texture of tomatoes, which affects their palatability.


However, room temperature in many of our homes is higher than 55-70 degrees, particularly in the warm summer months when we’re picking garden-fresh tomatoes. Unless you’re fortunate enough to have a wine cooler or wine fridge (which, optimally, should be set to 55 degrees Fahrenheit), you need to pick between the lesser of the two evils: the too-cold fridge or the too-warm countertop.


This New All-Natural Fertilizer Doubles Garden Production!


The best thing to do is strike a balance. Start by checking for ripeness. When lightly squeezed, a perfectly ripe tomato should give very lightly to the touch. If it doesn’t give at all, it’s not ripe yet; if it’s quite soft, it’s overripe.


Underripe and ripe tomatoes are best kept on the countertop as long as possible. As well, it’s best to store them stem- or scar-side down. There are several websites that discuss the stem-side down storage method, and some sites have done their own experiments to prove that it increases shelf life. It does work, but everyone seems unsure of the science behind it. It’s speculated that there are one of two things going on.


First, while the skin of a tomato is effective at keeping out bacteria, cracks in the scar can let bacteria in. When a tomato is stored upside down, the liquid inside the fruit moves to the top of the tomato, which provides a sort of seal to the cracks in the scar and a barrier to bacteria. The other possibility is that storing a tomato upside down somehow affects the way ethylene gas is transmitted. Fruits naturally create ethylene, which aids in the ripening process. When the production or transmission of ethylene is slowed, the ripening process slows as well.


Tomatoes stored at room temperature should be checked regularly, particularly if your home is on the warm side. The warmer it is, the more quickly tomatoes will ripen and subsequently mold or rot. Any tomatoes that are past optimal ripeness should be tossed in the fridge. Some spots in the fridge are slightly warmer than others, such as on the top shelf and near the door, and those are the ideal spots for tomatoes. But, in the end, while they may lose some palatability in the fridge, they will definitely lose palatability if they start to go bad on the countertop. Bottom line: Refrigerate when necessary.


Do you have any advice for extending the life of tomatoes? Share your tips in the section below:

Friday, August 18, 2017

Drowning In Tomatoes? Try Something Different This Year.

Drowning In Tomatoes? Try Something Different This Year.

Image source: Pixabay.com


If you’re a home gardener about to drown in tomatoes rolling in off the vines and demanding to be consumed before they go bad, hang on. Here comes a life preserver!


Everyone knows the delectable bliss of cutting up a perfectly ripe red tomato and enjoying the slices simply seasoned with salt and pepper on a plate next to a steak or macaroni salad or grilled cheese or chicken cutlet or just about anything. And we all know the decadent joy of picking sweet little orange cherry tomatoes off the vine and popping them into our mouths like candy.


But what about when it’s time for something different? Here are a few ideas to get your tomato creativity flowing and help you embrace the garden’s bounty.


First, consider them on sandwiches. Not just as an add-on to standard meat and cheese or tucked into a tuna- or egg-salad creation—although they are definitely delicious that way—but on their own, as well. Half-inch thick slices of fresh ripe tomato between two slices of bread with mayonnaise and a few dashes of seasoning tastes like a bite of delicious summer. Add a few slices of cucumber for added cool crunch, or mix it up with some ultra-thin slices of summer squash, onion or peppers. The dressing doesn’t have to be mayonnaise, either. You can experiment with ranch dressing, hot mustard, relish or other condiments to suit your own taste.


Tomatoes are tasty on hot sandwiches, too. Burgers and grilled cheese sandwiches are perfect places for tomato slices, as are hot meat-and-cheese on bun types that go by the name of heroes or hoagies in different parts of the country.


One of my favorites ways to eat tomatoes on hot bread is to grill Italian or French bread slices, spread it with pesto, add chopped tomatoes, and sprinkle with parmesan cheese. Yum.


This New All-Natural Fertilizer Doubles Garden Production!


Tomatoes make great salads, too. You probably already include them in tossed salads, from basic everyday side dishes to more elaborate or ethnic concoctions that use everything from feta cheese to walnuts to Asian noodles to corn chips. But tomatoes can be the main ingredient instead of an add-in in salads. Chopped slicing tomatoes or halved cherry or grape types can be dressed up with Italian-style or ranch dressing, fresh or dried herbs such as basil or chives or parsley, chunks or crumbles of any kind of cheese, chopped cucumbers or other fresh vegetables, or bits of bacon or prosciutto.


Tomatoes go wonderfully with pasta. Toss chunks of pasta in with cooked short pasta—I prefer corkscrew types—and your choice of seasonings, dressing, meats, cheeses and other vegetables.


Make a Sauce. Or Eat Them Like an Apple.


Drowning In Tomatoes? Try Something Different This Year.

Image source: Pixabay.com


Another fun way to enjoy tomatoes and pasta is as a fresh red sauce. I learned this dish from a campsite caretaker many years ago and wrote it down in my little camping journal, and the dish has long outlasted my hiking days. I chop up a small bowlful of fresh very ripe tomatoes, add chopped red onion or scallions, minced garlic, chopped fresh basil, and extra-virgin olive oil.  I sometimes add Kalamata olives. I make this dish in the morning and let it set on the kitchen table all day. By evening meal time, the flavors have melded nicely, and I serve it over hot cooked spaghetti noodles and top it with fresh grated parmesan for an easy meal on a hot summer day.


Tomatoes, either slices or cherry halves, are elegant and delicious mixed with fresh mozzarella cheese—either small balls or slices—and drizzled with olive oil and herbs. Full-sized tomatoes are delightful stuffed with cottage cheese and herbs and served cold, or stuffed with bread stuffing and baked or broiled and topped with cheese.


Don’t forget pizza. You can substitute slices of fresh tomatoes for the red sauce, or you can substitute pesto for the red sauce and add tomato slices on top of the cheese.


Cherry tomatoes can be sautéed or broiled. You can add bread crumbs, soft cheese, olive oil, butter, herbs or black olives to complement the lovely tomato flavor.


Tomatoes work well in scrambled eggs, baked eggs, frittatas and omelets. They can be cooked slightly to soften them before adding to egg recipes or added raw in some dishes. Tomatoes are a staple for many soups and casseroles, as well, providing an excellent way to use up yesterday’s fresh broiled or sautéed tomatoes to make room for more fresh ones coming ready in the garden today.


If somehow not one single tomato-eating idea on this list appeals to you, you can always try it my brother’s way. He has been known to pick a ripe tomato off the vine, rub the dust off on his shirt, and eat it like an apple.


A lot of foods from around the world pair nicely with tomatoes, so there is no reason to succumb to a flood of garden tomatoes in August. Try some of these ideas—along with your own recipes and your variations on the ones I’ve suggested—and you’ll be glad once again that you planted so many tomatoes.


Do you have any unique tomato-eating ideas? Share them in the section below:

Monday, August 7, 2017

So, Your Tomato Plant Has Wilted Leaves? Here’s What To Do.

So, You

Image source: ucanr.edu


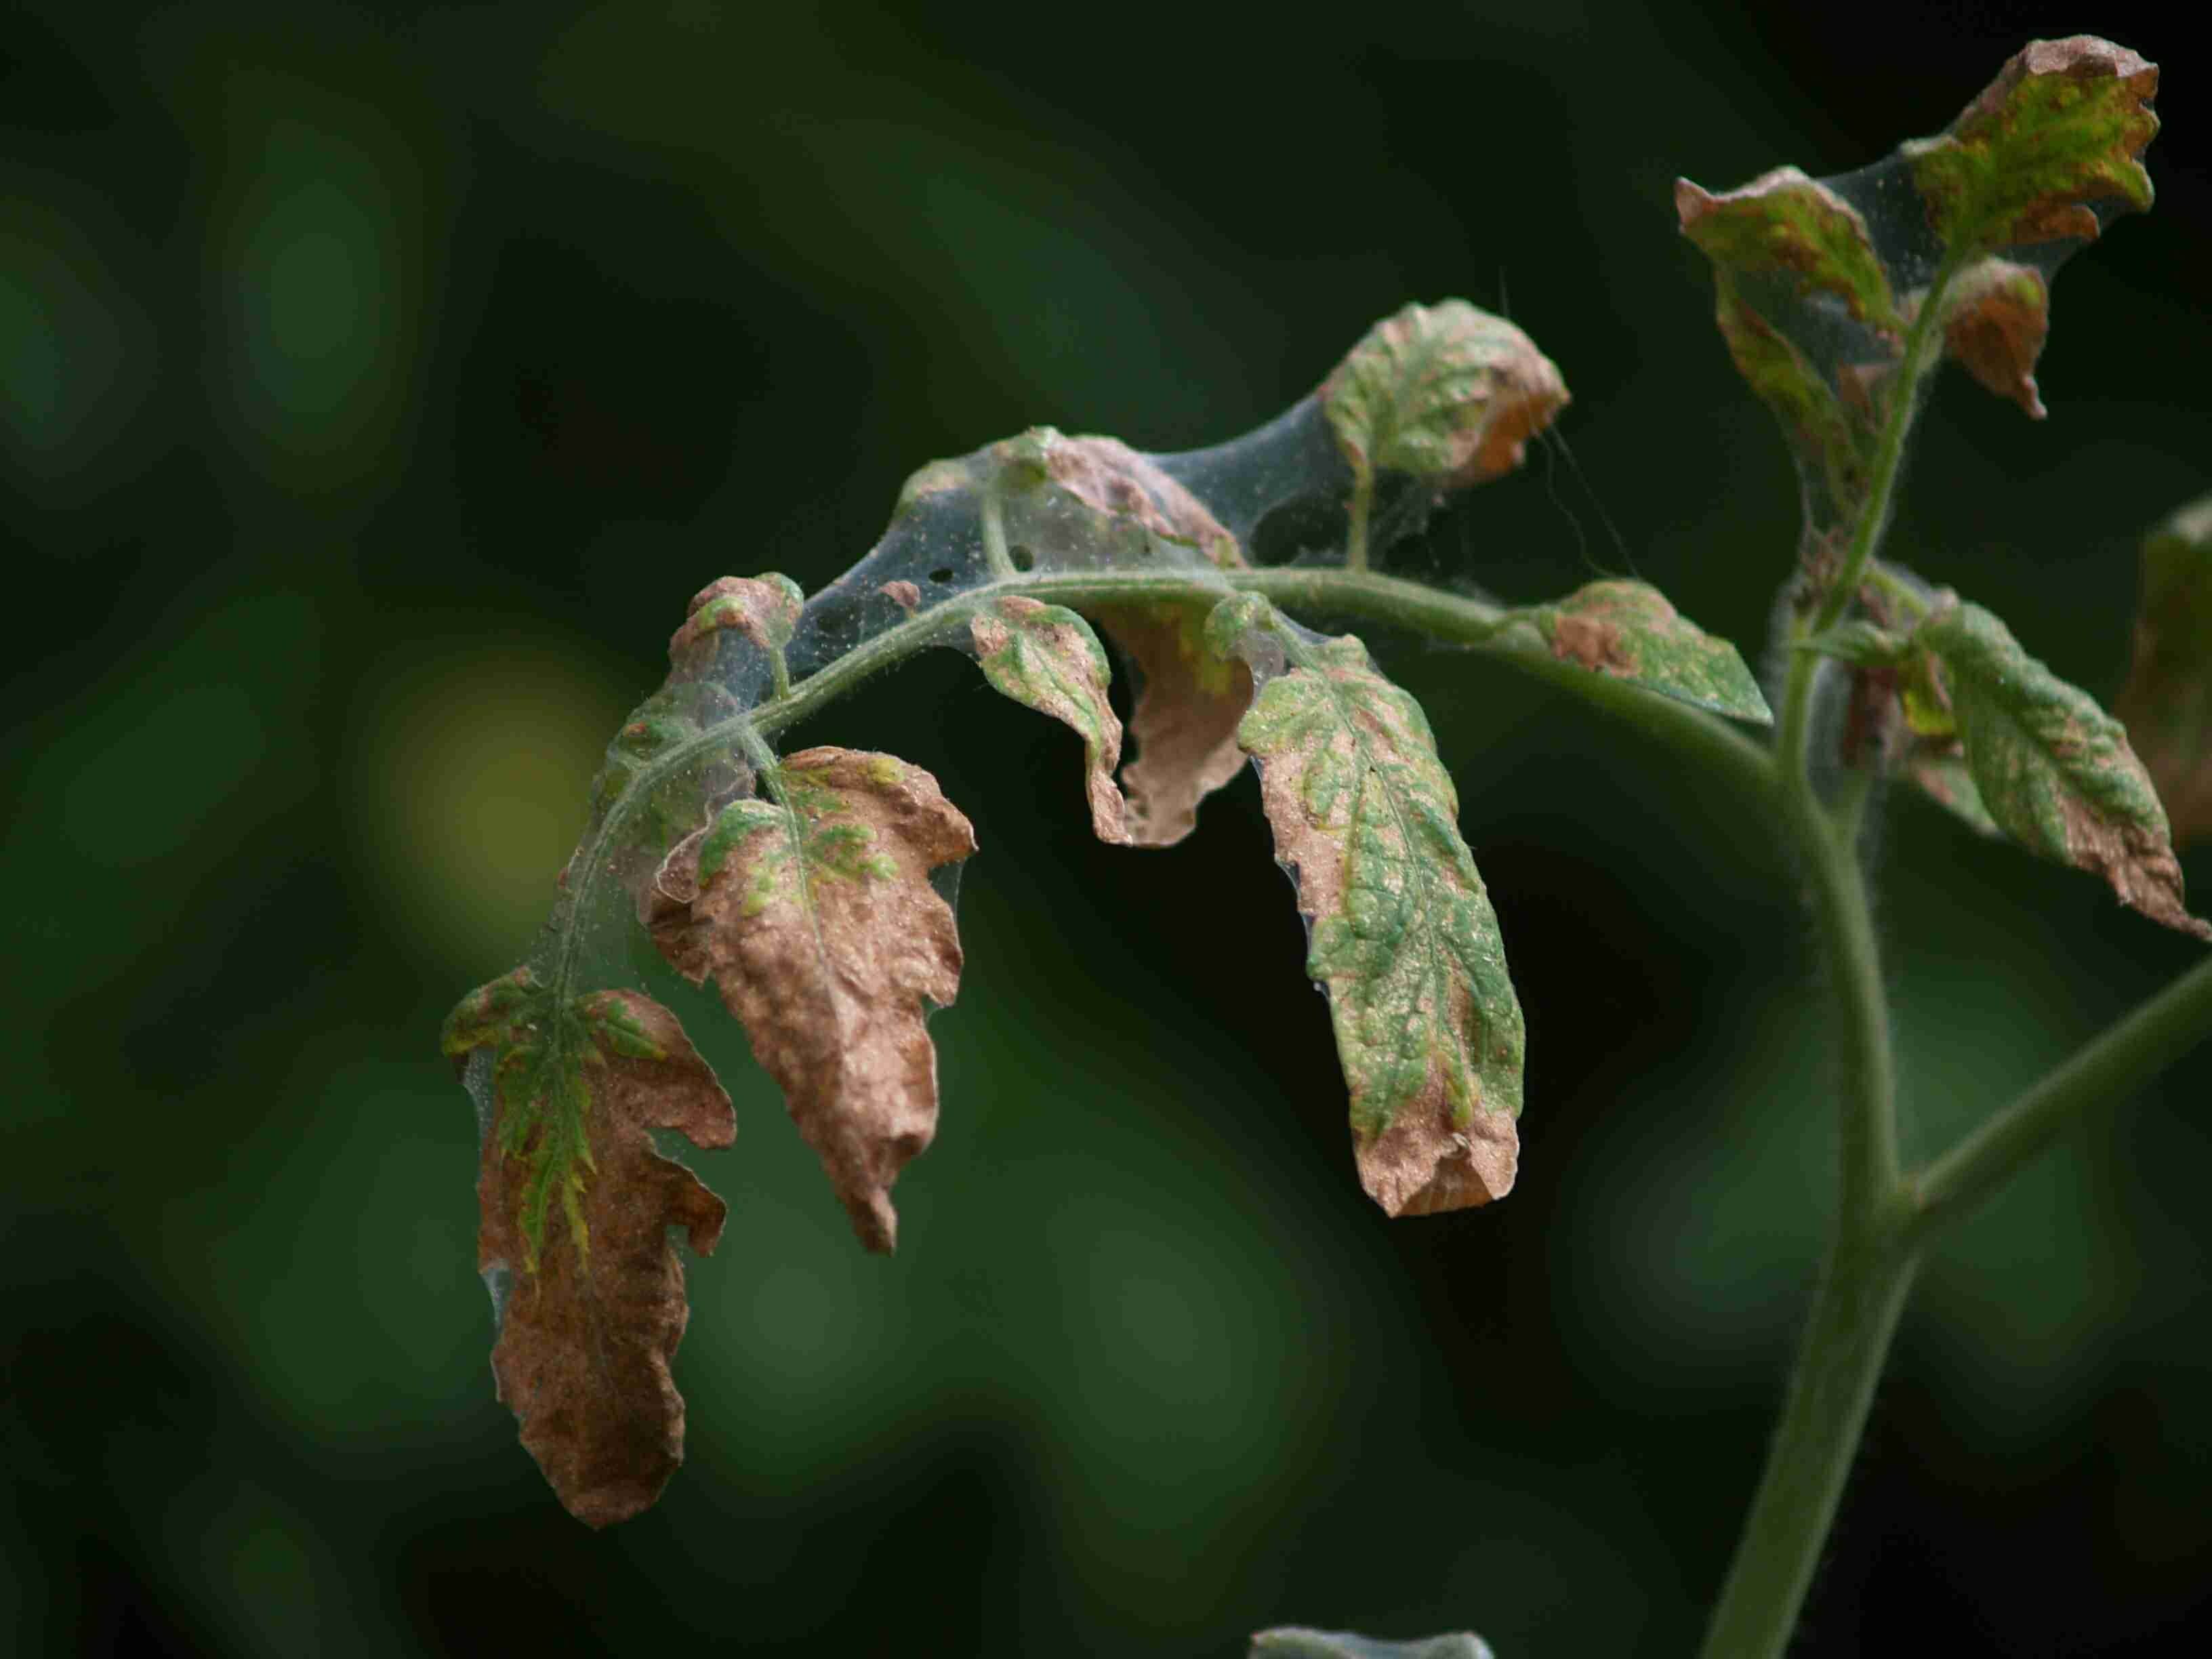
The leaves on a tomato plant are good indicators of the plant’s health. Tomato leaves can display all kinds of distress signals: yellowing, brown spots, purple edges and curling are all signs that the plant needs a little extra TLC. Wilted leaves mean the same.


Don’t be too concerned, though, if you spot wilted leaves during the hottest part of the day. The leaves just may be hot and languid (like all of us!). However, if the leaves remain wilted during the cooler evening or morning hours, your tomato plant is likely sending an SOS signal. Check for these issues:


Under Watering


A general rule is that mature, producing tomato plants need two inches of water per week. If you’re a stickler for following exact rules, set up a rain gauge and supplement any weekly rainfall with manual watering, as required. That said, the two-inch guideline may be insufficient at times. Extremely hot, dry and windy weather, or watering during the hottest part of the day, can increase evaporation and decrease moisture absorption by the soil. Sandy soils drain quickly and may not hold moisture long enough for your plants’ needs. Also, two inches per week is not sufficient for most container tomatoes.


This New All-Natural Fertilizer Doubles Garden Production!


It’s easy to check and see if there’s enough moisture in the soil. While the surface will usually be dry, soil 1-2 inches beneath the surface should feel damp. Stick your finger into the soil up to your knuckle; if the soil at the tip of your finger feels dry, your tomatoes need more water.


Fungal Diseases


If your soil seems adequately moist, and your plants seem to wilt more after being watered, they probably have a fungal disease such as verticillium wilt, fusarium wilt, or southern blight. Unfortunately, tomato plants infected with any of these need to be destroyed, to stop the fungi from spreading.


Verticillium Wilt and Fusarium Wilt


So, Your Tomato Plant Has Wilted Leaves? Here

Image source: Pixabay.com


Verticillium wilt and fusarium wilt are quite similar, and it can be difficult to tell which is infecting a plant. In both cases, the fungus lives in the soil, and the plant’s roots absorb it. As it infects the plant, it clogs the plant’s vascular system so that moisture can’t travel to the branches and leaves.


Both verticillium wilt and fusarium cause leaves to develop yellow spots, brown veins and wilt. Lower leaves show symptoms first. As the disease progresses, browned leaves dry up and fall off. The main difference between the two diseases is that fusarium wilt generally shows up on one side of a plant, while verticillium wilt moves more slowly, is less dramatic (noticeable), and isn’t restricted to one side.


Again, there is no cure for either of these diseases. It’s best to practice preventative measures including rotating crops, amending soil (when needed) so that it has adequate drainage, and choosing disease-resistant tomato varieties. Also, make sure to clean and sanitize all your garden tools (including tomato stakes and cages) if you suspect your plants have either of these diseases so that you don’t inadvertently transfer the fungi to a new bed. If you still end up with an infected plant, destroy it promptly and remove the surrounding soil.


Southern Blight


The initial symptoms of southern blight are quite similar to those of verticillium wilt and fusarium wilt: discolored leaves and wilt, starting at the base of the plant. However, once it progresses far enough, the plant collapses. You can determine whether it’s southern blight before your plant gets to that point; check for white hyphae or mycelia (soft, stringy, mold-type substances) around the plant’s lower stem, roots, and in the surrounding soil.


As with the other two fungal diseases, plants infected with southern blight cannot be treated.


Tomato Spotted Wilt Virus


Wilting is actually the last stage of tomato spotted wilt virus (TSWV); long before the plant starts to wilt, the rest of the plant will be sending out serious distress signals. Typically, plants infected with TSWV are stunted and pale, and often turn a bronze color. Leaves on these plants often have distinctive markings of circular or swirling patterns. Unlike other tomato diseases, TSWV first shows up in a plant’s top leaves.


TSWV is spread by small insects called thrips, which pierce plants in order to feed off them. As with fungal diseases, there is no way to stop TSWV from progressing once it sets in. Plants (and the thrips on them) should be destroyed. The best preventative measure is weed control, because thrips will feed on weeds until tastier plants are available to them.


The good news about TSWV is that it’s not transmitted through soil, and therefore there’s no need to remove soil when destroying plants.


Bacterial Wilt and Canker


Bacterial wilt is the one tomato disease where wilt is the predominant symptom. There is generally no discoloration of the leaves. The entire plant stays green, wilts and dies shortly afterward.


Bacterial wilt is most common in hot, humid regions, and particularly in soils that have a high pH. As with the other tomato diseases discussed here, there is no treatment for bacterial wilt. Diseased plants should be destroyed and preventative measures should be taken. Rotate crops, choose modern disease-resistant varieties, monitor soil pH (and adjust as necessary), and ensure generous air circulation by spacing plants widely and pruning indeterminate varieties.


Other Possibilities


Pests such as stalk borers, root knot nematodes, and aphids also can cause wilting, but they aren’t commonly attracted to tomato plants. However, if your plant displays symptoms that don’t seem to match any of the diseases listed above, it’s worth taking a close look for pests.


Also, the allelopathic properties of some plants can adversely affect tomatoes and cause wilting. Through allelopathy, plants leach their own natural chemicals into the soil, and those chemicals can affect nearby plants in both good and bad ways. Tomatoes are negatively impacted by black walnut and butternut trees and by sunflowers. If you have wilted tomato plants, in addition to checking for diseases and pests, take a look at what’s planted nearby.


What advice would you add? Share your thoughts in the section below:
Thursday, July 27, 2017

What To Do When Your Tomato Leaves Turn Yellow (And The Plant Starts Dying)

What To Do When Your Tomato Leaves Turn Yellow

Image source: Flickr / Scot Nelson / Creative Commons


A quick look at the leaves on your tomato plants will tell you if your plants need a little extra TLC. Curled leaves, brown spots, holes and purple discoloration are all signs that something is going on with your plants. Yellowing leaves may also be a cause for concern. Sometimes, it’s not a big deal — the leaves are just older ones that the plant is no longer supporting. But sometimes, yellow leaves are a sign that your plant needs help to stay healthy and keep producing. The tricky part is figuring out what exactly is going on.


Old Leaves


If the leaves on the bottom of your plants are turning uniformly yellow, it’s often just because they are old and/or not getting enough sun. As the plant bushes up and out, it directs its energy and nutrients to the new growth. As a result, older leaves don’t get the nutrients they need to stay green.


Yellowing leaves at the bottom of a tomato plant also can mean they aren’t getting enough sun. A simple fix is to prune out some of the suckers and non-fruit-bearing branches. Not only will sunlight be able to filter through the foliage better, but pruning has several other benefits including better airflow (which reduces the chance of pest and disease infestation) and bigger, more plentiful fruit (since the plant has fewer leaves to use up its energy and nutrients).


Too Much or Too Little Water


Tomato plants are picky about a lot of things, and the amount of water they receive is one of them. Watering either too much or too little can cause all kinds of problems, including yellowing leaves.


This New All-Natural Fertilizer Doubles Garden Production!


It’s difficult to provide “one size fits all” watering advice. A number of factors impact how much water tomatoes need, including average daily temperature, soil type, amount and type of mulch, the size and age of the plant, and whether the plant is in a container or in the ground. In general, however, the soil always should feel damp 1-2 inches beneath the surface. Stick your finger into the soil up to your knuckle; if the soil at the tip of your finger feels dry, your tomatoes need more water, and that could be the cause of the yellow leaves.


If the soil feels muddy and oversaturated, and the soil is normally in that condition, then the yellowing could be a sign of overwatering and, more seriously, root rot. The only way to determine if the roots are actually rotting is to uproot the plant and wash the roots so that you can see if there is any decay. If there is, trim the decayed parts off and replant the bush. Amend your soil with compost and apply mulch to improve drainage and avoid further rot.


Nutrient Deficiency


Tomatoes grow quickly and produce heavily. They need a lot of nutrients and energy to get the job done. If your soil is lacking nutrients, your tomato plants (and harvest!) will be affected. Yellowing leaves are often a sign of nutrient deficiency. Take a close look at the leaves to figure out which nutrients may be lacking.


  • Uniformly yellowing leaves throughout the plant (and not just at the base) often indicate a nitrogen deficiency.

  • If there are leaves at the bottom of the plant that are yellow but retain green veins, that may illustrate a potassium deficiency.

  • Younger leaves at the top of the plant that are yellowing while retaining green veins point to an iron deficiency.

  • If there are leaves throughout the plant that have yellow areas with dark spots inside the yellow, that may indicate a zinc deficiency.

  • If only the outer edges of leaves are yellowing, your soil likely needs more magnesium.

While you can definitely add a synthetic or natural fertilizer to adjust soil nutrients, you should also test the alkalinity of your soil. Tomatoes prefer slightly acidic soil, with a pH of 6.0 to 6.8. Too much fertilizer will impact the soil’s pH level and can lead to damaged plants.


Diseases and Pests


Yellowing leaves also can be due to disease or pest infestations, but in these cases the yellowing is usually just one sign of the plant’s distress. For example, an aphid infestation may cause yellow, misshapen, and sticky leaves. Septoria leaf spot and early blight both cause brown spots on yellowing leaves. Curly top virus causes leaves to curl up and become yellow with purple veins. If your tomato plants exhibit other problems in addition to yellowing leaves, it’s best to do some research or take a couple of leaves down to your municipality’s gardening experts to help identify the cause. In most cases, diseased plants should be destroyed so that the pathogens don’t spread. But, in case it’s just a simple case of needing a watering adjustment or extra nutrients in the soil, get a second opinion before you take drastic measures.


Whether it’s an easy fix (pruning off suckers) or a harder one (uprooting plants to trim off decayed roots), yellowing leaves are a tomato plant’s “SOS signal.” By addressing the cause, you’ll improve your plant’s health. A healthier plant means a bigger harvest. And who wouldn’t want more tomatoes?


What advice would you add? Share your tips in the section below:

Wednesday, July 19, 2017

The 4 Fastest (And Best) Ways To Ripen Green Tomatoes

The 4 Fastest (And Best) Ways To Ripen Green Tomatoes

Image source: Pixabay.com


Ah, the timing of nature. Each summer, I wait patiently for the delicious bounty from my tomato plants, and each autumn as temperatures start to tumble, I am left with many healthy green tomatoes on my vines.


If you experience the same problem – or if you have a ton of green tomatoes that have fallen to the ground – then you may be wondering the best ways to ripen them.


Here are the steps to follow.


First, for best results, cut the healthy green tomato off the vine with part of its stem still attached. If you have cherry tomatoes, snip the whole bunch off the vine. Only choose mature green tomatoes for indoor ripening. When in doubt, check for a shiny skin color. Small tomatoes that have a dull matte skin color will not ripen indoors.


Additionally, although tomatoes that are shiny green in color can ripen indoors, you will have the best luck with fruit that has started to show a bit of yellow or orange color.


The All-Natural Fertilizer That Can Double Your Garden Yield!


Next, find a warm spot to place the fruit. Many people think tomatoes need direct sunlight, so they place them in the windowsill. However, tomatoes need warmth, not direct sunlight. In fact, too much direct sunlight through a window can make a tomato’s skin tough.


The 4 Fastest (And Best) Ways To Ripen Green Tomatoes

Image source: Pixabay.com


Finding a warm, dry spot is your best bet for the ripening process. Here are a few options to try, depending on how quickly you want your tomatoes to ripen:


1. Place your green tomatoes in a single layer in a loosely folded-over paper bag along with a banana or an apple. These fruits release a gas called “ethylene” that speeds the ripening process naturally. Check the tomatoes regularly for signs of molding or rotting.


2. Put your tomatoes with an inch or two of space between them in a single layer in a cardboard box that is lined with a layer of newspaper. Cover them with another layer of newspaper. Check them every 24 hours or so.


3. Concentrate the effects of ethylene by placing the tomatoes in a sealed plastic bag or a large glass jar along with a banana or an apple. Caution: This environment can encourage mold growth, so check the tomatoes often for mold formation.


4. Hang up the whole tomato plant – roots and all — upside down in a garage or basement where temperatures remain above 50 degree Fahrenheit. This method takes the longest, but many people say tomatoes ripened this way taste the best.


Tomatoes stored in temperatures 50 to 60 degrees (Fahrenheit) usually ripen in four weeks or even longer, and tomatoes stored in temperatures of 65 to 70 degrees can be ready to eat in just two weeks.


Sorting and storing by ripeness levels is a good idea, since it allows you to check on each batch more consistently. If you have an abundance of green tomatoes this fall, you might want to store some in different temperatures to stagger your late harvest.


Whatever method you choose, be careful not to crowd your ripening tomatoes. Adequate air circulation helps prevent mold formation. Separate out and discard any damaged fruit and safely dispose of any diseased fruit.


How do you ripen green tomatoes? Share your tips in the section below:

Wednesday, June 28, 2017

8 Tomato-Growing Mistakes Even Smart Gardeners Make

8 Tomato-Growing Mistakes Even Smart Gardeners Make

Image source: Pixabay.com


Tomatoes aren’t difficult to grow. No matter how little care I give my plants, I always get some fruit. However, with a little extra care, tomato plants will reward you with a more bountiful — and tastier — crop. To max out your tomato production, avoid making these mistakes:


1. Not rotating crops


Tomatoes are heavy feeders and deplete soil as they draw up nutrients to send to their fruit. It’s best to rotate tomato plants annually, so that they have lots of nutrients in the new spot while the old spot is given time to replenish.


2. Not enough sun


Make sure the new spot is in a sunny location that’s warm but not hot. Like many garden vegetables, tomatoes can make do with six hours of sunlight daily, but the more sun they have, the better they produce. Sunlight gives plants energy, and tomatoes use extra energy to create extra fruit.


3. Too much heat


Although they’re sun worshippers, tomatoes don’t like extreme heat. If you live in a zone where temperatures regularly soar over 90 degrees Fahrenheit, it’s best to pick a spot where your plants will be shaded in the afternoon. Morning sun is important since it dries dew — and dry leaves keep disease at bay. But extreme heat destroys the pollen on tomato flowers, which means they won’t produce fruit. Try to pick a spot that will be shaded only during the hottest hours of the day.


4. Crowding the plants


Tomatoes — especially indeterminate varieties–are big plants. Popular varieties like Beefsteak, Super Fantastic, Early Girl and Lemon Boy are all indeterminate, and as such can grow up to six-feet tall or in some cases, even taller. Determinate varieties (bush tomatoes) are smaller, but still can reach heights of 3-4 feet.


The All-Natural Fertilizer That Can Double Your Garden Yield!


Make sure you give your plants sufficient space to grow. Consider whether you’re planting in rows, beds or square-foot plots, as well as whether the plant is determinate or indeterminate.


5. Not planting deeply enough


8 Tomato-Growing Mistakes Even Smart Gardeners Make

Image source: Pixabay.com


Tomato seedlings should be planted deep. In fact, it’s recommended to bury a full two-thirds of a seedling in soil. It is perfectly OK to cover existing leaves. The stem that’s buried will develop roots, too. The more roots your plant has, the more nutrients it can soak up and send to the fruit, which makes for more flavorful tomatoes.


6. Not pruning


Pruning? Tomatoes? You betcha. While it’s not essential, pruning your tomato plants — especially the big indeterminate varieties — has a few notable benefits:


  • Fewer leaves will increase the amount of sun and air that reach existing leaves and fruit. Wet leaves will dry more quickly, reducing the chance of pest or disease infestations. Diseases that flourish in wet conditions include:
    • Powdery mildew

    • Fusarium wilt

    • Verticillium wilt

    • Leaf spot

    • Bacterial spot

    • Bacterial canker


  • Since your plant has fewer leaves to support, it will use its energy to produce more and bigger fruit instead.

  • Fewer leaves to support also means that more of your plant’s energy can be directed toward ripening fruit, giving you an earlier harvest.

Before it’s time to prune leaves, however, you may need to pinch off flowers. Plants should be at least 12-18 inches tall before flowers are allowed to set. Otherwise, the plant may not be strong enough, with a strong healthy root system in place, to support heavy fruit and provide them with nutrients.


Determinate and indeterminate varieties must be pruned differently. With determinate varieties, only prune the bottom branches that touch the soil. Those branches may contribute to the spread of disease if left. However, removing other stems and/or leaves on determinate varieties may reduce your harvest.


On indeterminate varieties, prune off suckers as they appear. Suckers are the smaller branches that start growing right in the groove where an existing branch meets the main stem.


7. Not humoring the picky feeders


Tomatoes are heavy feeders and should be fertilized during the growing season, BUT they have specific feeding needs. Fertilizing weekly with a natural compost or fertilizer is the best option.


8. Watering frequently


Deep, strong roots are key to growing great tomatoes. In addition to planting seedlings deeply, you can encourage strong root growth by watering plants heavily about every 5-7 days. With this type of watering, plants will develop long, strong roots to seek water. With shallow watering, the roots will remain stunted near the surface to access the water there; with more frequent watering, plants have no reason to create stronger roots.


Watering too infrequently, so that the soil severely dries out, can cause problems like blossom end rot. Tomato roots need water to soak up calcium from the soil; without water — and ergo without calcium — tomato fruit are susceptible to disease.


Watering tomato plants at their base will help keep leaves dry, and again, dry leaves are the key to reducing pest and disease issues. For best results, install drip lines or hand water.


Final Thoughts


After reading through this, you may think that tomatoes are the most difficult vegetables in the world to grow. Nothing is further from the truth. However, correcting at least some of these mistakes will result in a bigger harvest of heavier, more flavorful fruit that ripens quickly.


What tomato-growing mistakes would you add to our list? Share your thoughts in the section below:

Thursday, June 1, 2017

Tomato-Growing Mistakes Every Gardener Makes

Kim Jon Un


Tomatoes are the second most-consumed vegetable in the United States today, but just 200 years ago, people throughout the U.S. had not even heard of them. Many gardeners even thought they were poisonous.


So, how did the tomato transition from obscure to popular?


This week on Off The Grid Radio we’re discussing everything you didn’t know about tomatoes, including ways you can harvest better-looking and better-tasting ones – without yellow leaves! Our guest is Craig LeHoullier, the author of “Epic Tomatoes: How to Select And Grow The Best Varieties of All Time.”


Craig shares with us the most common mistakes made by gardeners when growing tomatoes.


He tells us the fascinating history but he also tells us:


  • Why some tomato varieties need pruned — and some do not.

  • How to stop tomato leaves from spotting and yellowing.

  • Why he prefers heirloom varieties over hybrids.

  • Which type of fertilizers work best for tomatoes.

  • Why tomatoes grown in buckets can be even healthier than ones grown in the ground.

Craig also tells us the easiest ways to stop fungus problems before they start. If you have a garden and you’re growing tomatoes, then this is one show you don’t want to miss!


Tuesday, May 23, 2017

8 Health Benefits Of Tomatoes You Probably Didn’t Know

8 Health Benefits Of Tomatoes You Probably Didn’t Know

Image source: Pixabay.com


They are the pride of summer gardeners and the mainstay of many Italian dishes. They also add texture and flavor to sandwiches. People all over the world love tomatoes. In fact, contrary to what you might expect, China reigns as the top tomato producer with 34 tons each year.


Believed to have originated in Mexico, the tomato is the fruit of the plant with the botanical name Lycopersicon esculentum. Although they are most frequently recognized for their bright red color, tomatoes can come in yellow, orange, pink, green, purple, brown and even black. They also vary greatly in size and shape, from the large beefsteak to the tiny cherry size.


Although they are technically a fruit, tomatoes are often prepared and served as a vegetable. They have a slightly bitter and acidic taste that becomes rich and warm when cooked. However you choose to consume them, tomatoes are one of the world’s healthiest foods.


Fast, All-Natural Pain Relief With No Nasty Side Effects!


Here are seven health benefits tomatoes can provide.


1. Heart and blood health – Tomatoes are rich in potassium, which helps maintain your body’s nervous system and which is associated with a reduced risk of stroke. They’re also rich in iron, which is important for healthy blood. In addition, tomatoes are abundant sources of Vitamin K, which is necessary for blood clotting and for bleeding control.


The folic acid in tomatoes helps regulate your body’s homocysteine levels, which help lower your risk of heart disease.


The lycopene in tomatoes also offers protection against cardiovascular diseases. The regular consumption of tomatoes has been linked with lower levels of LDL (bad) cholesterol and of lower levels of triglycerides in the blood.


Consuming a tomato daily also reduces your risk of developing hypertension, or high blood pressure. As a vasodilator, potassium helps reduce the tension in blood vessels and arteries, helping to improve circulation and lowering the stress on the heart.


2. Vision – The rich content of Vitamin A in tomatoes contributes to eye health. As a powerful antioxidant, Vitamin A helps prevent night blindness and macular degeneration.


The lycopene, lutein and beta-carotene in tomatoes help protect your eyes from developing cataracts.


3. Digestion — Tomatoes are loaded with fiber and water, both of which can help you have regular bowel movements. Eating tomatoes helps prevent jaundice and works to remove toxins from the body.


4. Diabetes — The high fiber content of tomatoes is beneficial for people who have diabetes. A Journal of the American Medical Association study found that people who consumed tomatoes on a daily basis had a reduced risk of the oxidative stress associated with Type 2 diabetes.


Other research indicates that people with Type 1 diabetes who eat high-fiber diets have lower blood glucose levels, and people with Type 2 diabetes may experience improved blood sugar and insulin levels.


8 Health Benefits Of Tomatoes You Probably Didn’t Know

Image source: Pixabay.com


5. Skin – Eating tomatoes regularly also may help your skin. Vitamin C consumption is associated with protection from exposure to potential damage from sunlight, pollution and smoke. Your skin, hair and nails are all reliant on vitamin C to remain strong and healthy.


6. Urinary system – Because of the antioxidants they contain and their high-water content, tomatoes can help prevent urinary tract infections. The regular consumption of tomatoes also can help maintain a healthy gallbladder.


7. Cancer – A single tomato can provide you with 40 percent of your daily Vitamin C requirement. As a natural antioxidant, Vitamin C may help protect against certain forms of cancer. In addition, the lycopene in tomatoes may help prevent prostate cancer, stomach cancer, cervical cancer and pharynx and esophageal cancers.


Just 30 Grams Of This Survival Superfood Provides More Nutrition Than An Entire Meal!


The high presence of vitamin A in tomatoes can offer some protection against lung cancer. Additionally, tomatoes contain coumaric acid and chlorogenic acid, which can help protect the body from carcinogens produced from second-hand cigarette smoke.


8. Bone health — Tomatoes contain calcium and Vitamin K, both of which contribute to strong bones and bone tissue.


Of course, there always can be a case of too much of a good thing. People who have gastro-esophageal reflux disease (GERD) may experience heartburn and regurgitation after eating tomatoes, largely due to their high acidic content.


Also, tomatoes, especially cherry tomatoes, are high on the list of foods that frequently are sprayed with chemicals by non-organic farmers. Because of that, the Environmental Working Group suggests that you purchase organic tomatoes or grow your own tomatoes organically.


Are you wondering how you can add more tomatoes to your family’s diet? Here are a few ideas to get you started:


  • Make a Caprese salad with fresh tomato slices, mozzarella cheese and a drizzle of olive oil and balsamic vinegar. Top with fresh basil.

  • Spread smashed tomatoes on sandwiches instead of butter or mayo.

  • Scramble chopped tomatoes into eggs or use them to top an omelet.

  • Roast tomatoes in the oven along with potatoes or veggies.

  • Make your own fresh tomato sauce.

  • Stir-fry tomatoes on the stove.

  • Add sliced tomatoes to a grilled cheese sandwich.

  • Add fresh tomatoes to your next smoothie instead of water.

Have you discovered other ways tomatoes can benefit your health? Share your tips in the section below:

Wednesday, May 17, 2017

How To Grow 6-Inch Tomato Plants In Only 1 Week

How To Grow 6-Inch Tomato Plants In Only 1 Week

Image source: Pixabay.com


I have a confession (one that I’ve made here before): I don’t start seeds indoors. If they can be sown directly, I do that. Most of my garden does get started from seeds. But I buy some seedlings, namely tomatoes and eggplants.


At the garden center, of course I’m drawn to the large and bushy tomato plants, already blooming, maybe even with a few tiny tomatoes growing. If I bring that plant home, I should have ripe tomatoes in about two months (depending on the variety). But those bushes are expensive, and I normally put in 8-10 tomato plants. I simply can’t justify buying the bigger, more expensive bushes when I can also get tomatoes by purchasing the 3-inch-tall seedlings. It’s the same result, after all. It just takes longer.


But, here’s a secret: you can get several small tomato plants off a single large bush. You can propagate tomatoes the same way that you start new house plants — with cuttings. If you do this, you can have multiple tomato plants and still eat your early tomatoes, too. Your mature (“mother”) plant will provide you with tomatoes until your propagated plants start producing.


Rooting only takes about a week. Within seven days, you could have a sturdy, tall tomato seedling, which is about 6-8 weeks faster than starting a plant from a seed.


Benefits to Pruning Large Tomato Plants


If you’re over visiting a friend or neighbor and they have some large tomato plants chugging along, they might allow you to snip a couple of cuttings off their plants. That way, you don’t have to splash out on a mother plant. It should be easy to convince your friend to let you do this. Removing shoots is effectively pruning, and pruning tomato plants is beneficial.


Looking For Non-GMO Vegetable Seeds? Get Them From A Company You Can Trust!


As Louisiana State University’s Ag Center explains, pruning off the bottom branches encourages fruit production at the top of the plant. This way, heavy fruit on the bottom branches won’t pull those branches down so that the tomatoes rest on the soil, which can cause them to rot. Removing branches also improves air circulation, which can help with insect and disease control. Wet leaves can lead to problems like late blight. By pruning branches, the remaining leaves will receive more sun and air, and will dry faster.


Preparing Your Cuttings


How To Grow 6-Inch Tomato Plants In Only 1 Week

Image source: Pixabay.com


Typically, we root houseplants by placing them in water until roots form. Tomato cuttings can be started the same way. However, they will develop a stronger root system more quickly if they are rooted directly in soil.


Start by snipping off a side shoot (branch) that is at least 6-8 inches long. Be careful that you don’t lop off the top of the main stem by mistake. Once the shoot is removed, trim the bottom leaves off, so that there are only two leaves left at the top. If there are any flowers or buds on the branch, trim those off, too.


If you are rooting the shoots in water, immediately set them in a glass or jar of water. Make sure you don’t submerge the top leaves. Set the jar in a warm place, and top off the water as needed, if any evaporates. In about one week, roots will form. At that point, you can plant the shoots.


How to Plant the Shoot in Soil


If you are rooting the shoots in soil (or soilless mix), have your pots prepared before you snip the shoots off the mother plant. You should use clean pots, filled with damp soil. You can use a pencil or other instrument of that size (like a dowel or wooden spoon handle) to create a hole that the shoot can be quickly popped into.


The All-Natural Fertilizer That Can Double Your Garden Yield!


Bury the stem of the shoot up to where you snipped off the bottom leaves. For about a week, keep the potted shoots in a warm and sunny (but not hot) location. Also, make sure to keep the soil or mix damp at all times, to keep the shoot alive and help the roots form.


If your mother plant came from a garden center or greenhouse and needs to be hardened off, then you should harden off the cuttings, as well. If your mother plant had already been hardened off, then it’s safe to treat your cuttings as being hardened off, too. And, in that case, it’s also possible to root your cuttings directly into your garden. Just take extra care to protect them from the sun if it gets too hot and to make sure they get sufficient water.


Starting tomato plants with cuttings is a lot faster than growing tomatoes from seed. It’s also a cost-effective way to get a number of plants from one larger plant. Additionally, it’s a way to grow tomatoes year-round, on a serious budget. If you root cuttings into pots in late summer, and keep those pots indoors, you will have producing tomato plants over the winter. Those indoor plants, in turn, can provide cuttings for new plants in the spring. In this way, you can keep cloning your favorite tomato plant for several growing seasons, for free.


Have you ever propagated tomatoes this way? Share your tips in the section below:

Sunday, April 23, 2017

6 Healthy Foods that Cause Inflammation

6 Healthy Foods that Cause Inflammation | raspberries-and-yogurt | General Health Special Interests


Most of us try to incorporate healthy foods into our diet. Lean proteins and healthy fats are good additions; added sugar, and processed foods are best avoided. Although the nutritional value of food, in that respect, is important, it’s also important to understand that different foods contain different compounds that can cause other results within our bodies beyond the typical conversion to energy. Specifically, inflammation can be caused by a number of foods. Although it may not surprise you to know that “unhealthy” food can cause inflammation, it might shock you to learn that a number of healthy foods can be inflammation-causing-culprits as well.


1. Yogurt


Yogurt is often thought of as a healthy breakfast option, and it certainly can be, but it’s important to check the label. Many yogurts are nutritionally equivalent to ice cream and full of fat with lots of sugar. Sugar can cause inflammation and other obvious health consequences such as weight gain. Choose a yogurt that doesn’t have added sugar. Greek yogurt tastes great and can be a good choice, although it tends to have less calcium. Also consider yogurts with probiotics, as these can have digestive benefits.


2. Tomatoes


What? Really? Well, sometimes. Tomatoes belong to a group of plants known as nightshades, which also includes white potatoes and red and green peppers. Tomatoes are a beautiful, delicious, and seemingly harmless fruit, unless you have a sensitivity to solanine. For those folks, eating tomatoes can lead to inflammation that makes arthritic joints sore, encourages the growth of tumors, and increases the risk of developing heart disease.


3. Wheat


It’s been hammered into our lexicon that wheat is the healthy alternative to white bread, and that can be true, but usually isn’t. Wheat comes with its own set of health concerns. Why? Because it’s been engineered that way. In an effort to increase wheat production, scientists have genetically modified the wheat we eat so that 5 percent of its proteins are completely unique. Consequently, this unnatural tampering with nature has resulted in many people suffering from wheat allergies and associated inflammation.


4. Citrus fruits


Most people don’t have a problem with citrus fruits; in fact, they enjoy their many benefits. However, for those who have what’s known as a citrus allergy, citrus fruits can cause inflammation and contribute to the development of chronic diseases. If citrus allergies affect you, try tart cherries instead, which have the highest anti-inflammatory content of any food, according to research from the Oregon Health & Science University [1].


5. Nuts


Nuts are full of good fats and can be one of the healthiest and most nutritious food choices available. But if you suffer from osteoarthritis, the histamine in nuts can actually attack your joints and cause painful inflammation. If you find yourself hurting while doing simple tasks after eating nuts, you may want to cut them out of your diet!


6. Rice


A number of varieties of rice are extremely healthy and offer many benefits. However, highly processed white rice, and refined carbohydrates in general, is void of nutrition and can cause inflammation since it quickly turns into sugar within the body.


References:


  1. Oregon Health & Science. Researchers say tart cherries have the highest anti-inflammatory content of any food. PR Newswire. 2012 May 30.

Saturday, April 22, 2017

6 Healthy Foods that Cause Inflammation

6 Healthy Foods that Cause Inflammation | raspberries-and-yogurt | General Health Special Interests


Most of us try to incorporate healthy foods into our diet. Lean proteins and healthy fats are good additions; added sugar, and processed foods are best avoided. Although the nutritional value of food, in that respect, is important, it’s also important to understand that different foods contain different compounds that can cause other results within our bodies beyond the typical conversion to energy. Specifically, inflammation can be caused by a number of foods. Although it may not surprise you to know that “unhealthy” food can cause inflammation, it might shock you to learn that a number of healthy foods can be inflammation-causing-culprits as well.


1. Yogurt


Yogurt is often thought of as a healthy breakfast option, and it certainly can be, but it’s important to check the label. Many yogurts are nutritionally equivalent to ice cream and full of fat with lots of sugar. Sugar can cause inflammation and other obvious health consequences such as weight gain. Choose a yogurt that doesn’t have added sugar. Greek yogurt tastes great and can be a good choice, although it tends to have less calcium. Also consider yogurts with probiotics, as these can have digestive benefits.


2. Tomatoes


What? Really? Well, sometimes. Tomatoes belong to a group of plants known as nightshades, which also includes white potatoes and red and green peppers. Tomatoes are a beautiful, delicious, and seemingly harmless fruit, unless you have a sensitivity to solanine. For those folks, eating tomatoes can lead to inflammation that makes arthritic joints sore, encourages the growth of tumors, and increases the risk of developing heart disease.


3. Wheat


It’s been hammered into our lexicon that wheat is the healthy alternative to white bread, and that can be true, but usually isn’t. Wheat comes with its own set of health concerns. Why? Because it’s been engineered that way. In an effort to increase wheat production, scientists have genetically modified the wheat we eat so that 5 percent of its proteins are completely unique. Consequently, this unnatural tampering with nature has resulted in many people suffering from wheat allergies and associated inflammation.


4. Citrus fruits


Most people don’t have a problem with citrus fruits; in fact, they enjoy their many benefits. However, for those who have what’s known as a citrus allergy, citrus fruits can cause inflammation and contribute to the development of chronic diseases. If citrus allergies affect you, try tart cherries instead, which have the highest anti-inflammatory content of any food, according to research from the Oregon Health & Science University [1].


5. Nuts


Nuts are full of good fats and can be one of the healthiest and most nutritious food choices available. But if you suffer from osteoarthritis, the histamine in nuts can actually attack your joints and cause painful inflammation. If you find yourself hurting while doing simple tasks after eating nuts, you may want to cut them out of your diet!


6. Rice


A number of varieties of rice are extremely healthy and offer many benefits. However, highly processed white rice, and refined carbohydrates in general, is void of nutrition and can cause inflammation since it quickly turns into sugar within the body.


References:


  1. Oregon Health & Science. Researchers say tart cherries have the highest anti-inflammatory content of any food. PR Newswire. 2012 May 30.

Thursday, April 20, 2017

7 Little-Known Tomato-Growing Tricks You Should Try This Year

7 Little-Known Tomato-Growing Tricks You Should Try

Image source: Pixabay.com


Tomatoes are one of those things that just about everyone – from the most novice of gardeners to the most experienced – likes to grow.


So, it’s no wonder that new varieties are constantly being bred and that everyone and their neighbor has advice on how to grow the biggest, juiciest and most delicious tomatoes on the block.


We have combed through the advice and found seven of the best tips for getting an amazing tomato harvest this year:


Tip No. 1: Choose indeterminate varieties


If you are growing tomatoes in a compact space such as an apartment balcony, then you may want to choose determinate tomatoes, as these plants are compact and will stop growing once fruit begins to appear.


But if you’ve got the space and you’re looking for a big yield, it is best to choose indeterminate varieties, as they will continue growing and producing fruit throughout the season.


Tip No. 2: Plant horizontally


Especially for the new gardener, this tip may sound counterintuitive. But whether you have bought a plant from a nursery or whether you are transplanting your own seedlings, tomatoes do better when they have been planted in the ground horizontally.


To do this, dig a shallow trench and lay the seedling on its side, covering up all but the top leaves. (Remember to strip off any leaves on the parts of the stem that you are burying.)


Following this advice will help your tomato plant develop a bigger root ball – and that means more tomatoes for you!


Tip No. 3: Side-dress with compost


Side-dressing is simply adding more nutrients (fertilizer or compost) around your plants. Once your plants start to flower, side-dress them with about two inches of compost and the next time it rains or when you water your plants, nutrients from the compost will be carried to the roots.


You can repeat this process every three weeks or so.


Tip No. 4: Use seaweed


7 Little-Known Tomato-Growing Tricks You Should Try

Image source: Pixabay.com


To be at their best, tomato plants require a lot of nutrients – and if you want to garden organically, then seaweed fertilizer is a good option. Seaweed contains nitrogen and many other important minerals such as iron, zinc and potassium. Fertilize your plants with a diluted seaweed or kelp solution every other week and it will help stimulate growth and fend off disease.


Seamazing: The Low-Cost Way To Re-mineralize Your Soil


Seaweed also can be used as a mulch near the bottom of your tomato plants. Keep in mind, however, that as it dries out it will shrink to about a quarter of its original size – so four inches of mulch will give you one inch once it has dried out. An advantage to using seaweed as a mulch is that because of its saltiness, it acts as a natural slug repellent.


Tip No. 5: Keep young plants warm


Tomato plants that are exposed to temperatures below 55 degrees Fahrenheit will not produce fruit. If you find you’ve planted your seedlings a bit too early, or if you get some surprise cool nighttime weather, protect your plants with row covers overnight until the weather warms up.


If you do not have row covers, you can improvise using some tomato cages and old blankets. Just be sure to uncover again in the morning.


Tip No. 6: Harvest regularly


The moment of truth in tomato gardening comes when the delicious fruit begins to ripen. Once it appears that you are close to getting a ripe tomato, check the vines every few days and harvest as necessary.


This will help your plants to produce higher yields because the plant’s energy will be focussed on producing new fruit rather than on tomatoes that are already ripe.


Tip No. 7: Rotate your crops


To help keep your plants free of disease, you should wait at least three years before planting them again in the same spot. Tomatoes can be rotated with unrelated crops like lettuce, beans and corn. They should not be rotated with other members of the nightshade family like potatoes, eggplants or peppers.


What tips would you add to our list? Share your thoughts in the section below:

Thursday, March 9, 2017

The Companion Plant You ALWAYS Should Grow Around Tomatoes

small farmWinter is nearly gone and gardening season is just around the corner, which means it’s time to consider what you might do similar and different from last year.


Author and expert gardener Sally Jean Cunningham has a suggestion: Try companion planting.


By planting unique combinations of vegetables, herbs and flowers, you can minimize pests and diseases – while boosting your garden’s yield!


Cunningham, author of “Great Garden Companions,” is the guest on this week’s edition of Off The Grid Radio.


She says the Native Americans’ “three sisters” method is just scratching the surface in companion planting.


Cunningham also tells us:


  • What always should be planted around tomatoes, potatoes and beans.

  • Why she doesn’t use traditional gardening methods when companion planting.

  • Which vegetables, flowers and herbs should not be planted close to one another.

  • Why she believes most bugs in the garden are actually good for vegetables.

Finally, Cunningham tells us about her favorite types of mulch — and most of them are dirt-cheap.


If you’re a gardener who can’t wait to get your hands dirty this spring, then this is one show you don’t want to miss!