Showing posts with label stockpiling. Show all posts

Monday, February 19, 2018

10 Stockpiling Tricks That Will Make Your Food Last Longer

10 Stockpiling Tricks That Will Make Your Food Last Longer

U.S. Air Force photo by Senior Airman Zachary Hada


You would think that stockpiling food would be easy, right? Just buy a bunch of food, stash it away somewhere where it won’t be eaten, and you’re good, right? Uh, wrong. Building a stockpile and making it last is a lot harder than it looks.


The basic problem is that food, as it grows naturally, isn’t intended to be stored for years. For that matter, food the way it’s package at the grocery store isn’t intended to last for years. The manufacturers of that food assume that you are going to eat their products within a few months — and they pack it accordingly. So, if you want to keep your food around longer than that, you’re going to have to do something with it yourself and not trust their packaging.


The good news is that people have been hoarding food for millennia. Preserved food has been found in the various tombs of the pharaohs, demonstrating that mankind has been preserving and storing food for much longer than we would expect.


Fortunately, you and I don’t need to make our food stockpile last for thousands of years. It behooves us, though, to make sure that we store our food as well as possible, ensuring that we will have something to eat when everything suddenly goes wrong.


Here’s 10 ways to make your food last as long as possible:


1. Rotate Your Stock


One of the easiest ways to ensure that your food stocks last is to borrow a page from the stores you buy your food in. They have a rule called “first in, first out.” This merely means that they sell the oldest first. You should use the oldest first. If you are stockpiling a year’s worth of food and you always use the oldest can, box or bag of a certain item, you’ll never have anything in your stockpile that’s more than a year old.


This is especially useful for things you use all the time, like spaghetti sauce. To ensure that you’re actually using the oldest first, make a habit of marking the month and year of purchase right on the label. That way, you have a quick reference and don’t have to try and remember which style label is older than which.


2. If It’s Wet, Can It


Canning is one of the most effective and long-lasting means of food preservation out there. So make good use of it. The basic rule of thumb is that if a food item is wet, it can be canned. So, start canning meat loaf, extra produce from your garden and the fish from your latest fishing trip. If canned, it can stay usable in your survival stockpile for years. Some canned foods that are over a century old are still edible and nutritious.


3. Salt Does More than Flavor


Salt is nature’s preservative. So is sugar for that matter, although we use salt for preserving more than sugar. Other than fruit, just about anything you are trying to preserve probably needs salt added. It doesn’t matter if we’re talking about canning food, dehydrating it, making your own cold cuts or smoking a ham; salt is the key to ensuring that bacteria don’t spoil your food.


4. Overdo it With Oxygen Absorbers


If you’ve heard about packing dry food in aluminized Mylar bags and five-gallon buckets, then you’ve probably heard about oxygen absorbers, too. These are added to prevent food from oxygenating and losing its freshness. But oxygen absorbers also make an inhospitable environment for bacteria and insects, both of which need oxygen. So, when adding oxygen absorbers to dry foods that you’re packaging for your stockpile, go for a bit of overkill. Don’t just use the minimum recommended; step it up a bit and ensure that the oxygen has really been absorbed.


More than anything, this is about ensuring that insect eggs can’t hatch, creating a population of insects inside your preserved food. Any insects which did manage to hatch from their eggs won’t be able to survive without oxygen.


5. Don’t Forget the Silica Gel


Few people mention it, but adding a packet of silica gel to dry foods when packaging them for long-term storage can help ensure that they stay fresh. These foods turn stale when they absorb moisture. While you probably already try to make sure that there is no moisture in the container, when packaging those foods, things can happen. The addition of a silica gel package can ensure that any moisture which does get into the package is absorbed by something other than the food.


6. Keep Track of it All


Make sure that you develop and keep a good spreadsheet of everything you’ve got in your stockpile. This should mention package size, quantity and the location or locations you have it stored. Always be sure to update your list. Don’t just have that spreadsheet on your computer, either. Print a hard copy and keep it in a notebook.


7. If You Use it, Replace it


This is one I have to keep after my wife about. It’s easy to just dig into your stockpile if you need something and pick an item without realizing it’s the last one. Make a note so that the next time you’re shopping, you can pick up a replacement and put it in your stockpile.


8. Keep it Cool


Heat will cause many foods to alter while stored. It speeds up chemical reactions and in extreme cases can slow-cook the food. Always try to keep your food stored in cool, dry places rather than in hot ones. The attic really isn’t a good place for food storage for this reason. You’re better off hiding it under the bed or putting it in the basement.


9. The Tougher the Better


When it comes to packaging, the tougher the better. Never settle for “just good enough.” Go for something that’s overkill. I can show you five-gallon bucket lids which have been gnawed through by rodents. Bacteria and insects aren’t the only things that want to eat your food stockpile; there are plenty of mice and rats in the world that would love to have a picnic at your expense, too.


10. Spread it Out


Whatever you do, don’t store all your food stockpile in one place, or even all of one type of item in one place. Let’s say that your basement is your main food storage area. That’s probably pretty good. But if your basement floods, you aren’t going to have access to that food. So, make sure that some of it is stored under the bed or in the upstairs hall closest.


For that matter, you should have one or two food caches off-site, as well. You never know what could happen. The people of Southeast Houston probably weren’t expecting to have to abandon their homes before Hurricane Harvey came along.


What advice would you add? Share it in the section below:

Thursday, October 12, 2017

15 Vital Items The Pioneers Stockpiled For Hard Times

15 Vital Items The Pioneers Stockpiled For Hard Times


We tend to think that stockpiling food and supplies for an emergency is a modern invention. But it’s not. It actually started thousands of years ago, with people stockpiling food for a snowy day. Those ancestors of ours knew something that most of us today have forgotten: the fact that winter comes every year and you can’t grow crops or hunt game very effectively when the freeze hits.


In fact, the earliest recorded instance of stockpiling is in Chapter 41 of Genesis, in the Bible. Joseph, a son of Abraham, correctly interpreted Pharaoh’s dream and instituted a system of stockpiling grain in preparation for the seven years of famine.


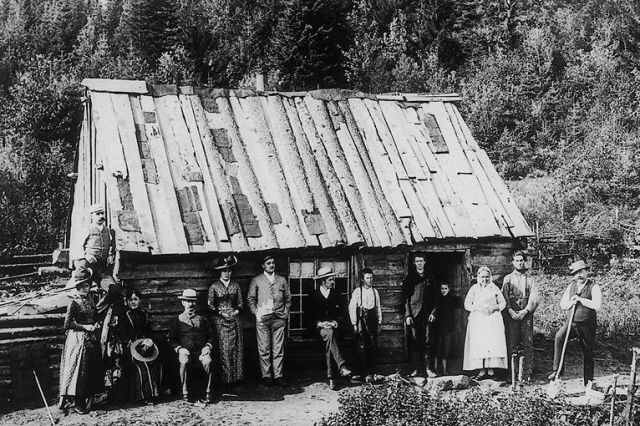
To the pioneers, stockpiling had to be a way of life. When Old Man Winter came to call, the only thing that would keep them alive was the food and fuel they had stored. If they were not ready, chances were that they wouldn’t make it through the winter.


Those who stockpile are returning back to the roots that our pioneering ancestors established, taking matters into their own hands.


So what sorts of things did the pioneers stockpile — and why did they stockpile them?


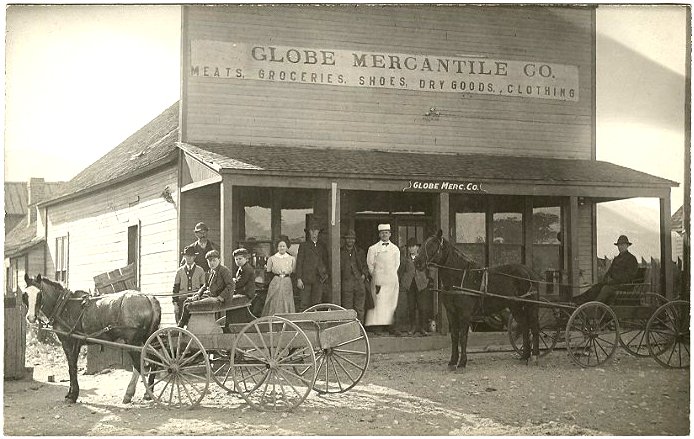
We can really break down the pioneer’s stockpiling into two categories — things that they bought and things that they raised, hunted, preserved or prepared themselves. The things from the store were precious to many of these people, as they didn’t have much cash money to spend. It was only when they sold a cash crop that they were actually able to pay off their account at the local general store and buy themselves a few new items.


Things the Pioneers Bought and Stockpiled


A trip to the general store was a big deal in those days and something that a pioneer might only do once a month, or less. It might be an all-day affair, which took time away from working the farm. Nevertheless, they had to make it to town once in a while for supplies, or they were stuck with living solely off the land.


1. Wheat flour and other grains


While many farmers raised grain, they usually didn’t eat their own. Their grain would be sold and then they’d turn around and buy flour and other ground grains from the general store. A few people would have their own hand-operated mills for grinding grains, but those were for grinding cornmeal, rather than flour.


Be Prepared! Store An ‘Emergency Seed Bank’ For A Crisis Garden


Going back in history, we find that grinding grain was a major part of a woman’s housework. In Medieval times, a woman might spend as many as six hours per day grinding grain so that she could make the bread of the day. Being able to buy ground wheat was one of the first true kitchen conveniences.


Bread was an important staple in the diet. It was a great source of carbohydrates, giving them the energy they needed to burn during the day. Of course, the breads they ate back then were very different than today’s, being much harder and heartier than our modern bread.


2. Baking soda


15 Vital Items The Pioneers Stockpiled For Hard Times

Artist: Jeremy Winborg


You couldn’t bake bread without baking soda, unless you happened to have yeast. Of course, many people made sourdough bread, always saving a bit of the dough to act as a starter for the next batch. But sourdough starter doesn’t work for biscuits, pies or bear sign (what they called donuts). So a stock of baking soda gave them much more variety in their diet.


3. Salt


Salt has always been highly valued. In fact, in the Roman Empire part of a soldier’s pay was given in salt. That became the root of the word “salary.” We need salt in our diets to survive, as well as to preserve meats. While some pioneers would harvest it themselves from salt licks, that only worked for those who had a natural salt lick on their property.


4. Sugar


While not an absolute necessity, sugar was an important item to stockpile. Not only is it used as part of the process of canning fruit, but even the toughest of cowboys and miners wanted a sweet treat every now and then.


5. Rice


Like grains, rice was an important staple for many people. But it wasn’t grown in many parts of the country, making it an item pioneers picked up at the general store.


6. Bacon


Bacon managed to become the default travel meat of choice in pioneering days. Cowboys would carry a chunk of bacon in their saddlebags, wagon trains carried it, and most families had a few slabs on hand. If you had bacon, you had meat to eat.


7. Coffee and tea


Who doesn’t like a good cup of coffee? Actually, coffee drinking in this country started with the Revolutionary War, in response to the Stamp Tax. Rather than pay the tax for British imported teas, many people switched over to coffee. Whereas before the revolution most people drank tea, after it the nation switched to coffee. By the time of the revolution, tea was mostly drunk only by the wealthy.


8. Dried beans


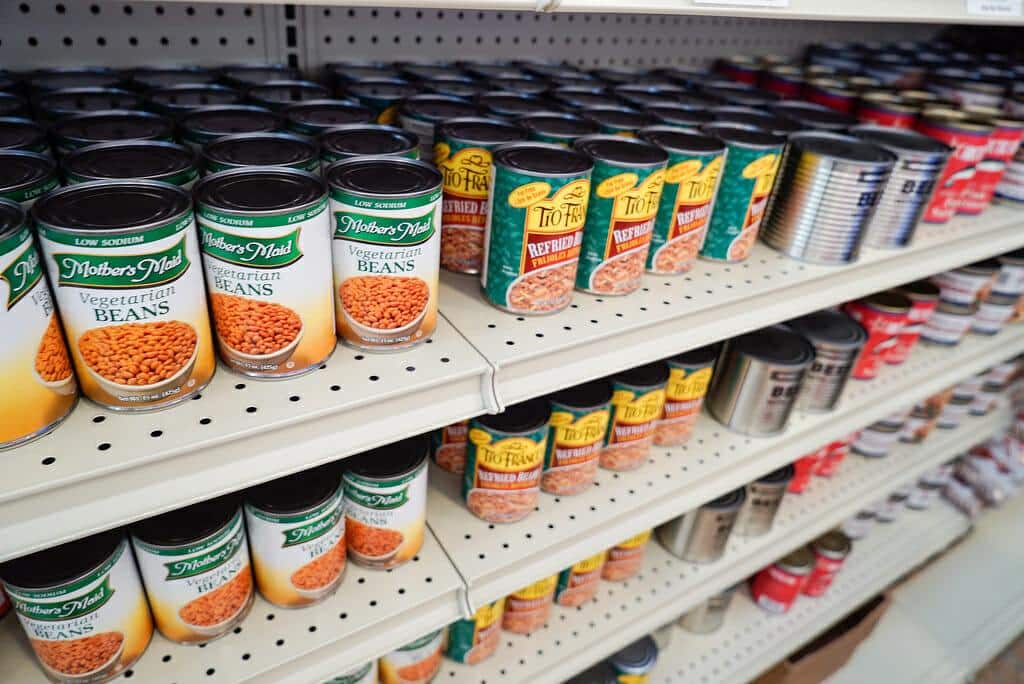
Just as it is for the average homesteader today, dried beans were a favorite staple for the pioneers. Chili con carne became a popular dish, starting in Texas and then moving north along the cow trails. Eventually, it was eaten all across the west.


Beans also could be eaten alone, or with tortillas. The Southwest culture had a strong Mexican influence, including the eating of refried beans as a staple. Many a meal was beans and biscuits or beans and bread. Even when they had meat, beans were often served on the side.


9. Dried and canned fruit


15 Vital Items The Pioneers Stockpiled For Hard Times Some people grew fruit. When they did, they’d can it or dry it. But not all kinds of fruit can be grown in all parts of the country. Besides that, not everyone was a farmer. The general store would stock dried and canned fruit, making it possible for people to buy these foods.


Since it kept well, dried fruit was another popular trail food, both for wagon trains and for drifting cowboys. It helped give variety to an otherwise dull diet, as well as providing them something sweet to eat.


Things the Pioneers Grew, Hunted, Preserved and Prepared


Many pioneers were involved in farming and ranching. Those who were grew as much of what they ate as they could. Since cash money was so rare, being able to hunt, gather or grow your own food was a real advantage. Even townspeople would have a garden patch behind their homes, growing their own vegetables and herbs.


10. Smoked meats


One of the signs that you’d “made it” was to have a smokehouse on your property. While the ability to smoke your own meats was incredibly useful, not everyone could afford the time or expense to build one. Those who could were usually well-established families who already had their homes and barns built. By then, they were producing enough that it was worthwhile to be able to smoke meats when it was time to slaughter a cow or pig.


11. Jerky


The pioneers learned how to make jerky from the Native Americans. While smoking was great, not everyone had a smokehouse. Plus, jerky lasts longer than smoked meats and is much more portable. Drifting cowboys and other travelers would often take jerky along just to ensure they had some meat to eat. A few strips of jerky and a couple of campfire biscuits made a pretty good lunch in the saddle.


12. Corn


Many pioneers grew their own corn, even if it was just enough for their family. They might grow wheat or some other grain for sale, but they’d put in a small patch of corn, as well. That corn was usually dried and kept for making cornmeal.


13. Vegetables


15 Vital Items The Pioneers Stockpiled For Hard TimesA vegetable garden alongside or behind the house was almost a requirement for pioneer families. Without it, their food would be bland and repetitive. Not only did they grow their own veggies, but their own herbs, as well.


Most vegetables were harvested and kept in a root cellar, not canned. Canning required owning a goodly supply of canning jars, something that most people didn’t have. It wasn’t until later, when towns were well-established and trade was more regular, that canning jars became common in the west.


14. Feed for the animals


Anyone who had animals had to consider their needs. Whether horses, cows or chickens, they were a valuable part of the homestead and needed to eat. Just like the family would stockpile food to get themselves through the winter, they’d stack hay and other feed for their farm animals.


Most hay was cut from wild grass growing near the farm. It would be cut by hand with a scythe and stacked in towering haystacks for the winter months. Some farmers who had larger barns with lofts would stack the hay in the loft. But that required hay bales, which meant having the equipment for baling hay. So that only happened in well-established areas on well-established farms.


15. Firewood


The only heat that most homes had was from the fireplace or wood-burning stove. That created the need for a wood pile, which was started in the spring so the wood could dry through the hot summer. In some places, they would stack their wood to act as a defensive breastwork for the home, giving themselves a good firing position for any attacks from Native Americans.


What items would you add to our list of what the pioneers stockpiled? Share what you know in the section below:

Harness The Power Of Nature’s Most Remarkable Healer: Vinegar

Monday, September 25, 2017

10 Often-Forgotten Items You Better Stockpile For Winter

10 Often-Forgotten Items You Better Stockpile For Winter

Image source: Pixabay.com


The sun is beating down, it’s somewhere around 80 degrees in the shade, there are hot dogs and fresh corn-on-the-cob corn on the grill, and the kids are splashing around in the pool. What time is it? It’s time to start stockpiling for winter, of course.


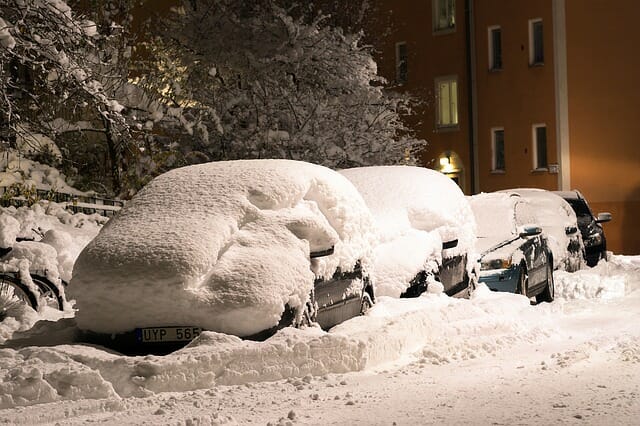
Even though it seems like snow and cold are in the far-distant future, there is no better time to start collecting necessities for winter than right now. By “winter necessities,” I do not mean items which are specifically related to weather, like snow shovels and roof rakes and sidewalk salt and windshield scrapers or winter clothing like sweaters and hats and mittens and boots. Although I would never discourage you from acquiring any of those things now if you can, there might not be adequate selections in stores quite yet.


I also am not referencing food. Most of us who are either off-gridders or homesteaders or preppers—or some combination of all three—keep a pretty good stockpile of food most of the time. In fact, canning garden produce and making big batches of cheese to put in the freezer are probably a couple of the activities we’re doing while the kids are swimming.


And even those who do not raise and preserve their own food often keep the larder full of store-bought non-perishables like grains and pasta and dry beans and canned goods. If your supplies of food are low right now, however, this is definitely the time to build them back up.


Water, too, is something that many people store all year long. But those of us who live out in the country know there is a greater chance during winter of being either without power or holed up at home during inclement weather, and recognize the need for storing water for other reasons, as well. I keep a couple of five-gallon jugs full of tap water on hand at all times—it’s nothing I would want to drink unless I absolutely had to, but it would work great for flushing toilets and other general household needs. But in winter, I double that amount, just because.


Are Your Prepared For A Downed Grid? Get Backup Electricity Today!


What I do recommend that you start stocking up on now are basics that you use both year-round and in winter. Here are a few ideas to get you started compiling your own list of needs:


1. Medications, both prescription and over-the-counter. If your life and well-being depend upon having access to medications, then you want to plan well in advance for possible foul weather to avoid being without them. It is also a good idea to go through the medicine cabinet and replenish regularly used items such as aspirin and cold treatments, replacing expired meds as necessary.


2. First-aid supplies. Bandages, first-aid creams and ointments, hot packs, and any other supplies that your family uses should be sorted through and stocked up before winter.


3. Batteries. Don’t wait until the weather turns ugly to check the battery supplies. Whatever you use them for—flashlights, lanterns, radios, smoke detectors or other needs—there will never be a better time than now to stock up.


4. Diapers. If someone in your house wears diapers, don’t risk running out. Nobody will be happy if that happens.


10 Often-Forgotten Items You Better Stockpile For Winter

Image source: Pixabay.com


5. Toilet paper. This is something that’s so easy to overlook, but so difficult to live without. Make sure you have enough on hand to see you through at least one snowstorm and two trips to the store without remembering to buy it.


6. Paper towel. If you use it, get it now. This goes for other everyday disposable products, too.


7. Hygiene supplies. While having soap and shampoo and conditioner and hand lotion and deodorant might not be at the top of everyone’s survival list, running out of whatever toiletries you are accustomed to using could be unpleasant. And chances are good that winter will bring about more inconvenience than true crisis—and by that I mean that while a half inch of freezing rain on the roads might not be the end of the world, it is enough to make you wish you had not run out of shampoo and were stuck with the choice of whether or not to risk driving on ice to go get some. Don’t forget to stock up on feminine hygiene products, too.


8. Laundry and cleaning supplies. As with personal hygiene items, having fabric softener on hand may not make a difference if anything truly catastrophic happens. But having clean clothes and housework done without having to go out in nasty weather will make life easier.


9. Pet food. This is another item which is easy to forget but important to have on hand. If you have pets, you know you won’t want them to go hungry.


10. Miscellaneous household and vehicle supplies. Different families have different needs, so your winter must-have list might look nothing like mine. Antifreeze, boot waterproofing, snowshoe bindings, long matches for the fireplace—evaluate your own needs, and stock up now.


Why is stocking up specifically for winter so important? Some items are more crucial in winter than during warmer months. Others are more likely to be used up when the weather is cold, and therefore there is a greater need for stockpiling. And some things are just so essential that you do not want to risk running out in the middle of a blizzard.


But why worry about it now? Remember that stocking up on many of these items can run into some money, and could be enough to put a strain on some households’ budgets if saved up and bought all at once. It’s easier to start well ahead of time and spread the costs out over multiple months. And people are so busy that last-minute tasks can steamroll right over them.


Planning ahead and anticipating potential needs are always prudent, and never more so than when dealing with household winter preparedness.


What items would you add to our list? Share your advice in the section below:  
Monday, September 11, 2017

15 Stockpiling Mistakes That Even Smart People Make

15 Stockpiling Mistakes That Even Smart People Make


No. 1. Careless packaging and storage


Careless packaging and storage will give you an inefficient and potentially unusable stockpile. You must protect your stockpile from pests, temperature extremes and humidity. The basement or cellar is an ideal spot for stockpiling because of moderate temperatures. Use airtight and waterproof packaging for long-term storage items (5-gallon buckets, jars, metal trash cans lined with food safe bags).


Keep an inventory checklist for efficient storage. Too much of one item will waste space and you won’t be able to rotate fast enough before expiration. Know the limits of your storage space, and make the most efficient use of it with an inventory checklist.


No. 2. No variety


Does your stockpile consist of a few foods and not too much variety? It’s a mistake to stockpile a narrow selection of foods. Your stockpile needs to have a variety of food groups, and a variety of ingredients for the meals and foods you currently eat week in and week out. A balanced diet to meet your nutritional needs is a varied diet.


No. 3. No flavor


Food without any flavor is a stockpile mistake. Do not overlook the importance of salt, sugar, herbs and spices, and condiments like lemon juice, ketchup, mustard, mayonnaise, relish, chili powder, hot peppers and even capers. Do you use onions and garlic? Look for powdered versions and see if those also work. If you use it now, you should stockpile it.


No. 4. One at a time


Are you really going to stockpile only one item at a time before moving on to the next item? This sounds efficient and well-planned, but it is not ideal at all. What if a situation occurs before your stockpile is finished? You might have plenty of one or two items, but not much else.


Bugging Out? Get The Essential Survival Secrets of The Most Savvy Survivalists in the World!


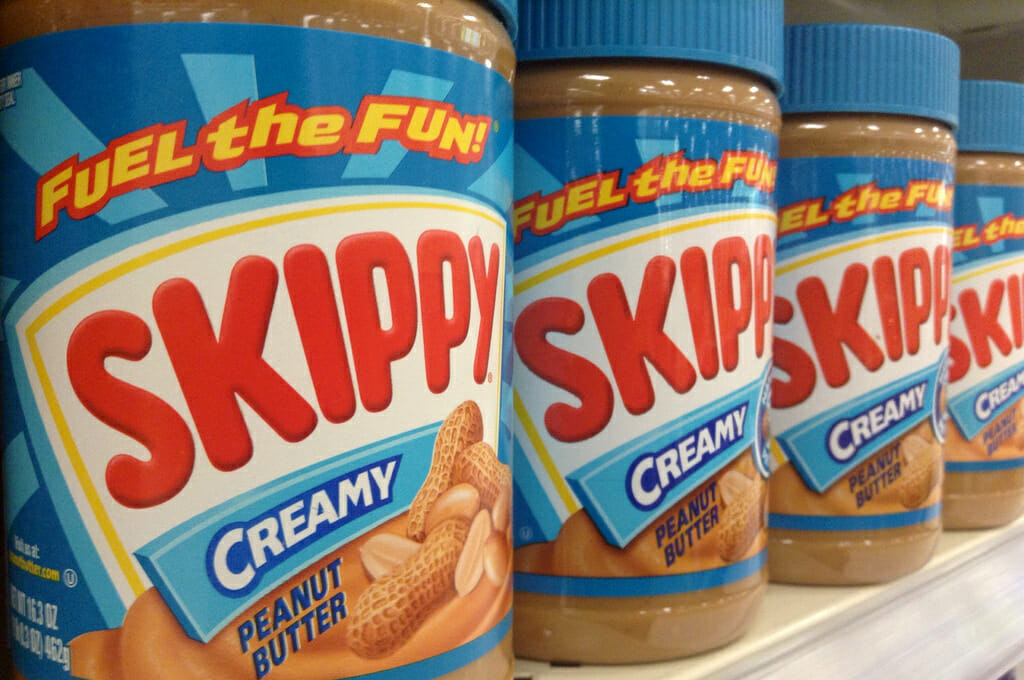
Each grocery trip, buy several different things to stockpile: a jug or two of water, a jar of peanut butter, and then a mainstay dish ingredient or two.


No. 5. Static stockpile


Your stockpile is aging past the point of use if you keep a static stockpile. For a well-planned and efficient stockpile, you rotate items out that are nearing expiration, and replace with new items. Most people do this by filling their cupboards from their stockpile, and then grocery shopping to replenish the stockpile (instead of grocery shopping to replenish the kitchen cupboards).


No. 6 Unfamiliar foods


Storing unfamiliar foods is a mistake. If you don’t know how to prepare it, learn how to and try it before you stockpile it. Analyze your actual use of foods and use your current use as a guide of the best foods for most if not all of your stockpile.


No. 7. Skipping small items with big impact


If you haven’t tracked your current use of items, you might be overlooking small items with big impact. You may have plenty of flour and beans and rice, but what do you actually need to make something with those? You need yeast and baking soda and powder, and you need oils. What about toiletries? You may have soap and toilet paper stockpiled, but have you tracked your family’s actual use of toiletry items? If not, you’re almost certainly missing something important. Take stock of your current use of groceries and toiletries so you don’t overlook small items with big impact.


No. 8. Expecting kids to adapt quickly


If you have kids, you probably know that expecting younger children to adapt quickly to new foods is asking for a hard time. Make things a little easier for them and for you by planning and including some foods tailored to children’s tastes.


No. 9. None of your stockpile foods are “easy”


Speaking of adapting and easy, it’s a big mistake to not have at least a few “easy” foods in your stockpile. Easy foods do not require a lot of effort to prepare, and should be familiar. In times of stress, transition, and new situations, having easy-to-prepare and easy-to-eat familiar comfort foods is a big advantage. With a few easy foods, you can focus on the situation at hand (whatever it may be) instead of having to focus food preparation.


No. 10. You only stockpile food


Not stockpiling anything but food is a mistake. You also need a full tank of gas, a full tank of heating fuel, and an alternate source of heat in a cold climate. Do you have a good first-aid kit? Do you have two or more ways of starting a fire and kindling? Is your woodpile ready? What about pet food? Do you have non-electric cooking equipment, can openers, trash bags, soap, toilet paper, toothpaste and extra toothbrushes? Don’t forget medications! Longer term items to consider: fresh canning lids (these are not reusable). Bleach. Hunting and fishing equipment.


No. 11. Everyone knows your stockpile


Your stockpile is an asset. You are storing a commodity in your home. Your stockpile today may not make you a target for thieves, but keep in mind that that the value of your stockpile may change under different circumstances. Today, you may feel secure talking up your stockpile. Tomorrow, your stockpile may be more valuable than cash. Is it wise to talk about storing a huge amount of cash in your house? Would you want many people to know? Be discreet.


No. 12 .You aren’t adding skills


Are you overlooking the importance of skills, knowledge and training? Brush up on first-aid classes. Learn about wood stove heat. Assess your skills in gardening, canning and preserving foods, and hunting and fishing. Can you navigate through rough terrain? Inventory your skills, and make plans to add to or improve your skills over time.


No. 13. Your stockpile is in one place


Storing everything at home, in one location, and not making a plan for mobility from home is a big stockpiling mistake. You need some supplies in your car and at work so they are accessible when you are not at home. You should have warm clothes, sturdy walking shoes, a flashlight, food, water, and a good first-aid kit near you when  traveling or at work. This could be as simple as storing these items in your vehicle and at work.


No. 14. Your stockpile isn’t tested


If you aren’t testing your stockpile, you are making assumptions that it will work as planned. Assuming is a mistake.  Do not assume your generator will fire right up, or that your private well or municipal water and sewer will work in a power outage. Have a hand pump? Have you not tested it recently? Don’t assume you’ve calculated the correct quantities without a trial run. Don’t assume, period. Always check and test.


No. 15. Not adapting


Don’t make the mistake of complacency. Remember that “the only constant is change.” Beginners may underestimate how much water or food to stockpile, or miss signs of pest damage. More advanced stockpilers may test their stockpile once or twice and then let years go by (and circumstances change enough to cause a potential problem that an interim stockpile test would have caught). Complacency will lead to failing to plan ahead sufficiently.


What would you add to our list? Share your tips in the section below: 

Monday, August 28, 2017

65 Essential Items (Other Than Food & Water) You Better Stockpile

65 Essential Items (Other Than Food & Water) You Better Stockpile

Image source: Pixabay.com


Many stockpiles focus exclusively on food. But it’s important to plan for the non-edible items you need to store.


Use this checklist of more than 65 non-edible essential stockpile items to make sure you haven’t missed something important.


We’ve split this list into three main categories: cooking supplies, shelter supplies, and personal comfort.


Cooking & Kitchen Supplies Checklist


These cooking and kitchen supplies are needed for food preparation, meal cleanup and food storage:


Dish soap, paper plates and disposable utensils, paper towels (using disposable items saves water, which may be a concern during a crisis), garbage bags, and freezer bags of various sizes are good items to store. Also consider food-grade buckets, can openers, charcoal and lighter fluid, and or one or more means of cooking food, whether that’s a propane fired generator or a propane fired grill or a wood stove. You also may need a knife sharpener. Also include hunting and fishing equipment.


Shelter Supplies Checklist


Shelter supplies are needed for heat, light, repairs, sheltering in place, and items that make a structure livable.


Get Backup Electrical Power In A Convenient, Portable Briefcase!


Heating: You need a source of heat in cold months. First, a supply of heating fuel (is your fuel tank full?). If you have a generator, you need a full tank of fuel to power that, too. If you don’t have a generator, you need a non-electric source of heat, such as a wood stove, and the wood, kindling, and newspaper needed to start a fire. Wood takes time to season, so do not assume you can just chop down a tree and get ready to use firewood. A fresh chopped tree is green wood, and green wood does not burn well.


Light: If the electricity goes out, you need candles and flashlights (and matches/lighters and batteries). It’s fairly easy to get solar power and battery setup to power lighting (heat and appliances are more difficult and expensive), which means you could save on your electric bill now and be prepared while having to store fewer flashlights and candles.


Additionally, evaluate your water supply and what you need for short- and long-term water supplies. Unless you have an artesian spring, your water supply likely depends on electricity (such as either a well pump or municipal water treatment plant). Store a supply of water, or have the knowledge and know-how to get water from a well without electricity.


Every home should have a supply of nails, screws and the basic tools for repair (a hammer, a screwdriver set, a set of socket wrenches, a measuring tape, a hacksaw, a wood saw, and a pipe wrench are the bare-bone basics). Other supplies to have on hand: duct tape, staple gun and staples, and plastic sheeting.


Think you can remember everything, all the time? Maybe not, so get a supply of pens, pencils, paper, and a pencil sharpener.


A washtub, washboard, laundry soap, clothesline and pins: These could go in the next category of health and personal comfort, but laundry and washing is so tied to home and water that it’s in this category.


Before we move on from shelter supplies, you should add the following supplies to your car or garage: a 5-gallon container to store gas, a length of tubing to siphon fuel, and a real spare tire instead of the donut that’s probably in your trunk.


Health and Personal Comfort Supplies Checklist


Health and personal comfort supplies cover everything from toilet paper to an upgraded first-aid kit. Get a good kit, or upgrade the basic first-aid kit you have with compression bandages and QuikClot (lifesavers in the event of heavy bleeding and NOT in the standard first-aid kit), real scissors, real tweezers (the plastic ones in most kits are a joke), antiseptics like peroxide and rubbing alcohol, splints and ace bandage.


Have a supply of your essential medications and the standard medicinal items like aspirin, fever reducers like Tylenol, electrolyte solution, and cough medicine.


Soap, bleach and hand sanitizer are important items to store, as are toothbrushes, toothpaste, and diapers if any of applicable age in the house. Don’t forget to consider the needs of children and  elderly relatives (both may need diapers). Extra towels (see laundry in the above category), blankets and sheets are always good to have.


In conclusion, there are many stockpile supplies that you can’t eat, but you really need.


What would you add to our list? Let us know in the section below:

Friday, August 25, 2017

Stockpiling 101: What To Buy & How To Store It

Stockpiling 101: What To Buy & How To Store It

Image source: Pixabay.com


Are you thinking about starting a food storage stockpile but you aren’t sure where to start? Do you want to stop stocking up on supplies – hurriedly — in advance of severe storms? Are you just beginning to store extra food, but you aren’t sure if you’re doing it right?


If so, then read on. We’ll tell you what to buy, how to get good deals, and ways to store extra food so you are prepared to shelter in place with plenty of supplies on hand.


Slow and Steady Wins the Race


How to best stockpile? Slowly and steadily is the best way to build a food supply. You don’t want the large expense and rush of trying to get everything at once. In addition, building a food supply gradually gives you the advantage of personalizing your plan, and adjusting for things you may have missed when you initially began.


How should you start the stockpile process? First, think about the meals you consistently prepare week in and week out. These meals and dishes are your mainstays, or simply the foods you and your family are accustomed to eating and that you know and like. When you are first beginning to stockpile, you should first stock up on these familiar ingredients to prepare your mainstay dishes. With a supply of these foods always on hand, you will be well-prepared in the event of a storm without having to make a rushed and crowded grocery run.


We’ll go into more detail about what exactly to buy below, but you should start by picking up a few items each week with your regular grocery runs. Initially, these extra items will be foods you already eat and like and use to prepare the mainstay dishes we talked about above. With a few items each week, you will build a supply of food that will last a week, and from there you can carefully and gradually double that to a two-week supply. Once you have a two-week supply of food, you will repeat the process until you again double and have enough of a supply to last a month, then two or three months. Step by step, week by week, you will gradually accumulate a stockpile to tide you through potential shortages.


Don’t Put all Your Eggs in one Basket (Diversify)


You might see suggestions to stock up on one item at a time; for example, to start with water and to stockpile only water until you have your supply of water all stored. This sounds efficient and well-planned, but it is not ideal at all. What if a situation occurs before your stockpile is finished? You might have plenty of water or flour, but not much else. It is better to buy a few different items at one time. Do not stockpile “one item at a time.” Instead, buy several different things: a jug or two of water, a jar of peanut butter, and then a mainstay dish ingredient or two.


Just 30 Grams Of This Superfood Provides More Nutrition Than An Entire Meal!


Water can be tricky to store. Evaluate whether you have a dependable source of water, and if you don’t, you will have to stockpile water in containers, and/or water filtration or treatments to make water from natural sources drinkable or potable (drinking untreated water from a river or a stream can make you seriously ill).


Practice Makes Perfect: Use Your Stockpile


Stockpiling 101: What To Buy & How To Store It

Image source: Pixabay.com


Yes, we really mean it: You need to use your stockpile. It might go against your instincts, but incorporating your stockpile into your meal preparation is important because when you eventually build a longer-term stockpile, you will go shopping to replenish your stockpile, not your cupboards. Why? All foods have a shelf life, and many have an expiration date. If you don’t use the items from your stockpile, it will (at some point) age past the point of use. You don’t want a stockpile of expired or ancient food. By incorporating items from your stockpile into your daily or weekly meals, you will keep the items in your supply fresh. This is known as “rotating” your stockpile — pulling older items out for use, and then shopping to replenish them. This is also why you should take a close look at whether MRE (meals ready to eat) rations and types of stockpiles really suit your purposes. They do expire, and unless you actually use them on a regular basis, you may find yourself one day with very expensive and totally inedible food.


As you use your stockpile and replenish it, take notes of items you are using the most to prepare meals. If there are items you use that you are not yet stockpiling, then add those items to the extras you pick up on your grocery runs.


What to Buy


As mentioned above, focus first on the ingredients needed to prepare your mainstay dishes, plus water. Other good staples to consider are:


  • Grains such as pasta, rice, & oatmeal

  • Peanut butter

  • Crackers

  • Cereal

  • Nuts and trail mix or granola bars/power bars

  • Dried fruit

  • Tuna fish

  • Canned soups

  • Canned vegetables

  • Vinegar, oil, mayonnaise, salt, seasonings

  • Water in containers and/or water treatments

Also, consider paper goods, food packaging, garbage bags, dish soap, personal toiletries and an upgraded first-aid kit and offline reference materials and skills.


How do you get the best deals? Conserving resources is important, so try to shop any deals that you spot. If there’s a sale on items you regularly use, then pick up one or two extra for your stockpiled food supply. Research whether coupons or buying in bulk for some items makes sense for your particular situation. Break down the cost per item by dividing the total price by the number of items to see if you are actually getting a deal buying a larger quantity.


Ways to Store Extra Food


The trick is to have your stockpile easily accessible so you can rotate items. You also need to protect your stockpile from pests, temperature extremes and humidity. Many people find that the basement or cellar is an ideal spot for stockpiling, using shelves or airtight and waterproof packaging (5-gallon buckets, jars, metal trash cans lined with food safe bags).


You also can add space to your cupboards by getting risers to create another level inside the cupboard, or racks to store items behind the cupboard door itself (take time to make sure your cabinets are securely fastened to the wall before adding the extra weight of canned goods). Consider extra unused or underutilized space in closets, under the bed, or in the back of deep kitchen cupboards. Are you storing empty suitcases? Why not fill those with food since they are taking up space anyway? Create shelving in odd spaces such as under stairs or above the clothes washer and dryer, or around the top edge of a garage wall.


So you see, it’s not hard to find and store items for your own stockpile. You can take the first steps to build a food stockpile easily and gradually during your weekly grocery shopping so that you can weather an emergency without having to make any runs to the grocery store.


What advice would you add? Share your tips in the section below:    

Saturday, July 29, 2017

How To Build A Long-Lasting Bargain-Priced Stockpile At The Dollar Store

How To Build A Long-Lasting Bargain-Priced Stockpile At The Dollar Store

Image source: DailyFinance


With many Americans and homesteaders living from paycheck to paycheck, it’s often hard to find the extra money necessary for stockpiling.


One great help is the local dollar store. While not everything in the dollar store is actually cheaper than it is in big box stores, there are some things that are significantly less expensive. The trick is to do your research and know how much the same or comparable item costs elsewhere.


I recently took a run through a couple of my local dollar stores just to see what I could find. Here’s the smart buys I spotted:


1. Cardboard boxes for the fire


I’ve found the local dollar stores to be the best source of cardboard boxes. Many of their products come in low-quality cartons, which are actually better for my purposes than the rugged ones. Shredded and soaked in water, they can be compressed into bricks in a homemade mold, just like newspapers. This is a cheap way of coming up with fire-starter or fuel for your fireplace or wood-burning stove. The store may even thank you for hauling them off.


2. Anti-bacterial hand cleaner


I’m a big believer in anti-bacterial hand cleaner as a survival supply. In a situation where water may be at a premium, washing your hands before eating may seem like a luxury. But it’s much more than that; it’s a means of helping to halt the spread of disease.


The Quickest And Easiest Way To Store A Month’s Worth Of Emergency Food!


If there’s not enough water around, then anti-bacterial hand cleaner may just be the way to go.Personal hygiene supplies


3. Personal hygiene supplies


Some personal hygiene supplies are much cheaper at the dollar store, especially when you buy their brand. I was shocked to find razor blades for about a third of the price they are in other stores. Granted, they don’t have a brand name on them, but they still work just fine. Another good find was toothbrushes. You can buy packs of cheap toothbrushes and similar personal care supplies cheaper at the dollar store than anywhere else.


4. First-aid supplies


Some dollar stores have a fairly good collection of basic first-aid supplies, especially adhesive bandages and medical tape. I was even able to find knuckle bandages in one local store, much to my surprise. First-aid supplies can be rather expensive, so it’s nice to find them at a low cost. I do suggest you buy a test box so you can try the bandages before stocking up. Some of those bandages don’t stick all that well.


5. OTC medicines


How To Build A Long-Lasting Bargain-Priced Stockpile At The Dollar StoreI think the dollar store is the only way to buy antihistamines, decongestants, cough drops and other over-the-counter medicines. These are generic products, which means that they are made of the same ingredients as name brand ones. But they are not made to such exacting standards. In other words, if something is supposed to have 50 mg of the active ingredient, the generic brand might have slightly less of that amount. But that’s close enough that it will still work just the same.


6. Duct tape


You can buy duct tape pretty much anywhere, and I try to buy the best. But there’s one thing I’ve found about dollar store duct tape that’s unique; they sell little rolls of it, rather than the big ones. Those little rolls are much better for survival kits.


7. Plastic dishes and cups


I’ve found some great survival gear in the kitchen section of the dollar store. They have cheap plastic bowls, cups and plates, which are perfect for camping as well as survival.


The World’s Healthiest Survival Food — And It Stores For YEARS and YEARS!


They also are the cheapest place around to buy Nalgene water bottles, which is what everyone recommends using instead of the cheap water bottles that you buy bottled water in. Nalgene doesn’t release chemicals into the water.


8. Plastic storage containers


I’m a big fan of storing my survival supplies in plastic bins and even plastic food containers. I live near the Gulf of Mexico, so one of the survival scenarios that is central to my planning is hurricanes. Storing things in plastic bins makes it water repellant and can even help it float. That helps protect my food and other supplies in case we have flooding.


9. Food


Buying food at a dollar store is a bit of an iffy proposition. There are some products which are the same as you buy in the grocery store and others which are off brands. Some of those off brands can really taste kind of off too, in my opinion. But one thing I’ve found is that dollar stores tend to have pre-packaged meals or main courses, which don’t require refrigeration. These are usually very hard to find and make great survival food.


What would you add to the list? Share your advice in the section below:

Discover The Secret To Saving Thousands At The Grocery Store. Read More Here.

Monday, July 10, 2017

What Is The True Shelf Life Of Store-Bought Canned Foods?

What Is The True Shelf Life Of Store-Bought Canned Foods?

Image source: Flickr / Creative Commons


Have you ever wondered how long store-bought canned good will last in your stockpile? Professional food processors and manufacturers have both the equipment and knowledge to properly preserve food — plus the tests and inspections from the federal government.


However, most canned foods are packed in water. That makes a big difference. Water or any other liquid can potentially become a petri dish for future bacterial growth. This is especially true for home canning, but we’ll get to that later.


pH 101


pH is a measure of the acidity or alkalinity of any food. Foods with a higher acidity (measured on the pH scale as between 4 to 6) form a natural barrier to bacteria and require simple processing and less processing time, but the acids can quickly compromise the integrity of a can or jar lid and the food itself. These foods include:


Juices (tomato, orange, lemon, lime and grapefruit); tomatoes, grapefruit, apples and apple products like apple sauce, mixed fruit, peaches, pears, plums, all berries, pickles, sauerkraut; foods treated with vinegar-based sauces or dressing like German potato salad and sauerbraten.


Quite often, these kinds of canned goods will have a white plastic coating on the inside of the can to prevent corrosion.


Are Your Prepared For A Downed Grid? Get Backup Electricity Today!


Foods with a high level of alkalinity (measured on the pH scale between 8 to 10) require more complex processing under pressure and longer processing time, but those robust processing steps actually add to the shelf life with no danger of internal acidity compromising the can or lid on a glass jar. These foods include:


Canned meats, poultry, stews, soups except tomato, pastas in sauce, potatoes, corn, carrots, spinach, beans, beets, peas and pumpkin.


What becomes clear is that you can’t lump all store-bought canned goods together in your storage area with long-term food products and assume all be well. You’ll have to separate them and write on the label or can the purchase date and the shelf-life. In fact, you should do this with all food stores, including long-term foods and most definitely with any home canning.


What About Expiration Dates?


Are expiration dates for real? Yes and no, Even the USDA says that expiration dates are suggestions or recommendations rather than a hard-and-fast rule or deadline. The reason is that so many factors can affect the shelf life of food. In fact, the dates on packaged goods aren’t referred to as expiration dates but “sell by” or “best by” dates.


Even then, some products don’t have any of these dates but instead a cryptic combination of letters and numbers. These are usually codes to indicate the point of origin for a particular product in the event of a recall.


The other truth is that a product does not suddenly go bad when it reaches its “best by” date. In fact, many canned goods are edible and safe for years after a “best by” date if stored properly. But be careful out there.


Several factors affect the storage of foods:


The temperature that any food is stored at is the most critical factor impacting shelf life. The standard recommendation is a temperature between 50 and 70 degrees Fahrenheit for canned goods. The lower the better, but don’t go below freezing; also, any canned food stored at or above 85 degrees Fahrenheit will quickly degrade and potentially become unsafe to eat


Temperature Extremes


Variations in temperature in an environment where you are storing any food is perhaps the greatest threat to shelf life. This is particularly true if any food goes through a pattern of freezing and thawing over a period of months or even years, and the freezing can complicate things, given that most canned food is preserved in water. The end result is often a tasteless mass of grey mush in a can bursting at the seams. Bulging cans are also a sign of bacterial contamination.


That’s why storing any food in an attic space, an unheated or unventilated garage or any other area subject to winter/summer temperature extremes is a bad idea. A root cellar is fairly stable, and a home basement, as long as water or moisture are properly managed, is fine, too. A dedicated pantry also works, and it may encourage you to engage in a recommended practice for food storage.


Eat What You Store!


“Eat what you store and store what you eat.” This is a very good idea, but I must admit I have a hard time doing it with long-term food storage. Long-term foods are usually dried foods in big, No. 10 cans, and my kitchen pantry only has so much room. I do have a No. 10 can of macaroni and a No. 10 can of cheese powder on the bottom shelf in the pantry, but that’s because my kids eat mac and cheese like wolverines.


On the other hand, I’m not real anxious to use taco flavored TVP (textured vegetable protein) as an everyday food on my tacos when I can still get a pound of ground beef and taco seasoning at the grocery store. And that starts to point to the desire to supplement long-term food stories with grocery-store canned foods.


Here’s six things to watch for when purchasing canned goods from the grocery store:


  1. Don’t buy or store a dented can. It’s more likely to be exposed to air, and bacteria will soon follow.

  2. Check any can or jar lid for corrosion. If you can wipe it off you may be okay, but you should probably toss it.

  3. If a can is bulging or the contents spurt out when you open it, stand back and put it into a double plastic bag and get rid of it. That could be sign of botulism and it could kill you if you consume it.

  4. Smell the contents after opening. If you detect any kind of off-odor, throw it away.

  5. Observe the color. Are the orange peaches a pale yellow? Are the dark, red kidney beans a shade of grey? It may be okay to eat, but boil it first.

  6. Boil all canned goods if they have been stored for a long time, and then smell and taste afterward. Acid foods should be boiled for 10 minutes and alkaline foods for 20. This will kill most residual bacteria, but will probably not kill any botulism microbes or spores.

Here’s a chart you can print and put up in your long-term food storage area if you are storing store-bought canned goods. These recommendations were made by the USDA:


FOODSTORAGE ON SHELFNOTES
Canned Ham2 to 5 years
Low-acid canned foods:  Canned meats, poultry, stews, soups except tomato, pastas in sauce, potatoes, corn, carrots, spinach, beans, beets, peas, pumpkin.2 to 5 years. 


Low acid foods have a low pH of 4 to 6.  They require high-pressure processing and longer processing times but have a better shelf-life
High-acid canned goods: Juices (tomato, orange, lemon, lime and grapefruit); tomatoes, grapefruit, apples and apple products like apple sauce, mixed fruit, peaches, pears, plums, all berries, pickles, sauerkraut; foods treated with vinegar-based sauces or dressing like German potato salad and sauerbraten.12 months. To 18 months High-acid foods have a pH of 8 to 10 and only require water-bath processing but have a lower shelf-life due to the effect of acids deteriorating both product and can, or jar/lid integrity over time.
All home-canned foods12 months. Before using, boil for 10 minutes for high-acid foods; 20 minutes for low-acid foods. Add one minute for every 1,000 feet above sea-level.Home canned foods are potentially the most dangerous from a food contamination standpoint if not processed properly. The shelf life is limited to one year.


Do you agree or disagree? Share your thoughts on storing cans long-term in the section below:

Thursday, June 15, 2017

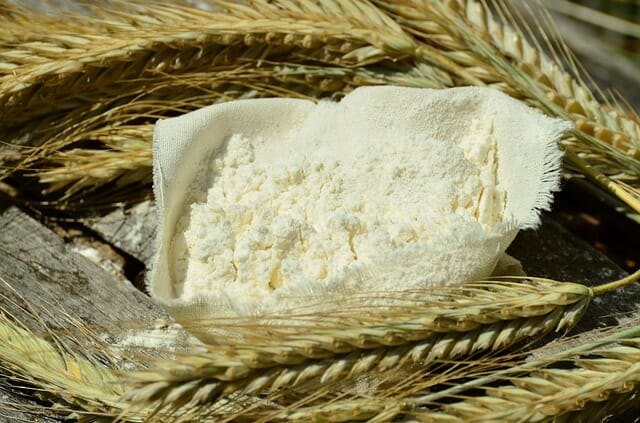
Stockpiling 101: How To Make Flour Last Forever

Stockpiling 101: How To Make Flour Last Forever


Most of us have at least one package of flour on our pantry shelf. If you have a stockpile or are considering starting one, you may be wondering: How long does flour stay fresh?


Flour is the powder created by grinding uncooked cereal grains or other roots or seeds. Packages of flour that you purchase in the supermarket generally have a “sell by” or “use by” date, but you may be able to use flour long after those dates. Some of the variables that determine how long flour will last include the type of flour, the container in which it is stored and the environment in which it is stored.


First, here are some general storage tips for flour, no matter what kind it is:


  • Store all flour in a cool, dry place to keep it from absorbing moisture.

  • You can extend shelf life by storing the package in the refrigerator in an airtight container.

  • Store flour in an airtight container, such as a sealed plastic freezer bag, a lidded Mason jar or a Tupperware container.

  • If you must keep your flour on the shelf, add a bay leaf to the package as a natural insect repellent.

  • Dispose of any flour that has a strong, stale or rancid odor.

  • Placing flour in the freezer for 48 hours will kill any insects or their eggs that have infested your flour.

  • For extended storage, keep the flour in the freezer, rather than on your pantry shelf.

Now let’s consider the type of flour.


All-purpose flour, the biggest seller at the supermarket, can be stored in its original unopened container placed inside a sealed plastic bag on the pantry shelf for 10 to 15 months. Be sure to keep it in a cool, dry place. For longer storage, place the container in the freezer for up to two years.


Just 30 Grams Of This Superfood Provides More Nutrition Than An Entire Meal!


Stockpiling 101: How To Make Flour Last Forever

Image source: Pixabay.com


Bread flour, made from high protein wheat, should be stored in an airtight container away from heat and moisture. If stored properly, it will last for up to six months in your pantry and for up to 12 months in the freezer.


Self-rising flour (phosphate flour) can last on the pantry shelf for up to 15 months. If you store it in the freezer, it will last for up to two years.


Instant flour, which is used for gravies, dissolves quickly when it is mixed with water. It will last up to eight months when it is sealed and on the pantry shelf and up to one year when in the freezer.


Cake flour, which can clump when left unopened and untouched and therefore need sifting, can last for two years stored in a dry, cool pantry.


Wheat flour will stay fresh six to eight months in the refrigerator and up to one year in the freezer. If stored properly, it will likely be usable for longer than that.


Nut flours and other alternative flours can last for up to six months in the refrigerator and up to a year if stored in the freezer.


How to Tell if Flour Is Fresh


Use your eyes and your nose to determine if flour is still usable. Flour that has
“gone bad” will be darker in color that it normally is. White four may appear gray, for instance.


Also, look closely for the presence of bugs in the flour. If you see weevils, moths or larvae, the flour is not usable.


If the color is good and you detect no bugs, it is time to use the smell test. Simply put, spoiled flour will smell bad or even rancid. Discard foul-smelling flour immediately.


Here are some other facts about flour:


  • The earliest archaeological evidence for flour — wheat seeds crushed between millstones — dates to 6000 B.C.

  • The first steam flour mill opened in 1879 in London.

  • It was during the Great Depression in the 1930s that some flour manufacturers began enriching their products with iron, thiamine niacin and riboflavin.

  • Pillsbury began its annual “bake-off” competition in 1950 to promote sales of its flour.

  • Flour dust can be explosive when it is suspended in air.

  • Flour that is mixed with equal parts butter and is heated makes a traditional roux, which is used for making sauces.

  • “Bleached” flour has been treated chemically to whiten it or to improve its baking qualities.

  • “Unbleached” flour is aged and is bleached naturally by the oxygen in the air. Unbleached flour is golden in color and may not have the consistency in baking that bleached flour has.

  • Flour is an important ingredient of bread, cookies, cakes, pasta and tortillas.

How do you extend the life of your flour? Share your tips in the section below:

Wednesday, May 10, 2017

Stockpiling Clothing: Here’s What You’re Forgetting

Stockpiling Clothing: Here’s What You’re Forgetting

Image source: Pixabay.com


Ask any non-prepper on the street what’s needed for survival, and you’ll probably get the answer, “food, clothing and shelter.” I’m not sure where that idea started, but I’ve heard it all my life. The sad thing is that way too many people think that it’s true, and while those three things are actually needed for survival, that little line leaves off some of the most important items — especially water.


Yet it does include clothing, which is something those in the preparedness community normally leave off a list of the highest survival needs. Instead, we use the term “homeostasis,” which refers to maintaining our body heat. Clothing is one of the things that helps us do that, in addition to shelter and fire.


We shouldn’t minimize clothing as a necessity for survival… yet we often do. You rarely find clothing listed on anyone’s list of things we need to stockpile, nor do you find it included in most bug-out bag lists. But it should be in both. Whether you’re bugging out or bugging in, you’ll need something to wear.


Of course, you could just say, “I have clothing, no problem” and I wouldn’t be surprised if you did. Considering that clothing is a durable item and that we all have closets full of the stuff, it really doesn’t seem much like an issue. But again, it is.


There are two ways that clothing could become a major issue in a survival situation. The first is that most of the clothing we own isn’t appropriate for survival. The second is that our children will easily outgrow their clothing if we find ourselves in a long-term survival situation.


Is Your Clothing Appropriate?


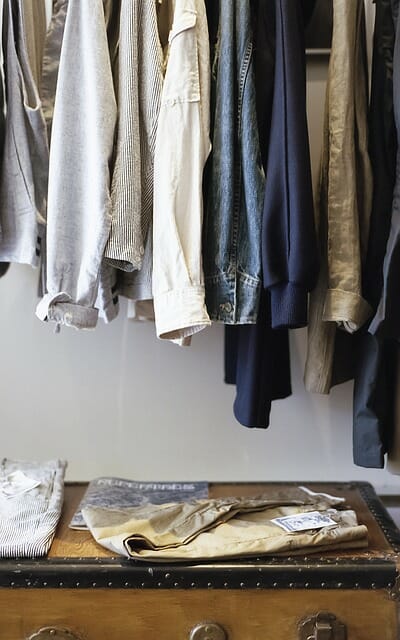
Let’s look at your closet first. Most survival situations are hard on the body, and therefore hard on the wardrobe, too. Yet the vast majority of the clothing in most of our closets is there because it is attractive, not because it is rugged. How much of it can you actually wear while hunting, gardening, digging a hole for an outhouse or trenching cross-country on a bug-out?


Goofy Gadget Can Recharge Your Laptop — And Jump-Start Your Car!


Unless you work in the construction trades, or some other job where you wear rugged clothing all the time, your wardrobe is probably lacking in that sort of clothing. Oh, you’ll have some blue jeans and T-shirts, and you’ll probably have some flannel shirts or sweaters for cold weather, but do you have enough?


Image source: Pixabay.com

Image source: Pixabay.com


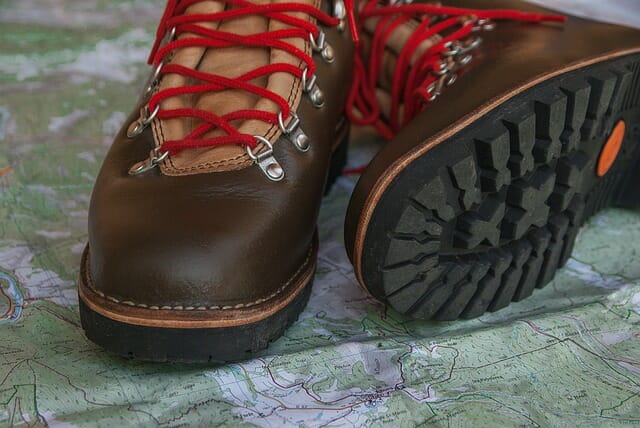
Even worse than your clothing, how are your shoes? About the only shoes that you might have which will be appropriate for survival are tennis shoes, unless you have some hiking boots somewhere.


If you are forced to bug out, you’ll need both rugged clothing and rugged shoes. The stuff you wear to the office every day just won’t do. For that matter, I’d hate to try cutting firewood in work clothes and shoes. I wouldn’t even want to do it wearing tennis shoes. I’d want something that would protect my feet — hiking boots or some good work boots.


The good news is that it won’t take much to rectify the problem. Buy some rugged clothing and some good rugged boots. Either hiking boots or work boots will do. Make sure that you take the time to break them in, though. The last thing you need to do is head out on a bug-out with boots that you’ve never worn.


And Then There’s the Kids


The bigger problem really isn’t your clothing; it’s that of your kids. As we all know, kids go thorough clothing like crazy. They either get holes in it or outgrow it. Either way, they are in regular need of new clothing. That definitely could be a problem, especially in a long-term survival situation.


Of course, your kids will need rugged clothes and boots, just like you do. You really don’t want your kids trekking through the woods on a bug-out without some sort of footwear that will give them ankle support. Kids are just too prone to accidents.


So, how do you deal with the issue of clothing for your kids? Whatever you buy them, they’ll outgrow. It would seem you’ll never get ahead in this game, yet there is a way to get ahead, especially when your kids are smaller and less likely to complain about their clothing styles.


Here’s what my wife and I did: When our children were still children (they’re adults now), we bought their clothes ahead of time. In other words, we didn’t buy the clothes they needed now, we bought the clothing they would need in two to three years. We started this when they were babies and outgrowing their clothes every few months. We just kept it up as they continued to grow.


Part of what made this possible was that my wife is a world-class champion garage-saler. When our children were small, just about all their clothing came from garage sales, especially our girls’ party dresses. There was one time that each of the girls had over 30 fancy dresses they could choose from, in their wardrobe, as well as less elegant clothing. All of it came from garage sales, at a fraction of the original price.


As they grew older, less and less of their clothing came from garage sales. It seems that the older that kids get, the harder they are on their clothing, especially boys. They also wear it longer, so it has more time to wear out. Nevertheless, we kept the system going, switching from buying their clothing at garage sales, to buying their clothing at whatever sales we could find.


Clothing has the highest retail markup of nearly anything, often in the 80 percent range. That means that something you pay $100 for in the store is really worth $20 at wholesale. This huge markup explains how clothing stores can have such incredible sales and still not go out of business.


If you’re buying ahead of time, there’s no problem waiting for the sales. You’ll be able to find what you want, at prices that won’t break the bank. Then you can stash it away, in the attic or basement, in boxes marked by sizes. When it’s time for new clothing, all you have to do is take out the next size box rather than rushing to the store.


Running a system like this, you can have two to three years worth of clothing on hand for your kids at all times, without spending a ridiculous amount of money. Granted, the clothing you’ve bought ahead of time may not be the latest style, but they’ll have clothes to wear. You can always buy them a couple of “in things” to add to that, rounding out their wardrobe.


More importantly from a survival point of view, if a major disaster happens, your kids will have enough clothing to keep them going for several years.


Let’s Go One Step Further


Stockpiling Clothing: Here’s What You’re Forgetting

Image source: Pixabay.com


Merely stockpiling clothing will go a long way toward ensuring that your family has what it needs, just like stockpiling food and toilet paper will. But let’s take that one step further. If we assume an event that requires long-term survival, your stockpiled clothing probably won’t be enough. In that case, it would be a good idea to be able to make your own.


Get Backup Electrical Power In A Convenient, Portable Briefcase!


Now, I realize that few people make their clothing anymore. It’s just not all that practical in our modern world, with so much commercially manufactured clothing available.


But learning to sew isn’t all that hard. I recently had to learn how to do it, because I was making a couple of bullet-proof vests. With a little knowledge and a sewing machine, you can make just about anything. Granted, you’ll also need a few other things, like fabric and thread, so you should probably buy some of them, as well (especially thread). You can always get fabric by cutting apart clothing that’s too big, to make clothing for smaller people.


Remember, we’re talking survival here. In such a situation, your children’s complaints about style won’t matter. They’ll need something to wear, regardless of what it is. I seriously doubt that their friends will keep pressuring them to wear the “in” brands when everyone is trying simply to survive.


One final point. If we assume a long-term event, then we’re probably going to be without electricity. That means that a sewing machine isn’t going to do you much good, unless you have a means of creating your own electricity. The other option is to buy an antique treadle machine and have that for your survival sewing. Turn it into a decoration in your home, and nobody will know that it’s actually a part of your plans.


What advice would you add on stockpiling clothing? Share your thoughts in the section below:

Friday, March 24, 2017

6 Vital Items You Can Never Stockpile Enough Of

6 Vital Items You Can Never Stockpile Enough Of


When stockpiling supplies in your home for survival and disaster preparedness, there are certain items that may run out quicker than you realize.


Think about it: A large-scale economic collapse is going to last for months, if not years. An EMP attack will knock the power grid down on a national scale for an equal amount of time, if not longer.


Here are six items to consider buying more of:


1. Baking soda


This is truly one of the most overlooked survival items on the planet. It is one of the best all-around cleaning and personal hygiene product that you can buy – and it’s cheap. With baking soda, you can make soap, shampoo, toothpaste, deodorant, dishwashing soap, and a cleaning agent for floors and furniture.


2. Batteries


Without batteries, how are you to power your electronic items and your flashlights? The best kinds of batteries to buy in bulk are common types such as AA or AAA, but you also will want to store plenty of more unique types, for any special devices. For example, many heavy-duty flashlights will require D batteries.


3. Fire-starters


Fire is imperative in any survival situation, because it can provide you with warmth, light, comfort, security and a way to cook food or boil water.


Your best move will be to focus on purchasing a variety of fire-starters — lighters, matches and magnesium flint strikers — rather than just one type, so that you can have options.


4. Ammo


Gone are the days of bows and arrows. Sure, you can build or use those kinds of more primitive weapons if firearms are not available, but you simply cannot call yourself truly protected in this society without guns.


The Life-Saving Water Filter That Purifies River Water!


Most prepping experts seem to agree that a minimum of 1,000 rounds stored per caliber is a good baseline. Nonetheless, even that much ammo may not last as long as you think it will. Consider storing more.


5. Food


There’s a good chance that food was the first item you thought of when you started reading this article. Of course, it’s best to be self-sufficient, but the best kinds of foods to store for survival are ones that are both nutritious and long-lasting. Examples include white rice (avoid brown rice because it spoils), beans of virtually any kind, MREs (not the most tasty, but they still last a long time), canned meats and vegetables, sugar and honey.


6. Water


Even though water is all around us in various forms, having access to clean and purified water for both drinking and personal hygiene purposes is an absolute must. Additionally, have plenty of emergency water filters. Store water in clean containers of various sizes and be sure to rotate it out at least once every six months to ensure it remains in good condition.


What would you add to our list? Share your thoughts in the section below:

Monday, March 20, 2017

23 Items (Besides Food & Water) FEMA Says You Should Stockpile

23 Items (Besides Food & Water) FEMA Says You Should Stockpile

Image source: Pixabay.com


Editor’s note: This is the second story in a two-part series about what the federal government says should be stockpiled. Read part 1 here.


Perhaps surprisingly, the federal government has been part of what has driven the prepping movement.


FEMA’s “ready.gov” website was developed with the idea of helping people to prepare for a natural disaster so that they would have a better chance of surviving it. While FEMA isn’t the definitive source for survival information, a number of things that are widely accepted in the prepping community trace their roots right back to Ready.gov.


The most glaring example of this is the three-day food rule, which defines that bugout bags, otherwise known as 72-hour bags, have three days of food in them. Just about everyone talks about having three days of food in their bug-out bag, without anyone taking about the “why” behind that figure. But here’s the why: because the government said so.


Personally, I carry five days of food in my bug-out bag, and have another couple of weeks worth in a secondary bag, with even more food in other portable containers. The idea is to take as much food with me as I can, and use the food from the other containers first, leaving what’s in my bug-out bag for last. That way, if I have to abandon my vehicle and the other food, I’ll at least have that five days’ worth.


So, where did FEMA’s idea of three days’ worth of food originate? It came from their master plan, which states that they will have relief services in place in three days. Forget that they haven’t been overly successful in accomplishing that in the past, but it’s still their plan.


We can extrapolate a very important point from this. That is: everything that the government says about disaster preparedness is based upon the assumption that the Nanny State government will be there to help you. If you trust the government, that’s fine; but if you don’t, then it’s not a good idea to put too much stock in what they offer as survival advice.


With that in mind, let’s take a look at FEMA’s list of “Recommended Items to Include in a Basic Emergency Supply Kit.” This printable list is what FEMA recommends having on hand, mostly with the idea of surviving a natural disaster.


Are You Prepared For A Lengthy Blackout? Get Backup Electricity Today!


In addition to food and water, the list includes:


  1. Battery-powered or hand crank radio and a NOAA Weather Radio with tone alert and extra batteries for both.

  2. Flashlight and extra batteries.

  3. First-aid kit.

  4. Whistle to signal for help.

  5. Dust mask, to help filter contaminated air, and plastic sheeting and duct tape to shelter-in-place (better to use a medical grade mask to keep out pathogens, too).

  6. 23 Items (Besides Food & Water) FEMA Says You Should StockpileMoist towelettes, garbage bags and plastic ties for personal sanitation.

  7. Wrench or pliers to turn off utilities.

  8. Can opener for food (if kit contains canned food).

  9. Local maps.

  10. Prescription medications and glasses.

  11. Infant formula and diapers.

  12. Pet food and extra water for your pet.

  13. Important family documents such as copies of insurance policies, identification and bank account records in a waterproof, portable container.

  14. Cash or traveler’s checks and change.

  15. Emergency reference material such as a first-aid book or information from ready.gov.

  16. Sleeping bag or warm blanket for each person. Consider additional bedding if you live in a cold-weather climate.

  17. Household chlorine bleach and medicine dropper. When diluted nine parts water to one part bleach, bleach can be used as a disinfectant. Or in an emergency, you can use it to treat water by using 16 drops of regular household liquid bleach per gallon of water. Do not use scented, color-safe or bleaches with added cleaners.

  18. Fire extinguisher.

  19. Matches in a waterproof container.

  20. Feminine supplies and personal hygiene items.

  21. Mess kits, paper cups, plates and plastic utensils, paper towels.

  22. Paper and pencil.

  23. Books, games puzzles or other activities for children.

Before going any farther with this, we need to understand exactly what this list is. By looking at it, it is immediately clear that the items listed are for sheltering in place, in your home, while waiting for government relief. That, in turn, assumes that the government will be able to bring relief, that they will be able to do it in three days, and that they will physically be able to get to you. Those are some pretty big assumptions.


When Hurricane Katrina hit in 2005, one of the many problems that delayed the arrival of relief into the New Orleans area was the trees and other debris scattered on the roads. There were many places where the roads had to be cleared before the trucks carrying the relief supplies could make it to those who needed it.


FEMA’s inability to deal with the situation in a timely manner was obvious and examined in great detail. So, it would be natural to think that they would have been ready seven years later when Hurricane Sandy hit the East Coast. But they didn’t even put out requests for quote (RFQs) for the supplies they needed until the day after Sandy hit. It doesn’t look like they learned a whole lot.


While there are many other examples we could use, I’ll just mention one other. In 2016 there was a massive flood in Louisiana, affecting about 30 parishes (what the rest of us call counties). In that case, it wasn’t FEMA that rescued people and brought relief, but rather the people of Louisiana helping each other. Some used their boats to rescue people stranded on their roofs, while others set up emergency shelters and cooked meals for those who were displaced by the flood. It was a great demonstration of community outpouring to help one another out.


23 Items (Besides Food & Water) FEMA Says You Should StockpileSince it’s clear that there are many cases where the government can’t get in place fast enough to truly make a difference, accepting the idea that three days’ worth of food and water is enough, is ludicrous. But even if they could, that three-day figure doesn’t take into account any long-term or national disaster scenarios.


Long-term disasters are those that last anywhere from a few months to more than a year. In such a case, it’s clear that we’d need a whole lot more food than the three days mentioned in FEMA’s list; or, we need to grow our own food.


Situations like terrorism taking out the grid or bio-warfare would mean that we’d all have to be self-sufficient for months.


Get Instant Electrical Power In A Convenient, Portable Briefcase!


Many writers have undertaken to write complete lists of what you’ll need in these sorts of situations, myself included. Take a look at the article on “22 Things Besides Food and Water That You Should Stockpile” or “21 Surprising Items You’ll Need when the Grid Is Down.” The truth is, there is no way of knowing for sure everything we’ll need, so we need to plan for everything and hope that we didn’t miss anything.


But let me take a moment to make a quick case for what’s missing from the government’s list. To determine what we need, we always have to start out with the basics for survival. Those are:


  • Ability to keep warm.

  • Clean water.

  • Nutritious, high-energy food.

To support that, we need to add:


  • The ability to defend ourselves.

  • First-aid supplies.

  • The ability to start a fire.

  • Tools.

Just looking at those seven areas, it’s clear that the FEMA list is missing a lot of things. They mention matches to start a fire, but they don’t talk about fuel for the fire. Their list assumes that everyone has a stock of firewood sitting behind their homes, as well as a government-approved wood-burning stove to burn it in? Incomplete answers to survival problems, like this one, get people killed.


They do mention the ability to purify water with bleach, but that’s the only water purification method they mention, and they missed the part about shaking up the water once you put the bleach in it to make the bleach dissipate, and then allowing it to sit for 20 minutes to kill the pathogens. But why not mention some other methods of water purification? Water is such an important part of survival, that depending on only one method is not safe.


Two of the “supportive” areas that I mentioned above are totally missed by FEMA: the ability to defend yourself, and tools. One of the things you can count on in the aftermath of any disaster is the criminal element coming out of the woodwork to take advantage of the situation.


The fact that they missed tools can be forgiven, if we assume that the plan is to shelter in place, in your home, awaiting the arrival of government aid. But then, if you were one of those people, you wouldn’t be reading this website. The fact is that many survival tasks, from building or repairing shelter to preserving food, are going to require tools of some sort. Of anything that FEMA has left off their list, this is probably the biggest omission. Yes, you can make it three days without those tools, but not a whole lot longer.


All in all, the only true value that the FEMA list has is as a starting point. For someone who hasn’t done anything about emergency preparedness, this list is an eye-opener. But the sad thing is that many will take this list as being the definitive word on survival and not go any farther.


Simply put, it is not wise to put our survival in the not-so-capable hands of the government.


What is your reaction to the FEMA list? Share your thoughts in the section below: