Showing posts with label heat. Show all posts

Thursday, May 10, 2018

Utilizing Passive Solar Energy

Using passive solar energy can save money on heating and cooling bills.


By utilizing passive solar energy, our ancestors could use temperate differences to heat and cool their homes. The sun rises in the east and sets in the west, right? And it is higher in the summer than in the winter. We know that. Thousands of years ago they knew that. By using the difference in the temperature between day and night, summer and winter, they could trap the sun’s energy to make their homes pleasant to live in—warm in the winter and cool in the summer.  In the temperate parts of the States, houses were built to have southern exposure. In the hot parts in the South, they had deep porches and large overhangs to provide shade during the hottest parts of the day.  What they did was to live in harmony with the cycle of nature – they used the sun’s passive energy, with no technological devices whatsoever.


Solar energy is rapidly gaining popularity among Americans, for various reasons. Of about 116 million homes in America, 200,000 are using some kind of a photovoltaic solar (PV) system, with about 10,000 using solar energy alone as their source of power.  The prices are going down, the technology is becoming more available and affordable, and it is very attractive to people wishing to go off grid. But, PV solar systems mean high-level technology, require a great deal of knowledge for maintenance, and the initial cost is still relatively high.


Passive solar energy uses the knowledge of the local climate, the angle of the sun’s passage across the sky and the nature of materials used to build the home. By making the house the right shape, placing the windows right and positioning walls, windows and roofs in the right direction, one can cut the building’s energy costs by 30 to 40 percent with no additional cost.


The science behind passive solar energy


There are a few scientific facts that enable us to use the sun’s passive energy:


  • Heat naturally travels from a warmer to cooler area until the temperature equalizes.

  • Certain materials retain energy (heat) better than others. This is called thermal mass. Water, earth, rocks and bricks have the highest capacity to retain heat.


How to design a house to use passive solar energy


Although it is easiest to use passive solar energy if you are designing your house from scratch, you can make changes to your existing house in order to decrease your heating or cooling bills. In fact, most of the principles of designing a passive solar house make sense in building any house, as one uses the power of the sun to make living more pleasant and less expensive.


Although designing a house in order to minimize or completely eliminate use of fossil fuels for heating or cooling requires a lot of knowledge and planning, the basic principles behind a passive solar design are simple:


Orientation


If terrain allows, the longer axis of the house should be oriented east/west, so that most rooms face sunny south. Large tilted windows trap a maximum amount of the sun’s energy, which naturally gets transferred to the interior. In the summer, when the sun’s arc is much higher, these same rays will bounce off vertical panes of glass.


Prevailing winds should be allowed to pass through to help air circulation and equalization of the temperature. High ceilings allow hot air to travel upwards and naturally cool the space.


Planting evergreen trees on the north side of the house will protect the house from harsh winter winds, and leafy deciduous trees planted to the south will provide pleasant cooling shade in the summer. Once they shed their leaves in the winter, they allow the sun’s warmth to pass through.


Shading


If you allow full sunlight to come through your large southern facing windows in the summer, you would be living in a boiler. Deep overhangs keep the summer high-passing sun from overheating your living space, but in the winter, when the sun is much lower, the overhang is not in the way. The same seasonal shading can be achieved with trellises covered by seasonal vines, which die down in the winter, or deciduous trees which shed their leaves in the winter.  Shutters and curtains that keep the sun from overheating the living space in the summer can keep the temperature in the room almost 20 degrees lower.


Windows and patio doors


Windows are your solar collectors, so they should be located mostly on the southern side of the house. Limit the number and size of windows on other sides of the house. They should play an important role in air circulation.  Keep in mind that your windows not only collect energy, but lose it too, so do not exaggerate in size. Thick drapes or shutters should keep the rooms from losing heat during the night. Double panes play the same role.


Insulation


A house in which every surface opened to the environment is well-insulated keeps the same pleasant temperature year round. Insulating materials, which do not conduct heat well, prevent heat loss in the winter or heat entrance in the summer. Keeping temperatures even is the key so that you do not have to waste energy by raising or lowering temperatures to be comfortable.


Thermal  mass


Thermal mass is a building material that collects and distributes solar energy. It is a solid or liquid material that absorbs and stores heat or coldness and releases it when it is needed. While other building   principles are just common sense ways of building a house in order to save on heating and cooling costs, use of thermal mass really makes passive solar design unique.


Characteristics of some materials that store and distribute the sun’s energy well were known to our ancestors a long time ago. People were building houses in Mexico of adobe, or were covering roofs with sod in England, or were baking bricks all over the world, or were building castles with large stone cubes.

During the day and in the summer, the sun heats walls, roofs and floors made of a thermal mass, such as concrete, earth, brick or water. At night, or in the winter, when the temperature of the surrounding air drops, they release that stored heat because the inherent nature of the materials try to equalize the temperature with its surrounding.


In addition, solar panels can serve not only as photovoltaic collectors of the sun’s energy, but work in a passive way as thermal mass.


The post Utilizing Passive Solar Energy appeared first on Off The Grid News.

Saturday, September 2, 2017

The $70,000 Solar-Heated ‘Earthship’ Home That’s Completely Off Grid

Off-Grid Life In a $4,500 Converted School Bus


Imagine living in an off-grid home and not ever receiving a utility bill – no electric bill, no water bill, no sewer bill. Even better, you don’t have to stockpile firewood, because your home is heated by the sun.


Sound impossible? It’s not. It is called an earthship home, and on this week’s edition of Off The Grid Radio we take a look at these unique houses that are revolutionizing what it means to live off-grid. Our guest is Craig Cook, who lives in an earthship home with his wife Connie in Canada – where temperatures in the winter often hover around 0 degree Fahrenheit.


Incredibly, their home cost only $70,000.


Craig tells us:


  • How his house stays warm in the winter and cool in the summer, without a stove or AC.

  • What is different between an earthship home and a typical homestead house.

  • How he and his wife have all the water they need – without a well or utility hook-up.

  • Why his home incorporates hundreds of used tires … that he got for free.

Craig also shares with us the pros and cons of an earthship home for those considering making the transition. If you’re a homesteader, off-gridder or simply someone who enjoys fascinating people, then don’t miss this week’s show!


Save


Saturday, August 19, 2017

NASA’S Risky Plan To Save US From Yellowstone


yellowstone-1400-0


Government officials have been closely monitoring the activity in the Yellowstone caldera.  However, scientists at NASA have now come up with an incredibly risky plan to save the United States from the super volcano.


A NASA scientist has spoken out about the true threat of super volcanoes and the risky methods that could be used to prevent a devastating eruption. Lying beneath the tranquil and beautiful settings of Yellowstone National Park in the US lies an enormous magma chamber, called a caldera. It’s responsible for the geysers and hot springs that define the area, but for scientists at NASA, it’s also one of the greatest natural threats to human civilization as we know it.


Brian Wilcox, a former member of the NASA Advisory Council on Planetary Defense, shared a report on the natural hazard that hadn’t been seen outside of the agency until now. Following an article published by BBC about super volcanoes last month, a group of NASA researchers got in touch with the media to share a report previously unseen outside the space agency about the threat Yellowstone poses, and what they hypothesize could possibly be done about it.


“I was a member of the NASA Advisory Council on Planetary Defense which studied ways for NASA to defend the planet from asteroids and comets,” explains Brian Wilcox of Nasa’s Jet Propulsion Laboratory (JPL) at the California Institute of Technology. “I came to the conclusion during that study that the supervolcano threat is substantially greater than the asteroid or comet threat.”


 Yellowstone currently leaks about 60 to 70 percent of its heat into the atmosphere through stream water which seeps into the magma chamber through cracks, while the rest of the heat builds up as magma and dissolves into volatile gasses. The heat and pressure will reach the threshold, meaning an explosion is inevitable. When NASA scientists considered the fact that a super volcano’s eruption would plunge the earth into a volcanic winter, destroying most sources of food, starvation would then become a real possibility.  Food reserves would only last about 74 days, according to the UN, after an eruption of a super volcano, like that under Yellowstone.  And they have devised a risky plan that could end up blowing up in their faces.  Literally.


Wilcox hypothesized that if enough heat was removed, and the temperature of the super volcano dropped, it would never erupt. But he wants to see a 35% decrease in temperature, and how to achieve that, is incredibly risky. One possibility is to simply increase the amount of water in the supervolcano. As it turns to steam. the water would release the heat into the atmosphere, making global warming alarmists tremble.


“Building a big aqueduct uphill into a mountainous region would be both costly and difficult, and people don’t want their water spent that way,” Wilcox says. “People are desperate for water all over the world and so a major infrastructure project, where the only way the water is used is to cool down a supervolcano, would be very controversial.”


So, NASA came up with an alternative plan. They believe the most viable solution could be to drill up to 10km down into the super volcano and pump down water at high pressure. The circulating water would return at a temperature of around 350C (662F), thus slowly day by day extracting heat from the volcano. And while such a project would come at an estimated cost of around $3.46 billion, it comes with an enticing catch which could convince politicians (taxpayers) to make the investment.


“Yellowstone currently leaks around 6GW in heat,” Wilcox says. “Through drilling in this way, it could be used to create a geothermal plant, which generates electric power at extremely competitive prices of around $0.10/kWh. You would have to give the geothermal companies incentives to drill somewhat deeper and use hotter water than they usually would, but you would pay back your initial investment, and get electricity which can power the surrounding area for a period of potentially tens of thousands of years. And the long-term benefit is that you prevent a future supervolcano eruption which would devastate humanity.”


Of course, drilling into a super volcano comes with its own risks, like the eruption that scientists are desperate to prevent. Triggering an eruption by drilling would be disastrous.


“The most important thing with this is to do no harm,” Wilcox says. “If you drill into the top of the magma chamber and try and cool it from there, this would be very risky. This could make the cap over the magma chamber more brittle and prone to fracture. And you might trigger the release of harmful volatile gases in the magma at the top of the chamber which would otherwise not be released.”


The cooling of Yellowstone in this manner would also take tens of thousands of years, but it is a plan that scientists at NASA are considering for every super volcano on earth.


Click here to subscribe: Join over one million monthly readers and receive breaking news, strategies, ideas and commentary.

Gas Masks, Filters, Body Suits, Anti Radiation Pills

Please Spread The Word And Share This Post


Author: Mac Slavo
Views: Read by 114 people
Date: August 19th, 2017
Website: www.SHTFplan.com


Copyright Information: Copyright SHTFplan and Mac Slavo. This content may be freely reproduced in full or in part in digital form with full attribution to the author and a link to www.shtfplan.com. Please contact us for permission to reproduce this content in other media formats.


Friday, May 12, 2017

Native America Survival Secrets: How They Cooked Without Metal

No Matches, No Metal, No Problem! How The Native Americans Cooked


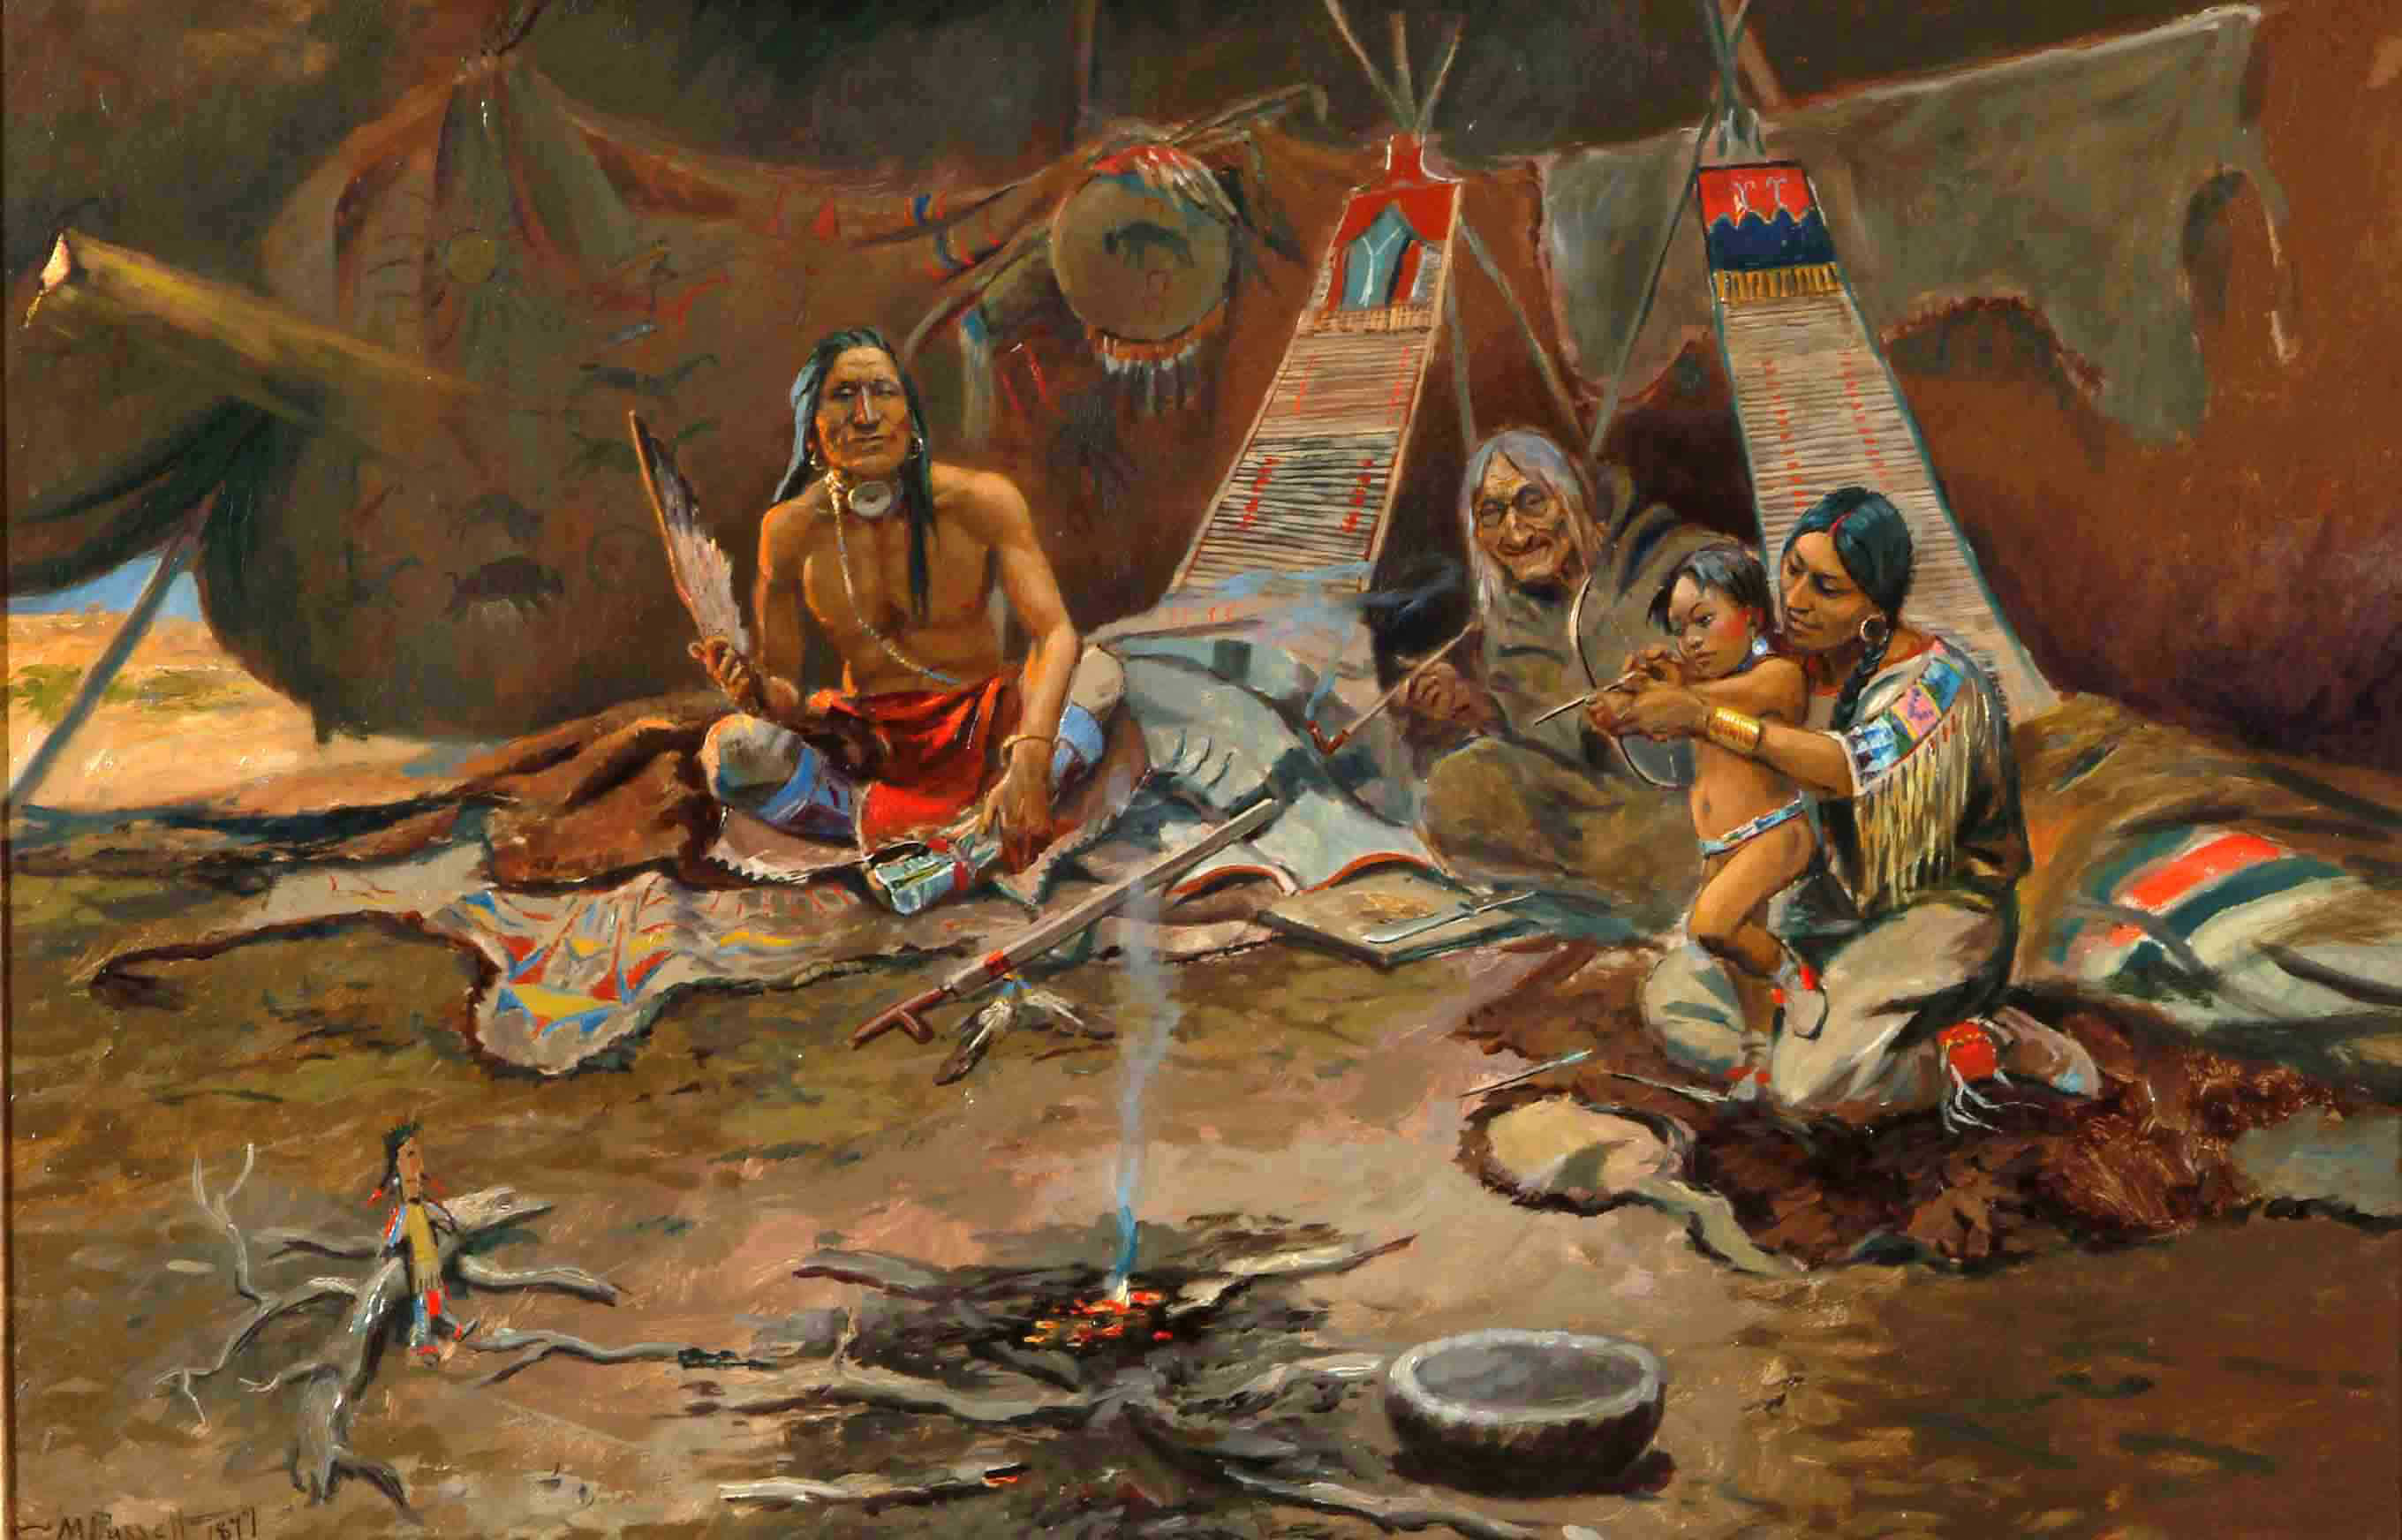
If you are anything like me, then you are fascinated with how native people lived before the Europeans came to the “new world.” I find immense satisfaction in doing things on my own, without the benefit of modern technology.


I’m not knocking modern life. It certainly has its appeal! I’ve washed clothes by hand (exhausting), skinned animals and tanned hides (also exhausting), and made huge batches of soap with animal fat and wood ashes (more complicated than it sounds). One thing that has always perplexed me, however, is exactly how did the native people of this land make fire and cook without metal or matches?


In this article, we are going to take a look at how they did it and how you can, too, if the need should ever arise.


Making Fire the Old-Fashioned Way


Perhaps the first thing that comes to your mind is Tom Hanks in the movie Castaway, right? I can relate! When I first tried to rub two sticks together to make a fire, I had huge blisters and no fire. Thank goodness I had brought some matches with me!


So did the native people actually rub two sticks together? You bet they did! This is an old tried-and-true method that really does work, and isn’t that hard, if you have a little practice beforehand. In the same manner that Tom Hanks used, they would find one stick about 12 or 18 inches in length and break off the end, at about a 45-degree angle. Now, taking another stick only a few inches in length and placing it on the ground, they would make a small indentation, using a bone or rock most likely, and put the pointed end of the longer stick into the indentation of the small stick. The longer stick was placed between the palms and whirled back and forth, creating friction. The wood dust created by the friction would start to smoke. A piece of dry, light stuff was applied and then blown on to create fire.


This Cool-To-The-Touch Lantern Provides 100,000 Hours Of Emergency Backup Lighting


This method must have caused plenty of blisters, however, so it was also very common among nomadic tribes to carry hot coals in the hollowed-out horn of a buffalo or moose antler to carry to the next campsite. Fires could then be started again from the hot coal.


Other tribes discovered that by striking two types of stones together, such as pyrites or chert, they would produce sparks. These sparks could ignite dry, light material fairly quickly. Later, Europeans brought flint and steel, which often was carried by native American people, but before that, it was usually stones made of pyrite and/or flint.


No Matches, No Metal, No Problem! How The Native Americans CookedTo avoid blisters, other tribes invented what is typically called a bowdrill. This uses a bow, very much like the kind used for hunting, with the exception being that the sinew was loose. In the same manner as mentioned above, the person would put one stick on top of another stick, but rather than use your hands to manipulate the vertical stick, the “string” of the bow was wrapped around it. One hand is placed on top of the vertical stick, while the other hand pulls the bow back and forth. This creates a great deal of heat and friction and has been known to start a fire in less than two minutes.


If making fire by any of these methods interests you, then I would suggest that you practice beforehand. I made the assumption it would be fairly easy, and it is — but only after a few hours of practice.


No Pot? No Problem!


Well, at least for the native people it was not a problem to cook without metal pots or pans! For modern man, not as easy.


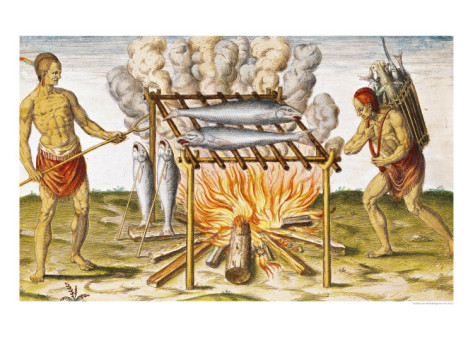
Depending on which tribe we are talking about, there were more ways to cook food than you can shake a stick at — with sticks being the most obvious choice. This is perhaps the easiest and least labor-intensive method that every camper learns pretty quickly. Put your meat on a stick and put it over the fire. However, there were plenty of other ways to cook food sans the ever-ready stick.


Ash cooking is still used in many places, even today. Fish, frog legs, even potatoes, can be wrapped in leaves and placed near or under hot ashes and coals. This is quick and effective, even if it means you might get a bit of ash on your food. Ashes actually don’t taste too bad!


Cooking in pits also was another popular method, especially if you wanted to cook a great deal of food at one time. Pits were dug into the earth, and then lined with an animal hide, fur removed, inside of the hide facing up. The food was placed in the hide, then covered with another hide or leaves. Hot coals were put inside the hole, and then covered again, usually with twigs and leaves.


Get The Essential Secrets Of The Top Survivalists In The World!


No Matches, No Metal, No Problem! How The Native Americans CookedNative people were well-known for their soups. How did they manage this without a metal pot? Similar to the pit method, a hole was dug in the ground and a piece of hide was used to line the hole. Water and food was put into the pit, where a fire was going nearby. Clean rocks were heated in the fire, and then dropped into the water. You would be surprised how quickly the water will reach a boil in this manner!


Tribes that lived near the sea were known to use large conch shells as pots to cook food. Southern tribes, such as the Navajo and Hopi, used clay pots, while others simply put flat rocks right next to a fire and let the food cook directly on the rock.


Last, but certainly not least, is a trick my father taught me. Small game that weighs about 2 pounds (1 kilo) or less can be easily roasted using a leather thong. My father would take the leather lace out of his boots, dunk them in water, and then tie one end of each lace to the meat. He would then make a stake out of a branch that made a “Y.” Putting one stake on each side of the fire, he would tie a lace to one of the stakes, and with the other lace, he would tie it to another small stick, with the stake being used as a support. The loose stick was then twisted around and around, so that the meat was on a manual type of rotisserie. He told me that his father taught him this skill and I must admit that it was pretty spectacular! Our meat was always perfectly done on all sides!


Try some of the above cooking methods on your next camping trip! You just might surprise yourself at all the ways you can make a fire and cook without modern utensils.


What fire-making or cooking tips would you add? Share your advice in the section below:


Learn How To ‘Live Off The Land’ With Just Your Gun. Read More Here.

Monday, January 30, 2017

6 Simple Ways To Generate More Heat From Your Fireplace

Image source: A Cozy Fireplace / Warrenville

Image source: A Cozy Fireplace / Warrenville


You may be thrilled to have a fireplace in your home. Your hearth provides an inviting glow and can become the center of a room. However, most masonry fireplaces are designed primarily for decoration and provide little heat. Compared to woodstoves, fireplaces are extremely inefficient: Fireplaces frequently only have 10 percent efficiency, versus 60 percent or more efficiency from a wood stove.


Certainly, it isn’t worth your while to chop 100 logs to get 10 logs worth of fuel. If you want to generate heat in your wood-burning fireplace, you are going to need to make some changes. Before doing that, though, ensure you use proper equipment and fireproof materials. Do not install anything in your chimney or fireplace that will endanger your safety during use. If you have any concerns, consult an expert before lighting a fire.


There are a few causes to fireplace inefficiency. First, the heated air is siphoned directly from the house through the chimney flue. Second, while the heated air rushes from the house, it creates negative pressure in the house and contributes to cold air leaking into the house through any other openings. Third, the rush of air over the fire makes the wood burn more quickly. Last, there is little heat reflecting from the fireplace masonry into the room. Fortunately, there are fixes for each of these problems, which you can use separately or together.


1. Use the damper to its potential


If your fireplace is well-designed, it will have a damper you can easily adjust to control the flow of air up the chimney. Once your fire is burning, you can close the flue to allow only a small amount of air through the flue and out of the house. You should close the damper as tightly as possible before smoke comes into the house.


2. Intake air supply from outside


You may be able to modify existing vents to draw in air from outside to feed the fire, thus preventing the vacuum effect of using air from inside the house. This can be a simple modification, depending on the construction of your fireplace, but will not make a large difference in efficiency.


3. Fireback


6 Simple Ways To Generate More Heat From Your Fireplace

Image source: Pixabay.com


A fireback is a cast-iron reflector that is placed on the back wall of the fireplace, behind the fire grate. For maximum efficiency, the fireback must be of comparable size to the back of the firebox.


Discover More Than 1,100 Homesteading Tips And Tricks!


The iron absorbs heat from the fire and reflects it back into the room; it will also store heat after the fire is out and continue to radiate for some time. A fireback will not make a lot of difference on its own, as the heated air still needs to be flowing into the room, but it will help if you are able to control the direction of the airflow.


4. Fireplace doors


Glass or ceramic doors that can be closed once the fire is burning will prevent the flow of air from the room into the fireplace, and allow more air around the fireplace to be heated. It is important to use a glass or ceramic door that can withstand the heat of the fire. Freestanding screens are also available and will serve a similar purpose; ensure they are safely handled to prevent breakage. Fireplace doors also can improve the safety of your fireplace and allow you to attend less to the fire.


5. Heat exchanger


Passive heat exchange systems are simple in principle: The fire rests on a tubular grate that draws cool air from the room and channels it back into the room. Note that these should not be used with glass doors, which may be unable to withstand the heated air venting directly on them.  Some heat exchange systems have blowers to aid the convection; ensure yours will not blow sparks or embers into the room.


6. Fireplace with an insert


The best efficiency solution for a fireplace is a full insert. This is essentially installing a woodstove inside the masonry fireplace. The cast iron or iron and steel box should fit securely in the masonry fireplace, and the entire chimney should be lined for maximum efficiency and safety. Fireplace inserts are readily available and will increase the heating potential of your fireplace while reducing the heat loss through the fireplace when not in use.


Regardless of the solution you choose, keep in mind that your first concern is safety. It is better to safely cover your fireplace and not use it than to risk trying a solution that could start a fire. Exercise prudence every time. With a trusted solution for home heating, however, you will soon be enjoying more than a pretty view from your fireplace.


What advice would you add on generating more heat from a fireplace? Share your thoughts in the section below:  


Discover The Secret To Saving Thousands At The Grocery Store. Read More Here.

Friday, January 13, 2017

How To Pick The Cheapest, Most Efficient Heat For Your Home (Hint: It’s Not Always Wood)

How To Pick The Cheapest, Most Efficient Heat For Your Home (Hint: It


Heating your home is a critical, but what is the most effective fuel source to do it – and what should you use as a backup?


Electric heat? Stove oil? Propane? Wood? Choosing a fuel source can seem overwhelming when trying to balance both cost efficiency and heating efficiency.


Whether you live urban or rural, in the prairie or in the forest, your average seasonal temps are all variables that weigh heavily on choosing the most efficient heating source. In this article, I’ll detail five different common ways of heating your home and the pros and cons of each.


Electric Heat


Let’s start with one of the most common types of home heating in urban areas: electric heat. In many areas of the country, electric heat is popular because it is a relatively cheap source of heat. If you live in the Midwest this is especially true, where electricity prices average about 10 cents per kilowatt hour. If you live on the coasts or where I am (Alaska), however, you can pay upwards of 17 cents per kilowatt hour. This can make electric heat quite a bit more expensive than some other heat sources. Electric heat also can be problematic if you are living off-grid and have other fuel sources readily available that might be better put toward the use of heating your home.


Firewood


If you have an easily accessible source of wood in your area and don’t want to be dependent on other infrastructure systems for your source of fuel, heating with firewood may be your best option. Modern-day woodstoves have become much more efficient in recent years, with many models burning at upwards of 80 percent heating efficiency.


Are You Prepared For A Long-Term Blackout? Get Backup Electricity Today!


If you can cut the wood yourself, your fuel source also can be virtually free, leaving you with only the initial cost outlay for the woodstove itself. If you don’t have the means to cut your own firewood, the average cost for a cord (4 x 4 x 8 stack) of firewood is between $150 and $250, although this cost is heavily dependent on your area. You can expect to go through about 4-7 cords per winter season with a modern-day wood stove.


Stove Oil


Stove oil is also commonly used for heating homes. Stove oil is available in most areas of the country and is especially popular in the Northeast and my area of Alaska. Stove oil prices fluctuate just like gasoline prices, but current prices for stove oil are right around $3 per gallon. Although not ridiculously expensive, stove oil has a higher cost than both propane and natural gas, with the average household spending about $2,500 per household per winter season. Stove oil can be more efficient than heating with wood, however, and has efficiencies ranging from 80 to 90 percent.


Propane


How To Pick The Cheapest, Most Efficient Heat For Your Home (Hint: ItAlthough still fairly common, propane has been losing popularity in recent years as a heating fuel. Current average household propane costs for the country are right around $2 per gallon, but that price varies significantly region to region. In some areas, propane may be cost-prohibitive. In others, it may be vastly cheaper than electricity. Propane stove efficiency is not the highest, averaging 75 to 85 percent, but propane is a readily available source of heat in most areas.


Natural Gas


If you have access to it in your area, natural gas often can be an economical and efficient choice for heating. It is one of the most popular choices in the country, with as many as 56 million households using it for space heating (as of 2009). Using natural gas, you will be dependent on the infrastructure necessary to bring it to your home, but the cost savings may be worth it. While natural gas heaters often have standard efficiency comparable to propane stoves, your heating costs will be drastically lower. This cost also varies by area. The state of Massachusetts reported a winter home heating cost of over $3,000 for propane users in 2014, while that number for natural gas users was closer to $1,200.


Choosing which primary and backup fuel source is right for you requires a close look at a wide range of variables. Compare different fuel costs for your specific region of the country and be sure to take into account your budget for the initial cost of a stove and availability of chosen fuel source.


Aryn Young lives in Homer, Alaska, running a small farm and sustainable land-clearing operation. 


What are your primary and backup sources of heat? Share your tips in the section below:


Wednesday, January 4, 2017

Biosecurity: 7 Steps To Protecting Your Livestock From Deadly Disease

Biosecurity: 7 Steps To Protecting Your Livestock From Deadly Disease

Image source: Pixabay.com


Twenty-first century homesteaders have the advantage of being able to pick and choose between ancient practices and modern technology, selecting the one that works best in every situation. At my place, I love old-fashioned methods, but not when it comes to biosecurity.


I get some startled looks when I say the word “biosecurity” out loud to farm visitors. It sounds a little scary, like a scene from a sci-fi movie with people running around in crisp white hazmat suits. While biosecurity may or may not look a little like that on huge corporate agriculture farms, that is not how it is on my small sustainable farm. However, it is every bit as important here.


I learned about biosecurity the hard way. I purchased two registered heritage breed goat kids one spring and did not quarantine them before putting them in with my existing herd. Later that year when a college class conducted an animal health workshop in my barn, the professor expressed concern about one of the young does. She took fecal samples to examine back in her office, and called me the next day with the results. The animal was loaded with barber pole worms, she told me.


I had no choice but to embark upon a steep learning curve. Just as I was beginning to acquire the knowledge and skills I needed in order to take biosecurity seriously myself, a big dose of similar reality landed on the doorstep of a neighbor. Symptoms, fecal samples, and vet visits revealed the words no owner of small ruminants ever wants to hear out loud. Caseous Lymphadenitis.


“No,” I half-whispered when she told me. “Not CL.” A disease that is highly communicable and can mean a death sentence for much of the herd, it is said to sometimes remain onsite even after the animals are gone. Nobody wants that.


Diatomaceous Earth: The All-Natural Livestock De-Wormer!


When it comes to livestock diseases and parasites, complacency is not a friend of the homesteader.


Protecting yourself and your animals is crucial. It is also imperative to avoid infecting other homesteads. Although I am not a livestock health care professional, I do have a few tips that may help other owners create and maintain a barrier to keep animals healthy.


1. Boot wash. This is one of the most effective preventions you can do, and one of the easiest and least expensive.


Biosecurity: 7 Steps To Protecting Your Livestock From Deadly Disease

Image source: Pixabay.com


I use a black rubber feed dish, a wide shallow model that sells for very little money at most feed stores. In it, I place a gallon of cool-to-tepid water, and a cup of household bleach. This is a very strong solution, more potent than I would use elsewhere. I also provide a long-handled utility brush. Both the dish and brush are dedicated to this purpose only.


Bleach solution does not maintain its efficacy for long. If visitors are not arriving until later, I set the supplies outside in the shade and mix the solution once they arrive. The liquid is about an inch deep in the feed dish, adequate for reaching organisms on the bottom of most farm boots. I ask folks to step one foot into the dish at a time, dunk the brush, and use it as needed in crevices of boot soles.


2. Shoe coverings. If people show up in sandals or dress shoes, they will not want to dunk their feet in an inch of bleach water. I do not blame them—I would not want to either! In cases where boot wash is impracticable, I offer plastic grocery store bags as coverings. They are easy to slid over footwear and can be tucked down into the tops of shoes or secured with a gear tie or little piece of duct tape.


3. Hand washing. Preventing transmission of disease in animals is similar to doing so in humans, in that washing between contacts makes a difference. I happen to have a barn spigot in summer and a utility sink conveniently located just inside my back door the rest of the year. Other options could include rigging a handwash station using a garden hose, or an old-fashioned bowl and pitcher if needed. Antibacterial products can be used, as well.


4. Screening. If I know that someone just came from a barn full of animals infected with Johne’s Disease, I really might secretly wish I had that hazmat suit. But in reality, I will ask the person to take extra care at my place. Farmers and homesteaders are generally honorable and genuine folks who will readily disclose where they have been and do whatever it takes to avoid transmitting infection. But they are also people with plates so full that they might not think to take precautions unless asked. Screening visitors amounts simply to asking the questions.


5. Commercial products. There are many choices on the market, from disposable boot covers to convenient boot-brush setups to many other types of disinfectant.


Be Prepared! Store An ‘Emergency Seed Bank’ For A Crisis Garden


Biosecurity: 7 Steps To Protecting Your Livestock From Deadly Disease

Image source: Pixabay.com


Bleach is not everyone’s first choice, nor should it be. It is not the most effective solution in all situations, and is not without risk. I choose it for reasons of my own, but fully respect others’ preference of alternative solutions.


6. Professional advice. Although nearly last on this list, consulting a veterinarian or other expert should never be a homesteader’s last resort. I cannot stress enough how important it is to make use of whatever knowledgeable people are available to you, from your vet to a cooperative extension professional to an animal health educator to someone within your support network. Ask, listen and learn.


7. Share information. Be generous with your knowledge. Keep in mind that there are livestock owners who — like I once was and you may have been, also — do not even know what they do not know. Spreading the word about biosecurity is in everyone’s best interest.


I am not advocating that livestock owners become overly paranoid, but I do recommend taking care. Prevention is always easier than treatment, and careful biosecurity practices are a great way to avoid livestock loss, worry and veterinary bills on any size homestead.


How do you protect your animals from diseases on the homestead? What are your biosecurity tips? Share them in the section below:


Harness The Power Of Nature’s Most Remarkable Healer: Vinegar

Tuesday, December 13, 2016

The Most Efficient Wood Stoves For Off-Grid Heat

The Most Efficient Wood Stoves For Off-Grid Heat

Photo by Stephen McKay. Creative Commons license: https://creativecommons.org/licenses/by-sa/2.0/


Heating with wood is a great option for many households – and a must for most off-gridders and homesteaders. Wood stoves are easy to use and the feedstock is renewable and easy to obtain. If you live in a heavily wooded area, are living without electricity, or simply want to reduce your fuel bill, wood stoves often make a good deal of sense.


In this article, we are going to explore the different types of wood stoves, their features, and differing levels of efficiency. Not all wood stoves are created equal, and they can range from something as simple as a 50-gallon steel drum to something more complicated, like a circulating stove with a catalytic converter.


Open Fireplace


We’ll begin with one of the most iconic kinds of wood-burning heaters: the open fireplace. Open fireplaces are popular because they’re romantic and make a nice visual addition to a room. Who hasn’t imagined themselves relaxing at the hunting lounge with a big, stone fireplace in the center of the living room? The problem with open fireplaces is that they are extremely inefficient.


Crazy Gadget Makes Every Window A Cell Phone Solar Charger


Why? Because they actually suck all the heat out of a room, sending it outside via the chimney. Because of this, you will rarely find fireplaces in homes where wood is the main source of heat. Not only are they hugely inefficient, but fireplaces are also extremely smoky. This is an annoyance, but it’s an indicator that you are not getting a very clean, and therefore efficient, burn of the wood itself. Modern fireplaces typically only covert 10 percent to 20 percent of wood burned to heat.


Radiant Heat Stove


Another common wood stove is a radiant heat-type wood stove. These wood stoves heat the area around them by radiating the heat from an enclosed chamber. Common types of radiant heat wood stoves include potbelly stoves and rocket mass heaters. Because the combustion chamber is either enclosed or insulated, radiant heat wood stoves will be much more efficient than an open burning fireplace, and the heat will be radiated into the room for a much longer time after the fire has gone out.


The Most Efficient Wood Stoves For Off-Grid Heat

Image source: Pixabay.com


There are varying levels of efficiencies within radiant heat wood stoves, with perhaps the most efficient being a rocket mass heater. Rocket mass heaters use an insulated burn chamber, are designed for more draft, and have heat-exchange passages that capture exhaust gases before they escape through the chimney, resulting in a cleaner burn that can be up to eight times more efficient than traditional radiant heat wood stoves. The heat created from a rocket mass heater is then radiated into the room via a thermal mass (concrete, adobe, dirt, etc.) that surrounds the heating components.


Get Free Electricity — And Never Be Without Power!


Radiant heat wood stoves can be inexpensively built out of something as simple as a 55-gallon steel drum with a chimney attached. Although this can be a great option if you have the materials lying around or can procure them cheaply, keep in the mind that the life of these wood stoves will be much less than something built out of sturdier material like firebrick, concrete or cast iron.


Circulating Heat Stove


The more modern kind of wood stoves that you can purchase at many heating supply stores are circulating stoves that use air to heat the living space. Circulating stoves are double walled with an inner combustion chamber. There is an air space between the two walls where air is passed over the inner wall near the combustion chamber, and then pushed out into the room, conveying heat. These types of stoves can achieve 70 percent to 80 percent efficiencies and are popular for families with children, since the outer wall of the stove does not get nearly as hot as with radiant-type stoves.


As air pollution became more and more of a concern, many circulating wood stoves started to integrate catalytic converters and secondary air combustion chambers to reduce emissions and increase efficiency. Catalytic converters are simply platinum grids that are placed in the firebox of the stoves, capturing the exhaust and combusting it for a cleaner burn. Modern circulating stoves that do not have catalytic converters have a damper that directs smoke from the stove into a secondary chamber, where hot air is added and reignites any unburned fuel.


Non-catalytic circulating stoves are often cheaper than catalytic stoves and easier to maintain. A wood stove with a catalytic converter is more efficient than one without, but the catalytic converter will need to be replaced every five years and may require yearly maintenance.


Wood stoves are a great way to reduce you heating bill, reduce your reliance on the electric grid and make use of a renewable natural resource. When choosing one, take into consideration your budget, the size of space you want to heat and your desired efficiency for a warm, happy home.


How do you heat your home? What advice would you add for a new buyer or homeowner? Share your tips in the section below:


Are You Prepared For Extended Blackouts? Read More Here.

Wednesday, November 2, 2016

Why You Should Never, Ever ‘Turn’ A Compost Pile Again

Why You Should Never, Ever ‘Turn’ A Compost Pile Again

Image source: Pixabay.com


Many experts insist that in order to make good compost, it must be turned regularly, but is that really the case?


Consider: When leaves fall each autumn and dead trees topple over in hardwood forests, is that decaying matter turned over? No, it just sits there turning into rich leaf mold. A common myth is that you cannot make good compost without regularly turning the compost pile. It’s not true. You can make your life easier by eliminating the compost-turning step.


Compost-turning proponents tell us that turning the compost pile does four things:


  1. It supplies oxygen to aerobic microbes.

  2. It eventually places all parts of the pile into the high-heat area.

  3. It mixes all compost ingredients for a better-looking end result.

  4. It speeds up composting.

Toss Out Numbers 3 and 4


But if you’re the only one using your own compost, then worrying about how it looks once the compost is buried in your garden is ridiculous. It’s in the ground, so who cares how it looks? Gardening, by its very nature, is not a hectic and fast-paced activity. Why speed up composting if it’s not needed? That eliminates reasons three and four.


Importance of Oxygen


The first point on the list — adding oxygen to compost to benefit aerobic microbes — is an excellent argument. Without adequate oxygen, anaerobic decomposition develops, creating a stinky mess. Commercial compost businesses pump air into compost piles, with big fans blowing through holes in aeration tubes.


Seamazing: The Low-Cost Way To Re-mineralize Your Soil


How do you aerate garden soil? You do it by adding humus, or the compost that you’re making. Well, that same principle can be applied to compost production. You can add minute air spaces to the compost pile by layering in coarse items, such as weed stalks, straw, hay, and even egg shells.


Why You Should Never, Ever ‘Turn’ A Compost Pile Again

Image source: Pixabay.com


The king of organic gardening knowledge, the late J.I. Rodale, wrote in his 1960 book, The Complete Book of Composting, “Good compost can be made without turning by hand if the materials are carefully layered in the heap, which is well-ventilated and has the right moisture content.” Ventilation, layering and moisture are keys words in Mr. Rodale’s statement. Coarse material layered between moist animal manure gives you excellent compost ingredients.


Heat Layer of a Compost Pile


To analyze the second reason for turning a compost pile — that it places all parts of the pile into a high-heat environment — you first need to understand the mechanics of compost heat. It’s a result of a blend of carbon to nitrogen, with various bacteria breaking down this combination. The perfect carbon/nitrogen blend is 20 parts carbon to one part nitrogen. Carbon comes from plant matter. The best nitrogen sources originate from animal manure.


Three bacteria types break down the compost. Bacteria that enjoy cool temperatures of 59 degrees Fahrenheit (15 degrees Celsius) and lower are psychrophilic. They work very slowly. Mesophilic bacteria like medium temperatures of 68-113 degrees Fahrenheit (20-45 degrees Celsius). Thermophilic bacteria love temperatures above 113 degrees Fahrenheit (45 degrees Celsius). All of these bacteria work together by combining carbon and nitrogen to create carbon dioxide and energy. Part of the energy helps reproduce more bacteria. The remaining energy creates heat.


Just after you apply layers of carbon (plant matter) and nitrogen (manure) to compost, the mesophilic bacteria multiply, boosting the temperature of that layer to 111 degrees Fahrenheit (44 degrees Celsius). Add additional layers and your first layers go into a second stage where thermophilic bacteria thrive, boosting the temperature to roughly 158 degrees Fahrenheit (70 degrees Celsius). This thermophilic activity is located just a couple of layers under the compost pile’s top surface. As layers are added, the original layer cools, bacteria die off, and fungi takes over decomposition.


Mixing Cools the Hot Bacteria


Stir up these layers by turning over your compost pile, and you cool down temperatures below the level enjoyed by thermophilic bacteria, or those that perform the most robust breakdown of the carbon and nitrogen in your compost. So, continuously stirring your compost actually cools that heat layer just under the top of the pile, instead of putting all areas of the compost into the heat, as suggested by compost-turning proponents in their second argument.


A better composting method is to lay down layers of course plant matter with layers of manure. High-moisture manure is best: pig manure, at 82 percent moisture; cattle manure, at 80 percent; and horse manure, at 75 percent, are best. When using sheep manure, at 68 percent, or chicken manure, at 56 percent, you need to add a daily bucket of water to your compost.


Continue layering like this for a year. Start a new compost pile of layers on year two and allow the year one compost pile to rest during the final fungal breakdown. At the end of the second year, add your compost to the garden and enjoy tremendous gardening results without the backbreaking chore of always turning the compost pile.


Do you agree? Disagree? Share your thoughts in the section below:


Every Year, Gardeners Make This Stupid Mistake — But You Don’t Have To. Read More Here.