Showing posts with label first aid. Show all posts

Tuesday, May 1, 2018

Items That Might Be Missing From Your Family First-Aid Kit


You never know when a family member might get injured. Accidents, by their very nature, are unpredictable. While we might be able to say that some activities are statistically more likely to produce accidents, that doesn’t help us predict when they will come or who will receive them.


This can be even worse in a survival situation, where family members will be called on to do activities and use tools which they aren’t accustomed to.  What makes that even worse is that medical services tend to become overrun during such times, making it harder to get your loved ones the help that they need. If you happen to be in an outlying area, where you have to go a distance to get to help, that makes the situation worse.


In such a situation, your ability to provide adequate first-aid could make the difference between life or death. Few of us have training in first-aid techniques more complicated than applying a self-adhesive band-aid. Fortunately, a few supplies and a little knowledge can make all the difference in the world.


At this point, I’m going to make an assumption, as dangerous as that is. I assume that you already have a good first-aid kit. I’m not talking about a $19.95 drugstore special here, but an actual trauma kit, which allows you to treat more extensive wounds. Even then, you might be missing some crucial things.


Tourniquet


Tourniquets are used to stop excessive bleeding from the extremities. How do you know when one is needed? Whenever you see spurting blood coming out of a wound on one of the patient’s limbs. In that case, there is a risk of them bleeding out before they get to medical care.


There are many types of tourniquets on the market, made in some different ways. But there are three important things you want to keep in mind when choosing one:


  • You want something that can be used one-handed, in case you have to use it on yourself.

  • The idea of the tourniquet is to crush the veins against the bone, blocking blood flow. To do that, the ones with a windlass for tightening the tourniquet work best.

  • Buy quality. The last thing you need is a tourniquet breaking when you’re trying to use it.


Many people say that the tourniquet should be applied two inches above the wound. The problem with this is that not all wounds are nice neat round holes. Wounded veins often tear longitudinally, so if you only put the tourniquet two inches above the injury, the wound might still bleed internally. Go higher; as high as you reasonably can.


Clotting Agent


Clotting agents work by cauterizing the wound, stopping blood flow. They are ideal in situations where a tourniquet might not be usable, such as a shoulder wound. But for it to work, it needs to be pressed into the wound and held in place while it heats and cauterizes the wound.   It will be excruciating as you can imagine, so you may need some help in holding the patient down.


Steri-Strips


Open wounds, where the skin does not meet are dangerous from an infection point of view. They are also less likely to heal properly. In that case, you want something to hold the skin together. Typically, doctors use stitches for this, but you and I are not trained in suturing. Steri-strips allow you to keep that wound closed so that it can heal.


Irrigation Syringe


All wounds should be cleaned before they are bandaged. A large syringe, with a plastic (non-penetrating) needle, makes this much easier to accomplish. Any water which is clean enough to drink is sufficient for use in the syringe.


Lidocaine


This is a topical anesthetic, available in a cream, which numbs the skin. Most often used before giving an injection, it is also ideal for use around a wound, when needing to clean it.


Benzoine


Any adhesive bandage and most medical tapes need a clean surface to stick to. This can be difficult to accomplish in the field. Benzoine is a liquid product for cleansing the skin around a wound, allowing those bandages to stick.


Chest Seal


Used for sealing a chest wound, specifically for a patient which has been shot in the chest, causing what is known as a “sucking chest wound.” Without a chest seal in place, it is possible for the person to draw air in through the wound, on every breath. This will take up the space the lungs need to have to inflate, making it impossible for the person to catch a good breath.


While it is possible to make a chest seal out of any thin plastic material, such as a plastic bag and some tape, it is best to use a premade medical chest seal because it is sterile and already has the adhesive applied.


Needle Chest Decompression


The state where there is air in the lung cavity which prevents the lungs from inflating properly is called a “tension pneumothorax.” The sign that a patient is suffering this is that the veins in their neck are distended, and they can’t inhale. In such a case, the air needs to be allowed a means of escape, so that they can breathe again.


A special needle is used for this, which can be bought in a needle chest decompression kit. This kit also includes chest seals. To use the needle, find the top of the sternum and move down 1½ inches. That’s where the second rib is. There will be a bump on the sternum there. The needle needs to be inserted between the second and third rib, above the nipple.


The needle needs to be pushed in as far as it will go. There is a plastic part of the needle, which will stop it from going any further. Once inserted, remove the metal needle, leaving only the thin plastic sleeve in place. This is flexible, so will move out of the way as the lung inflates. Do not worry about hitting the lung, as if you do, it will heal.


Saran Wrap


Believe it or not, everyday plastic wrap for food is a useful first-aid supply to have on hand. Specifically, it is helpful for multiple wounds, such as those caused by a shotgun or shrapnel from a grenade. In such a case, it will be virtually impossible to bandage all the wounds properly. Wrapping the patient in Saran Wrap will at least protect the wounds from dirt and bacteria, while you are transporting them for medical care.


Nasal Pharyngeal Airway


In cases where the patient is unable to control their breathing, it is not uncommon for the tongue to fall across the airway, blocking it. Obviously, something needs to be done in these cases, to retain the airway open. There are several types of airways on the market, designed for this purpose.


The advantage of the nasal airway is that it is less uncomfortable for the patient. Inserted in the nose, they are unable to bite down on it, blocking off the airflow. Made of soft rubber, these come in different sizes. You’ll want to pick one that is the size of the patient’s pinkie. Cut it to length, from the tip of the patient’s nose to the angle of their jaw. Then push straight into the nose, not angling it up.


This type of airway should not be used in cases where there is bruising behind the ear, or the patient has blood coming out of their ear.


The post Items That Might Be Missing From Your Family First-Aid Kit appeared first on Off The Grid News.

Saturday, September 2, 2017

Off-Grid Medicine: 4 Things Every Homesteader Should Grow

Off-Grid Medicine: 4 Things Every Homesteader Should Grow

Turmeric powder. Image source: Pixabay.com


When I think about medical issues out on the homestead or any other off-grid lifestyle, my thoughts naturally drift toward a well-stocked first-aid kit and maybe a pair of crutches. I am immensely careless where and how I am walking and am prone to deeply entertaining — yet humiliating — falls.


But enough about me.


What is often overlooked are the minor (and not so minor) discomforts of daily life. Things like sore backs, pounding headaches, cramps and rashes. And let’s be honest with ourselves for just a bit; life on the homestead is not always a walk in the park.


Burns, sprains and poison ivy in less-than-ideal places are all things we face. If we are preparing for long-term sustainability or have made the off-grid choice a permanent lifestyle, it is wise to consider how we will handle all manner of medical care.


After all, the local pharmacy may be hours of travel away.


Learn How To Make Powerful Herbal Medicines, Right in Your Kitchen!


It is with this in mind that I have compiled the following four remedies that can easily be sustained on the typical homestead. In no way is this a complete list, but I feel that it addresses some of the most common maladies. If you don’t already grow them, then consider including them in your upcoming garden plans.


1. Turmeric


Latin name: Curcumae longae


What it’s good for: anti-inflammatory. Taken orally, turmeric has shown great potential for alleviating joint pain and has shown efficacy in slowing the progression of rheumatoid arthritis in rats. When transformed into an essential oil, it is effective against athlete’s foot and other fungal infections.


Where it grows: It is a tropical plant and thrives in warm, humid climates but will grow in any part of the world that has temperate summers. It will die in the winter if not brought inside.


What part to use: The root is dried and made into a powder. This is a component in the favorite spice of India — curry. Also, it can be used fresh if kept refrigerated or distilled into an essential oil for topical purposes.


2. Feverfew


Latin name: Tanacetum parthenium


What it’s good for: Headaches. Particularly migraines. It has also been traditionally used for reducing fever and aiding with digestive problems. So if you happen to be unfortunate enough to be experiencing a sour stomach and a migraine at the same time, this is your herb.


Where it grows: Native to Eurasia, it is now found across the globe, including North America and Europe. Given full exposure to the sun, it will grow to near weed-like status outside its native regions.


What part to use: The leaf, preferably dried and powdered. Although a common practice, chewing the leaves can lead to ulcerations in the mouth.


Note: May interact with blood thinners. This herb should not be used by women who are pregnant.


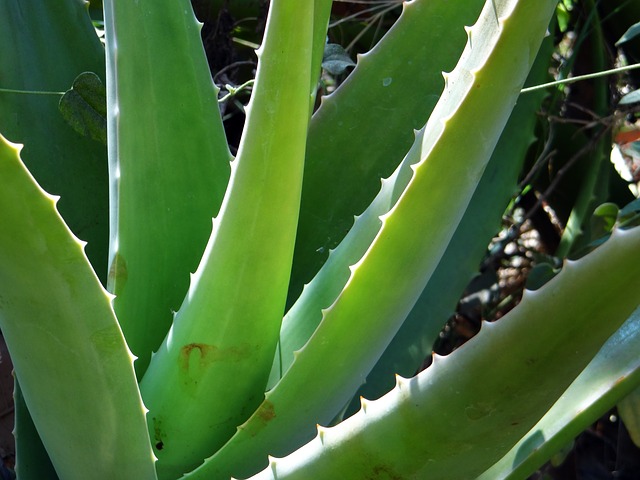
3. Aloe Vera


Off-Grid Medicine: 4 Things Every Homesteader Should Grow

Image source: Pixabay.com


Latin name: Aloe Vera


What it’s good for: All manner of skin irritations and rashes. Although not in itself a cure, the gel that can be harvested from the inner part of the plant’s “leaves” or stalks is a natural and effective soothing agent.


Where it grows: The Arabian Peninsula and North Africa, although it can be grown indoors anywhere – and outside in many climates.


What part to use: The gel, which is found inside its stalks. Apply liberally to affected areas accordingly.


4. Honey (locally sourced)


What it’s good for: Cold and flu symptoms and immune system. Honey, particularly when it is local and raw, is a Swiss Army knife of medicinal remedies and preventatives. Honey possesses a wealth of antioxidants and has demonstrated antibacterial and antiviral properties. When it has come from local hives, it can actually assist in relieving allergies. This is due to the honey containing small amounts of local pollen. Sort of like a tasty, sweet allergy shot. It also has been the go-to remedy for sore throats and coughs for centuries. The fact that it is delicious just adds to its appeal.


Where it is harvested: Anywhere in the world where honeybees thrive.


What part to use: The liquid honey as well as the honeycomb are wonderful additions to your pantry. Remember those antibacterial properties we talked about previously? Well, those same medicinal qualities happen to make for a very long shelf life. The honey will likely crystalize over time, but the quality of it is not compromised.  To return it to its original liquid form, simply place the jar in a warm water bath.


Final Thought


Remember that with herbal remedies, more is not always better and in some cases can even be dangerous. There are a wealth of easily cultivated and sustainable remedies that are available to the average homesteader. Take the opportunity to become educated on the various plants and their uses, and you will be on your way to a more healthy and sustainable medicine cabinet.


This article is for informational purposes only and is not intended to diagnose or cure any particular health condition. Please consult with a qualified health professional to determine which treatments are right for you and any individual health condition(s) that you may have.


What would you add to this list? Share your tips in the section below:


If You Like All-Natural Home Remedies, You Need To Read Everything That Hydrogen Peroxide Can Do. Find Out More Here.

Thursday, July 13, 2017

Wilderness First Aid: What To Do When You Can’t Call 911

First AidWould you know how to treat a snakebite if you were miles and miles from a hospital? What if a family member tripped and suffered a major cut or even a broken bone? What would you do?


Wilderness first aid is the topic of this week’s edition of Off The Grid Radio as we talk to Jason Hunt, a survival expert and the co-author with Dave Canterbury of “Bushcraft First Aid: A Field Guide to Wilderness Emergency Care” (Adams Media).


Jason tells us the differences between wilderness first aid and traditional first aid.


He also tells us:


  • When a tourniquet is necessary – and when it can be dangerous.

  • How to care for someone with a bleeding wound or broken bone.

  • Why dehydration is perhaps the biggest concern for someone in a survival situation.

  • What to do if someone is vomiting or has diarrhea.

Jason also shares with us tips for treating snakebites.


We learned a lot by talking to Jason. You will, too!


Wednesday, May 31, 2017

How To Deal With Open Wounds When Help Is Not On The Way

How To Deal With Open Wounds When Help Is Not On The Way | injury | General Health PreparednessSurvival


If there is one area that I feel singularly unprepared for it is with dealing with physical trauma following a disruptive event.  Basic first aid?  Sure, I can handle that and have a decent first aid kit to back me up.  But serious wounds, broken bones, and other physical traumas? Not so much.


The thing about physical traumas, and especially open wounds, is that they can occur anytime including right in your own home.  An accident in the kitchen or the yard can begin with a bloody mess and end with an unwelcome infection.  Who wants that?


As far as I am concerned, the moment is now.  It is time to become educated and to start learning how to deal with more serious medical matters. To help us along, I welcome contributing author Joe Alton who is allowing me to share his expertise on how to deal with open wounds.


The Open Wound


Years ago, we held the first suture class for non-medical people in the preparedness community. Our purpose in doing this was to provide education that might be useful in a post-apocalyptic setting. We felt that teaching people medical skills may save some lives in long-term survival scenarios. To us, any unnecessary death in times of trouble is one too many.


Nowadays there are a lot of folks that put on these classes.  The main goal, however, is not simply to learn the mechanics of throwing a stitch but to develop the judgment necessary to understand when a wound should be closed and, more importantly, when it should be left open.


When the medically-responsible person evaluates a wound, the following question must be asked:  What am I trying to accomplish by stitching this wound closed?


Your goals when performing wound closure are simple.  You close wounds to:


  • Repair the defect in the body’s armor

  • Eliminate “dead space” that can lead to infection

  • Promote healing.

  • Provide a pleasing cosmetic result (less scarring).

Sounds like every wound should be closed, doesn’t it? Unfortunately, it’s more complicated than that.  Closing a wound that should be left open can do a lot more harm than good, and could possibly put your patient’s life at risk.


Take the case of a young woman injured in a “zipline” accident.  She was taken to the local emergency room, where 22 staples were needed to close a large laceration.  Unfortunately, the wound had dangerous bacteria in it, causing a serious infection which spread throughout her body.  She eventually required multiple amputations.


We learn an important lesson from this tragic case: Namely, that the decision to close a wound is not automatic but involves serious considerations.


Infected Cut


The most important of these is whether you are dealing with a clean or a dirty wound.


Most wounds you will encounter in a wilderness or collapse setting will be dirty.  If you try to close a dirty wound, you sequester bacteria and dirt into your body.  Within a short period of time, the infected wound will become red, swollen, and hot.  An abscess may form, and pus will accumulate inside.


Here’s an article I wrote about infected wounds: Infected Wounds


The infection may spread to the bloodstream and, when it does, you have caused a life-threatening situation.  Leaving the wound open will allow you to clean the inside frequently and observe the healing process.  It also allows inflammatory fluid to drain out of the body.  Wounds that are left open heal by a process called “granulation”; that is, from the inside out. The scar isn’t as pretty, but it’s the safest option in most cases.


Other considerations when deciding whether or not to close a wound are whether it is a simple laceration (straight thin cut on the skin) or whether it is an avulsion (areas of skin torn out, hanging flaps).


If the edges of the skin are so far apart that they cannot be stitched together without undue pressure, the wound should be left open.  If the wound has been open for more than, say, 6-8 hours, it should be left open; even the air has bacteria, and the injury may already be colonized.


IF you’re certain the wound is clean, you should close it if it is long, deep or gapes open loosely. Also, cuts over moving parts, such as the knee joint, will be more likely to require stitches.


Remember that you should close deep wounds in layers, to prevent any un-approximated “dead space” from occurring.  Dead spaces are pockets of bacteria-laden air or inflammatory fluid in a closed wound that may lead to a major infection.  An exception to this is a puncture wound from an animal bite.  These are loaded with germs and should never be sutured.


If you are unsure, you can choose to wait 72 hours before closing a wound to make sure that no signs of infection develop.  This is referred to as “delayed closure”.  Some wounds can be partially closed, allowing a small open space to allow the drainage of inflammatory fluid.  Drains, consisting of thin lengths of latex, nitrile, or even gauze, should be placed into the wound for this purpose.  Of course, you should place a dressing over the exposed area as it can get messy.


Improvised Butterfly Closure with Duct Tape


If you must close a wound, use the least invasive method.


If you can approximate the cut edges of skin with butterfly closures, it is better than puncturing the skin again and again with sutures or staples. Use an adhesive such as tincture of benzoin to hold the tapes in place. Even Super-Glue may be a better option in certain cases, and is used routinely in underdeveloped countries like Cuba with good effectiveness.


Irrigating the Wound


The safest method, though, is to leave that questionable wound open.


Using a 60-100cc irrigation syringe, flush the area aggressively with a dilute solution of Betadine (Povidone-Iodine) or sterilized saline solution. If you don’t have commercial sterile solutions, studies show that clean drinking water can keep a wound clean in an austere environment.


Place a sterile moist (not soaking wet) dressing in the wound and then cover with a dry sterile gauze dressing. Replace the dressing at least daily, more often if possible.


If you have antibiotics, this may be a good time to use them. Check out the link in this article about infected wounds to see which are most useful.


About hydrogen peroxide, undiluted Betadine, or Alcohol as a cleaning agent for open wounds:  If it’s all you have, it’s ok for the first cleaning before you place the dressing.  These substances, however, tend to dry out newly forming cells and may actual hinder healing.  As such, stick with milder solutions or clean drinking water for long-term wound care.


Learning how to suture is a useful skill. Knowing when to suture, however, is much more important.


Joe Alton, M.D., aka Dr. Bones “Doom and Bloom” Survival Medicine


Takeaway: Many Wounds Should Be Left Open


Before now, I was under the false impression the all serious wounds should be closed up or sutured to prevent infection. Little did I know that closing a wound, especially while out in the field, should be carefully evaluated if there is any hint of dirt or bacteria. Sometimes, closing a wound will foster an infection and make it worse.  Who knew?


Here is the takeaway for determining whether a wound should be left open:


1.  If the wound has been open for longer that 6 to 8 hours, leave it open.  During that period, bacteria will have had time to work its way through the body, potentially causing a massive infection.


2.  If the flaps of the wound cannot be closed without using a lot of pressure, leave it alone.


3.  To repeat: dirt and bacteria will cause an infection if allowed to fester in a closed up wound.  If there is any suspicion of such, leave the wound open!


The Final Word


After digesting Joe’s advise on open wounds,  I pulled out my copy of his book, The Survival Medicine Handbook (written by Joe and his wife, Amy) to see what else it had to say on the subject.


Note: this is a big fat book of over 500 pages.  I keep in next to my desk and use it as a reference, but I have not read it cover to cover.


In chapter six, I found lot of information on open wounds including photos and extensive details on the use of commercial hemostatic agents (such as Quickclot and Celox) and suture instructions for those hopefully rare times when suturing will be needed.


The book also mentions something I already knew and that is that it is a good idea to apply some triple antibiotic ointment to a healing wound or, as I prefer, raw honey, lavender oil or to Melaleuca (tea tree) essential oil.  Lavender, especially, is something I always carry with me in my portable survival kit (see 8 Essential Items: The Perfect Portable Survival Kit).


At the end of the day, I am more than a little bit discouraged by how ignorant I am about wound control and other physical traumas.  That said, as with everything preparedness related, there is always something new to learn and of course, it is never too late to start.


Enjoy your next adventure through common sense and thoughtful preparation!

Monday, May 29, 2017

Chicken First-Aid: 8 Vital Items You Better Have On Hand

Chicken First-Aid: 8 Vital Items You Better Have On Hand

Image source: Pixabay.com


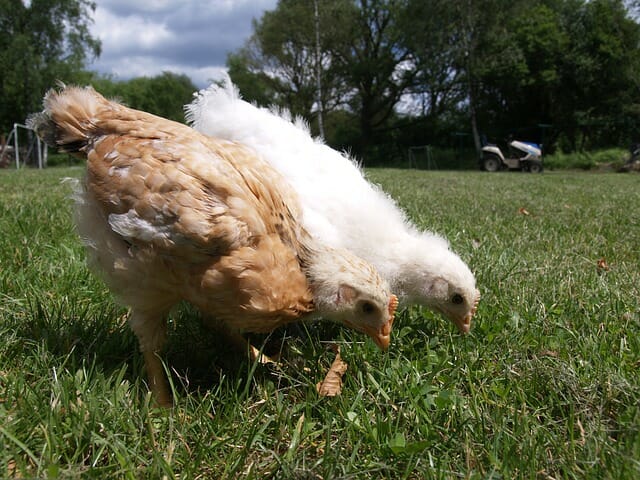
Standing at the kitchen counter, early on a Saturday morning, I caught a glimpse of a white blur, closely followed by a large black blur. Turning to look closer, I saw a black dog, not belonging to us, attacking my flock. I lost three to that attack, including our rooster.


Thankfully, one wise hen that was attacked did escape by taking refuge with our farm dog. She had a deep wound under her left wing that healed quite nicely after being cleaned and treated with ointment from our first-aid kit.


From frostbite to predator attacks, our flock has experienced a lot in a few short years. Having a basic first-aid kit — and the knowledge to use it — is essential on the homestead. Chickens will be injured from time to time. Sometimes they hurt each other, sometimes it is a predator attack that can leave them wounded, or perhaps it is just a routine illness.


Below you’ll find a list of basic supplies that any first-aid kit for chickens should have. As always, use caution when using any type of antibiotic or other medication and carefully read the instructions.


1. Disposable gloves


Protect your hands while keeping the wound area free from contaminants by having a supply of disposable gloves readily available. They also prevent infection from spreading and make clean up much easier.


2. Rubbing alcohol


A small bottle of rubbing alcohol is perfect for cleaning wounds.


Diatomaceous Earth: The All-Natural Livestock De-Wormer!


Be careful not to get the liquid near the bird’s eyes. Hydrogen peroxide also can be used; however, it also kills healthy cells surrounding the wound, so it is best to use it for the initial cleaning.


3. Cornstarch


Cornstarch, styptic powder and Wonder Dust are all useful for stopping bleeding due to broken nails or minor wounds. A small pair of nail clippers to trim broken nails on the spot also should be included to keep them from being further torn.


4. Triple antibiotic ointment


Chicken First-Aid: 8 Vital Items You Better Have On HandWhen choosing an antibiotic ointment for your first-aid kit, pick one free of pain-relieving ingredients. The ointment is most useful for preventing infection in wounds and abrasions.


5. Petroleum ointment


Useful as a protectant, petroleum ointment is helpful to fend off frostbite on combs and wattles during extreme cold snaps. It also can be used to treat scaly leg mites. To do this, simply coat the leg with ointment once or twice a week until the leg scales once again lay flat.


6. Blu-Kote


An antiseptic spray, Blu-Kote masks the wound to prevent other hens from pecking at it. It also stops infection and can be used in combination with a triple antibiotic ointment for serious wounds. Carefully spray on affected area as needed. It may take multiple applications each day before the wound has healed sufficiently enough to deter pecking.


7. Oral syringe


For dispensing any liquid medications, an oral syringe is a must. Electrolyte solutions can be easily administered to aid ailing chickens with an oral syringe. For crop issues, specifically a compacted crop, a few drops of a vegetable oil can be given with an oral syringe to loosen and soften the mass, allowing it to pass freely from the crop.


8. Gauze wrap


Occasionally, a wing will be broken and need to be secured. Position the broken wing in a natural position on the bird’s side and wrap the body and wing with gauze to secure it in place. Broken legs can be splinted and wrapped with gauze as well. It is best to isolate the chicken to prevent further injury due to pecking.


Along with these specific supplies, general supplies such as cotton balls, small gauze pads and small scissors are all helpful in emergencies. Keeping all first-aid supplies in a portable kit allows you to easily treat injured chickens on the spot.


What items would you add to our chicken first-aid kit? Share your advice in the section below:

Wednesday, April 19, 2017

Natural First Aid: 5 Items To Put In Your Emergency Medical Kit Today

Natural First Aid: 5 Items To Put In Your Emergency Medical Kit Today | natural-first-aid | Natural Medicine PreparednessSurvival


When the SHTF and a medical situation does occur simultaneously, things can go to absolute turmoil very quickly. Most medical situations that will arise during this time may not be considered life threatening, but can quickly become one if not appropriately treated. For instance, a simple cut that makes contact with tainted water (a very typical scenario following floods and hurricanes) can quickly become infected. That said, as preppers we need to prepare for medical emergencies and not only learn basic first aid, but also know how to use natural alternatives to care for the wounds themselves.


5 Items To Put In Your Emergency Medical Kit Today


1. Books


One cannot become proficient at something without study and application. Going as far as to take medical courses in community colleges, local county extension offices, local fire departments, and with veterans groups, along with other civic clubs and organizations can give you a great edge on acquiring knowledge on medical emergencies and how to treat them. It should go without saying, but stock up on medical manuals like:


2. Kitchen Staples


Since most of us have limited shelf space, it is only logical to find shelf stable foods and products that will perform multiple jobs for us. And some of your kitchen staples can do just that – including medical care. For instance, did you know you can make an antiseptic (first discovered during World War I) made of a diluted solution of baking soda and bleach? It’s called Dakin’s Solution and has been proven to kill most bacteria and viruses.


3. Honey


As well, honey has become a poster child for an alternative to antibiotics. In fact, numerous studies have shown that certain kinds of honey can fight multiple species of bacteria, fungi, and superbugs, making it a viable alternative to antibiotics.


As Ready Nutrition writer, Jeremiah Johnson recently wrote, “Honey is also good for wounds/abrasions/cuts of the mouth, as it is a demulcent that soothes abraded tissues, and it also is a medium that microbes do not live in.  Who doesn’t remember the time-honored honey and lemon mixture for a sore throat?  The thing of it is: it works, and if it works it should be employed. Read more on how to use honey to treat wounds.


4. Medicinal Herbs


Having access to health-inducing herbs is another essential for wound care. Herbs such as oregano, garlic, lavender and thyme can help protect a wound from infection and promote healing. Along those lines, writer, Jeremiah Johnson recommends every prepper have the Three G’s: Ginger, Garlic and Ginseng in their natural medicine cabinet. Further, knowing which herbs can be used for natural pain killers is also paramount in your medical preparedness knowledge. Some pain reducing herbs to add to your herbal first-aid kit are:


  • Aloe (Aloe vera)

  • Calendula (Calendula officinalis)

  • Comfrey (Symphytum officinale)

  • Gotu Kola (Centella asiatica)

  • Tea (Camellia sinensis)

  • Lavender (Lavandula angustifolia)

Common pantry items can also be used to help bleeding wounds clot. Many have found that cayenne pepper is an effective alternative and natural version of QuikClot. Cayenne pepper contains an active ingredient, called capsaicin, which has analgesic (pain relieving) properties and various other medicinal uses.


5. Essential Oils


In an extended disaster, bacterial infections and viruses are likely to be one of the reasons that people will die. Historically, essential oils  have been used as a natural therapy to relieve symptoms when modern-day medicine was not available. The most amazing aspect of essential oils lies in their ability to effectively kill bad bacteria while leaving good bacteria alone! Rather than targeting one symptom, as Western medicine does, it targets multiple symptoms. There are two types of essential oils you should stock up on for SHTF planning:


Antibacterial – Due to the increase of antibacterial resistant illnesses, many are turning to essential oils such as basil, cassia, cinnamon, clove, cypress, eucalyptus, geranium, lavender, lemon, marjoram, melaleuca, myrrh, orange, oregano, peppermint, rosemary, tea tree and thyme.


Antiviral – Oils that have been studied to help control viral infections include: basil, cassia, cinnamon, eucalyptus, frankincense, lemon, lemongrass, marjoram, Melaleuca, myrrh, oregano, and thyme.


I started out with a simple beginner’s essential oil kit and have found it of great use! Some more popular ways of using essential oils are aromatherapy, herbal soaks, compresses, tinctures and salves.


Things can go awry very quickly when a medical emergency occurs during a disaster. Having resources to turn to, skills to treat wounds, along with items you have around you can be lifesaving.