Showing posts with label spring. Show all posts

Thursday, April 19, 2018

7 Spring Gardening Tricks That Will Stop Summer Weeds


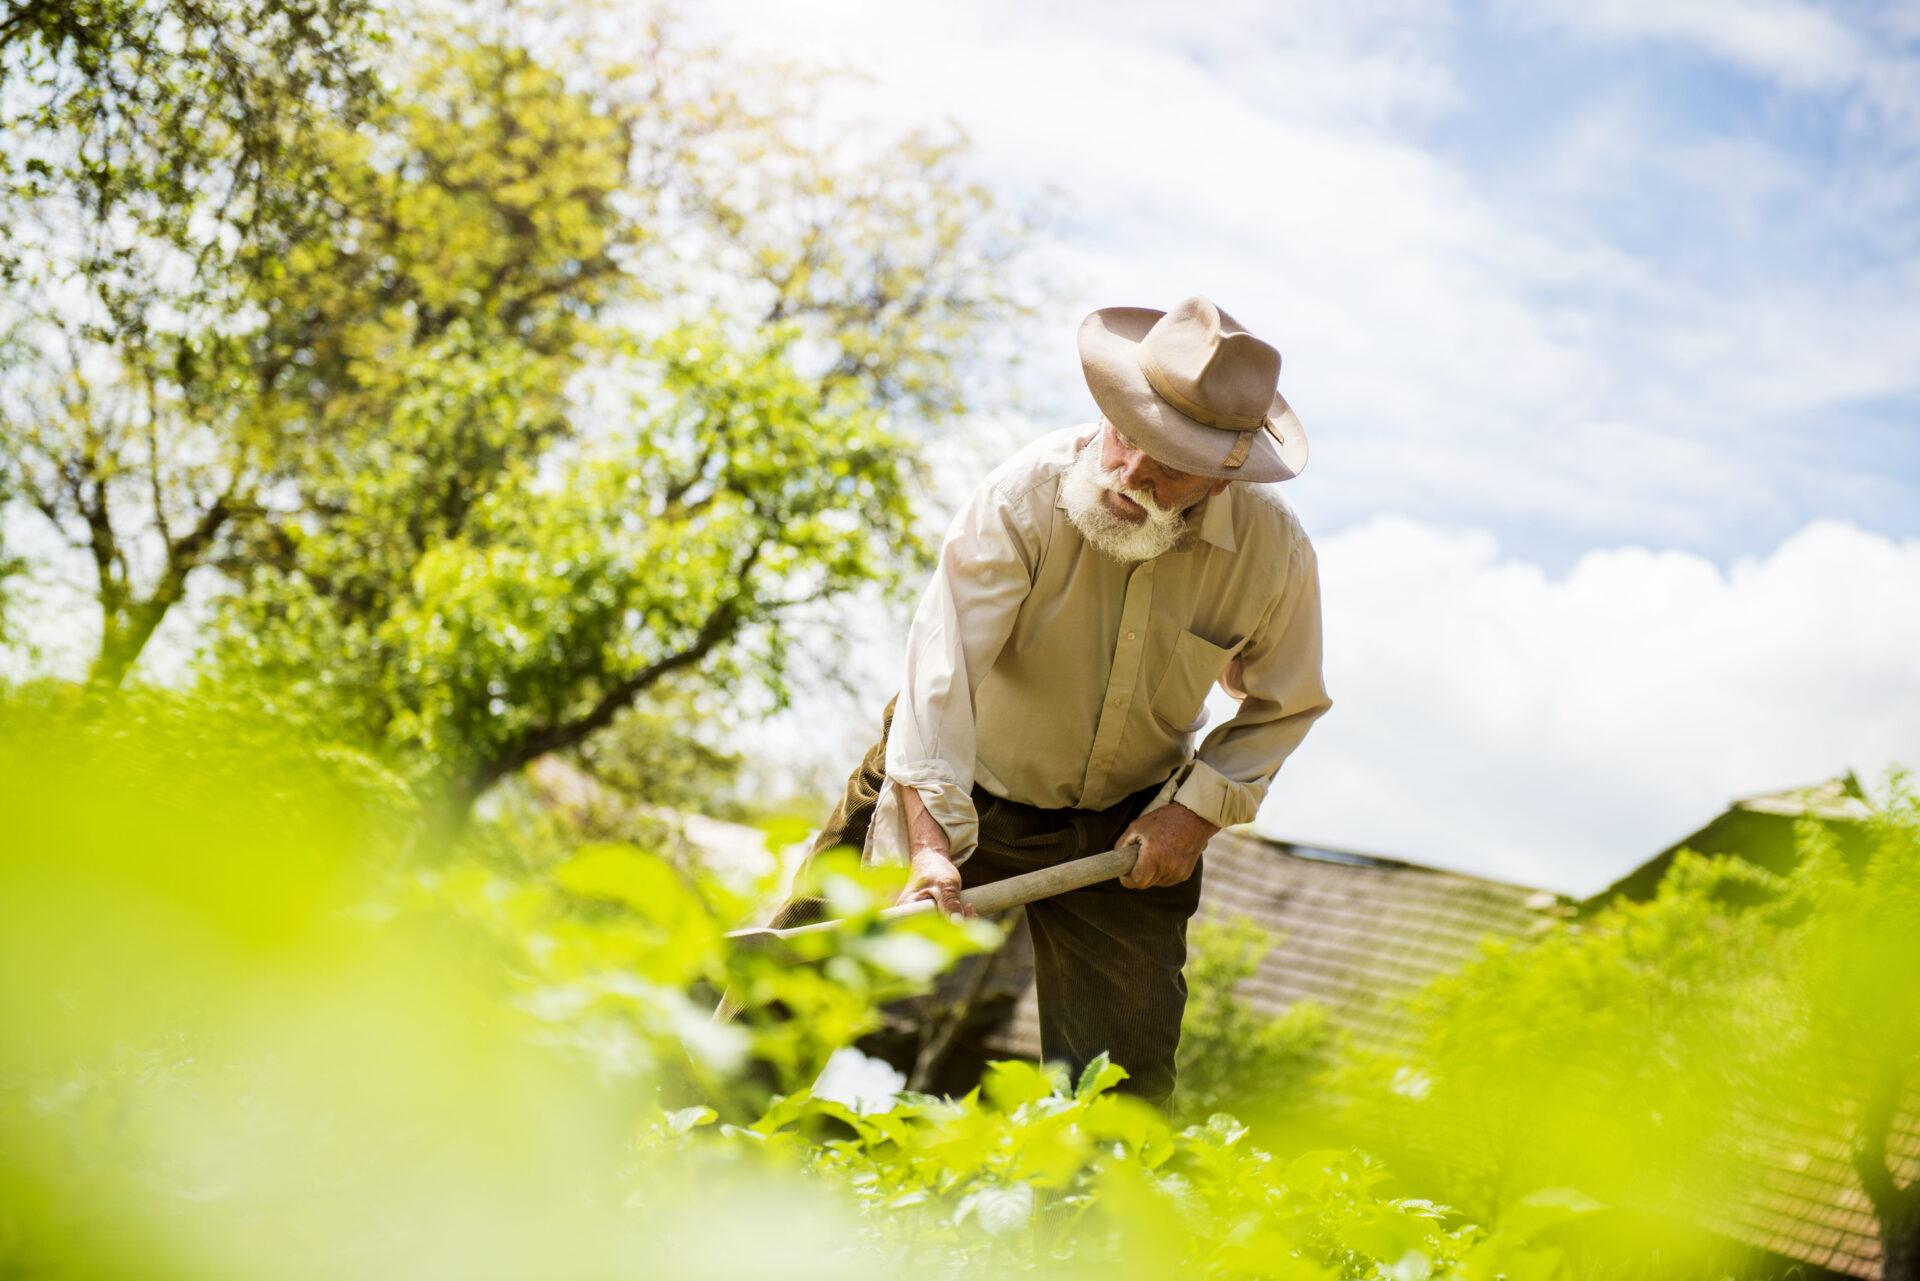
A little extra work in the spring can prevent a lot of weeding later in the year.


It’s a story most gardeners know all too well. We start off the growing season with a blank palette of natural soil in an atmosphere of spring optimism, always confident that this will be the best garden season ever. But if the arrival of summer brings with it an onslaught of weeds, even the most positive of spirits can get crushed under the weight of battling them.


The good news is that there are ways to combat weeds in spring, without using synthetic or even organic herbicides, which can make life a little more comfortable later on. Here are seven tricks to try.


Kill weeds first with clear plastic. Laying reusable clear plastic over the garden before planting any seeds is often an effective way to kill a lot of weeds at once. Sometimes, the greenhouse effect that is created by this method can generate so much heat that it destroys not only sprouted weeds but their seeds, as well, and possibly even other soil pathogens. As a nice side bonus, using clear plastic can preheat the soil in preparation for seeds or seedlings that will appreciate the residual warmth when the plastic is removed. One downside to this method is that it can be less effective in colder climates or during a cold, wet spring, and can end up creating favorable conditions for weed growth if the sun’s rays lack the intensity for searing heat. Make sure this one is right for your situation before using it.


Use fabric mulch before or during planting. I buy high-quality landscape fabric by the roll—the heavy-duty kind sold by greenhouse supply outfits—as often as I can afford it. It costs me a lot more money up front than the cheap stuff, but it works out to be cost-effective because I use it over and over. I use it between the rows in my in-ground garden every year, laying it out before or during planting in a way that defines walk spaces and prevents weeds in all but the smallest slivers of soil. I also use fabric in long-term applications as a weed barrier between and around raised beds, and around berries and fruit trees.


Less expensive fabric or recycled materials can also make a real difference in weeds. Some of my favorite repurposed items for mulching are bags from livestock grain and other animal feed. Used carpet—especially around the other edges of a garden where any possible chemical seepage is less of an issue—works well, too.


Use grass clippings, cardboard and newspaper. These are an excellent mulching option for smaller garden spaces and tight budgets. As with synthetic materials, it is essential to use this method before the weeds take hold—better still before they even sprout. I’ve used this mulching process with good results, and have found that the most important secrets to success are to do it on a day with little to no wind. Don’t skimp on materials, use heavy, wet grass clippings, and pack it down well.


Use weed-free compost. Whether purchased from a commercial compost facility or retailer, obtained directly from a farm, or made right on the homestead, the key is to ensure it’s been heated sufficiently to kill weed seeds. We get all the weeds we need from nature, and do not need to import more!


Maintain the highest possible soil quality. Weeds flourish in poor soil, but most vegetables are not as adaptable as weeds. The more favorable conditions we can give our plants, the better armed they are to grow bigger and stronger and be better equipped to hold their own in the constant fight with weeds for space. Minimal rocks, the right ratio of sand and loam, ample organic material, and proper drainage all contribute to soil health—and in turn, make a big difference in plant health.


Provide plenty of water to newly planted seeds and seedlings. As with soil quality, water helps provide intentional plants with what they need to compete against weeds.


Provide the specific nutrients for the plants that you are growing. This point goes along with general soil quality and water but adds soil composition into the mix. It’s crucial to test garden soil—most cooperative extension services or state universities can help with this—and to amend the soil as recommended. Depending upon geography and the variety of crops being grown, soil test reports might advise raising or lowering soil pH, adjusting the ratio of organic matter, or adding specific nutrients like phosphorus, magnesium or sulfur.


The fundamental way to stop summer weeds in spring is twofold: First, make life as difficult as possible for weeds by overheating them in the sun under clear plastic or suffocating them under mulch. Second, make life as easy as possible for the plants you do want to grow by giving them the best possible soil and water conditions.


What advice would you add? Share it in the section below:


Friday, April 13, 2018

Four “Spring Hardy” Crops to Grow Before It Gets Hot

So you’ve picked out your favorite heirloom tomatoes and cucumber seeds for summer gardening and are just waiting for a little warm weather to plant your garden, right? Perhaps, but there are some tasty vegetables you can grow before the summer heat arrives. With the addition of a cold frame in northern regions, you can start to enjoy fresh vegetables right now.


digging in soil
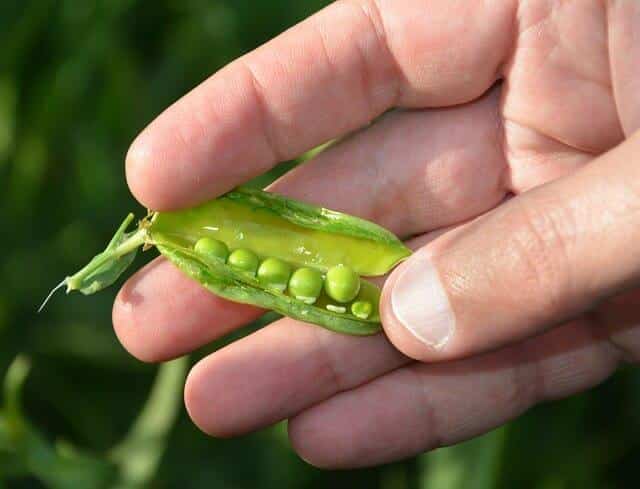
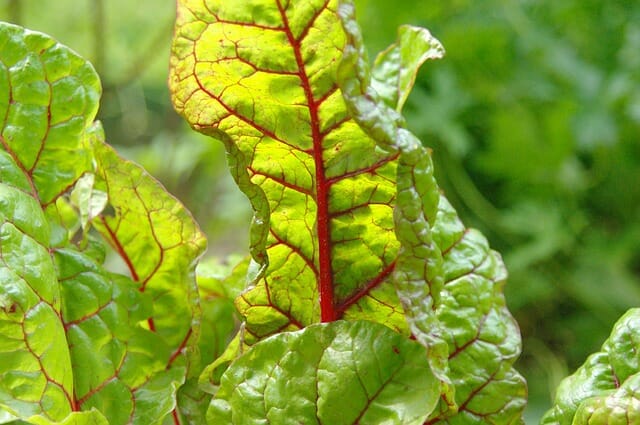
Here are four hardy crops you should consider growing before it gets too hot.


Kale

Kale is one of the hardiest vegetables out there and belongs in any spring garden. If you plant a row of kale early enough, you’ll have plenty. There are lots of kale varieties, all with different flavors and colors, so be sure to plant a mixture to spice up your plate before the days grow longer and the sun gets hotter. Sautéed kale is a great side dish with poultry and meats. It adds a tasty zing to salads and can make a delicious smoothie in the blender, too. If you have a dehydrator, you can also make kale chips for a delicious, healthy snack.


Swiss Chard

Swiss chard is another leafy green that will thrive in the cold. Plant it right away, and like kale, it will produce in colder temperatures. In colder climates, a bed of mulch is all this plant needs to keep growing on chilly spring nights. If you live in a northern region, however, Swiss chard is an excellent candidate for cold frame growing. Chards are another vegetable that comes in a wide variety of sizes and colors. They are great sautéed as a side dish; blanching them first can soften the stems up a bit. Chard is also excellent in soups and is paired nicely with ham.


Turnips

If you plant them right away, you may still be able to enjoy delicious turnips this spring, well before your neighbors get their summer gardens planted. Turnips grown in cold weather will often accumulate more sugar within them and have a delightful flavor when harvested. These root vegetables are also ideal candidates for cold frames and a protective mulch bedding. They’re a great side dish when roasted in the oven with spices like ginger. Mashed turnips are great too. You can also substitute turnips for potatoes the next time you make leek soup.


Cabbage

Who doesn’t love cabbage? Lucky for gardeners, this is another “cold hardy” vegetable you can grow right now. Plant cabbage right away, and it will produce, even in the north. (cabbage can withstand late spring snows and below freezing temperatures.) Cabbage is incredibly versatile as well and can add a nice variety to an otherwise mundane early spring meal. So try planting colored varieties to add pizazz to a plate. You can also stuff cabbage leaves with your favorite meats or sauté it with herbs and spices to ratchet up the flavor.


No Time Like The Present!

Late spring snows are no excuse to stop gardening! These four crops and many others will keep on growing well until the hot weather hits. Just give them what they need to thrive, and you’ll be enjoying fresh vegetables before you know it. So, don’t wait any longer; get out there and plant your cool weather vegetables before it’s too late!

Saturday, August 19, 2017

"Colossal Fraud": Lawsuit Accuses Poland Spring Of Selling Groundwater

Ever wonder if that bottled mineral water you just spent several dollars on is really mineral water? According to a bombshell new lawsuit filed this week, at least in the case of one company it isn"t.


A group of bottled water drinkers has brought a class action lawsuit against Nestle, the company which owns Poland Spring, alleging that the Maine business has long deceived consumers by mislabeling common groundwater. The lawsuit was filed on Tuesday in a Connecticut federal court and accuses Nestle Waters North America Inc. of a “colossal fraud perpetrated against American consumers” the Bangor Daily News reports.


The plaintiffs claim that falsely labeling its "groundwater" product as pure spring water allowed Nestle to sell Poland Spring water at a premium; as a result the consumers who brought the legal action are seeking at least $5 million in monetary damages for a national class and several state subclasses. They requested a jury trial. The civil suit was brought by 11 people from the Northeast who collectively spent thousands of dollars on Poland Spring brand water in recent years. It seeks millions of dollars in damages for a nationwide class and hinges on whether the sources of Poland Spring water meet the Food and Drug Administration’s definition of a spring.


The 325-page lawsuit, which was filed by lawyers from four firms, claims that none of the company’s Maine water sources meets the federal definition for spring water and that the company has “politically compromised” state regulators. Rather than spring water, Nestle Waters is actually purifying and bottling groundwater, some of which comes from sites near waste and garbage dumps, the suit claims. The legal challenge comes as Nestle is looking to expand its operations in Maine.


For instance, the suit claims that the company’s wells in Poland, Maine, have never been scientifically proven to be connected to a spring and draw in surface water, which cannot legally be called spring water. It further alleges that the company has put water from some of these wells through a purification process that disqualifies it as spring water under federal regulations.


The suit makes similar claims about Poland Spring water sources in Hollis, Fryeburg, Denmark, Dallas Plantation, Pierce Pond Township and Kingfield.


Poland Spring has gotten away with this deception for years, the suit claims, by co-opting state regulators and interweaving its interests with those of state government. Since 1998 the company has generated millions of dollars for Maine through licensing agreements, and since 2003 it has had an executive on the governor-appointed body that oversees the state drinking-water regulation enforcement agency, the suit states.


The court complaint further says that the Maine Drinking Water Program scientist who approved many of the company’s spring water permits spent a decade working with this executive at a private engineering firm and that the agency failed to get independent proof of the springs’ existence.


In response to the lawsuit, a Nestle Waters spokesperson said that its water meets all relevant federal and state regulations on the classification and collection of spring water and that the suit is “an obvious attempt to manipulate the legal system for personal gain.”


“The claims made in the lawsuit are without merit. Poland Spring is 100 [percent] spring water.”


This is not the first time that Nestle Waters has faced such allegations. In 2003, it settled a class action lawsuit alleging that Poland Spring water doesn’t come from a spring. In that case, the company did not admit the allegation but agreed to pay about $10 million in discounts to consumers and charity contributions. In other words, pulling a page from Wall Street, it neither admitted, nor denied guilt.


The full lawsuit is below

Monday, May 8, 2017

5 All-Natural, Inexpensive Ant Repellents You Already Own

5 All-Natural, Inexpensive Ant Repellents You Already Own

Image source: Pixabay.com


Ah, spring! It’s a beautiful season, marked by the arrival of things we greet joyfully: longer days, warmer temperatures, much-loved perennials poking out of the soil, and fully stocked garden centers. But spring also sees the return of some things that we don’t greet with as much joy. Like ants, especially when they make their way inside our homes.


Ants hibernate over the winter. Just like bears, they gorge on food in the fall. Their bodies survive off those stored nutrients over the winter. And then, just like bears, when warmer temperatures arrive, ants emerge from their nests seeking food. In those early spring days, when the nights are still chilly, they also look for a warm place to spend the night.


Discouraging Ant Visitors


Ants communicate with each other by secreting pheromones (natural bodily chemicals created by mammals and insects). When an ant locates food, it will create a pheromone trail for other ants to follow to the food source. Because tiny ants can squeeze through minute crevices, it’s often difficult to figure out where they are entering the house so that the entrance can be sealed. If you don’t know where to block them from entering, ants will continue following the pheromone trail into your house.


Keeping your home free from food debris will deter ants from visiting. They are especially attracted to sweet foods, like fruit, fruit juices, honey and sugar. Keep your counter and table surfaces clean, your floors swept, and your compost and trash bins tightly covered. Ants also need water. If they seem to be coming in for a drink, remove or relocate that water source (e.g., pet bowl).


Check the exterior of your home and caulk up any noticeable crevices. If you don’t have caulk on hand or the hole is very small, you can use petroleum jelly, which will hold its seal for about a year.


Natural Ant Repellents


If you’ve removed their food and water sources, and have sealed any noticeable entrances, but you still have ants indoors, there are a number of cheap natural repellents that you can use.


1. White vinegar or lemon juice


Vinegar and lemon juice both disrupt the pheromone trails, making it difficult for ants to know where to go. Mix one part white vinegar (or one part lemon juice) with one part water. The solution can be sprayed around the area the ants congregate and/or their suspected entrance, or it can be applied to a cloth so that those surfaces can be wiped down.


2. Essential oils


A number of different essential oils may deter ants from coming in, including eucalyptus, cinnamon, clove, tea tree, peppermint, neem and citrus oils. Like vinegar and lemon juice, essential oils disrupt the ants’ pheromone trails. Citrus oils have an added benefit: because they contain d-limonene, they’re toxic to ants.


5 All-Natural, Inexpensive Ant Repellents You Already Own Essential oils may be applied by swabbing the area with an oil-soaked cotton ball, or by spraying. Some online sites suggest mixing 10 drops of essential oil to one cup of water; others suggest mixing equal parts essential oil and water. Personally, I would probably start with 10-20 drops of oil to about ½ cup of water, and if that didn’t seem to be working after a few days, I would add more essential oil.


Heather at mommypotamus.com suggests putting vodka into the spray, too, which will help keep the oil and water from separating. Her “recipe” calls for ¼ cup of water, ¼ cup of vodka, and 30-40 drops of essential oil.


3. Spices


If you don’t have essential oils on hand, you can use similar spices, such as ground cinnamon, ground cloves, dried mint, cayenne pepper, black pepper, salt, bay leaves, or garlic powder. Just sprinkle where needed.


4. Food grade diatomaceous earth


While DE has health benefits for mammals and plants, it is toxic to insects that have exoskeletons, including ants. The sharp edges of DE particles damage the waxy coating on ants, and once that happens, DE dehydrates the insect.


Diatomaceous Earth: The All-Natural Ant Killer!


To use, just sprinkle it where ants travel and/or congregate.


5. Soap and water


Soap creates a coating on insects which makes it impossible for air to reach them, and as a result, they suffocate. Make a spray by combining ¼ cup of dish detergent with 1 cup of water. It’s best to spray ants directly.


In general, ants are beneficial in the garden. They aerate soil, pollinate plants and distribute seeds. Also, ants are not herbivores and usually don’t damage plants, but they do prey on other herbivorous bugs that may be chowing down on your plants. Wherever possible, it’s best to leave outdoor ants alone. However, if they’ve built an anthill very close to your house, and are entering it, it may be best to kill off the entire colony by dousing the hill with a pot full of hot soapy water.


There are many other suggested natural ant repellents. Some, like coffee grounds and cornmeal, are reported by some online sites as being ineffective. Others, like borax, are not recommended to use around small children or pets. If you’ve had success with any natural ant repellents, please let us know in the comments below.


How do you get rid of ants? Share your suggestions in the section below:

Monday, April 17, 2017

Frost-Tolerant Vegetables You Should Be Planting Right Now

6 Frost-Tolerant Vegetables You Should Be Planting Right Now

Image source: Pixabay.com


During early spring, the urge to get out in the garden and start planting almost becomes overwhelming.


Stores are stocking up on gardening tools, and seeds are luring me in with the promise of a bountiful harvest. I take full advantage of the warmer climate where I live. But if you live up north you may be hesitant, knowing winter may still throw a few frosty nights at you.


Go ahead and get your gardening gloves out; you can avoid pre-season garden blues by planting frost-resistant plants this spring.


Here are a few ideas:


1. Peas


Snow peas, snap peas or other varieties are easy-to-grow veggies that do well in early spring. With their large seeds, they’re perfect for even the smallest hands to plant. Useful for getting restless kids (and grandkids) out of the house and into the yard, peas do well in early spring – even with a late frost. They’ll grow as vines or bushes, and can take up to 65 days to mature. Plant more than you think you’ll need – the harvest seems to disappear with these easy-to-reap veggies that are loved by both grown-ups and kids alike.


2. Spinach


Baby spinach is a quick sprouting addition to an early spring garden. You can harvest in as little as three weeks, giving you small, tender leaves to use in salads and cooking.


The All-Natural Fertilizer That Can Double Your Garden Yield!


Spinach is frost-resistant, but seems to thrive when grown under cover, so consider using a garden cover the first few weeks after planting. To help prevent loss from frost, plant spinach close together and harvest early. Plant a few varieties to have an assortment of greens from which to choose.


3. Chard


6 Frost-Tolerant Vegetables You Should Be Planting Right Now

Image source: Pixabay.com


Another type of green that grows well in early spring, chard gives your garden a sneak peek at the bursts of color that warm weather brings. For a beautiful display, add yellow, red or white varieties to your planting rows. Sow seeds close together, and then harvest young growth to thin the seedlings. Some chard is available for harvest within 25 days, while others can be grown longer to reach full size. Use chard fresh, toss some into a blender for a nutritious smoothie addition, or cook leaves for a delicious addition to soups.


4. Beets


Beets thrive with cooler weather, and seem to do best before the ground heats up. You can plant beets up to a month before the last frost. This prevents their roots from becoming woody, and it gives them a sweet taste. Beets mature in 60 days and should be approximately two inches wide at harvest. Plant seeds three to four inches apart for optimal growth. Their lovely greens add bright stripes of green to your garden.


5. Carrots


Perfect for locations with heavy soil, carrots take longer than most vegetables to germinate. Sow carrot seeds directly in the soil, but plant more than you will need, because germination is spotty. Get them in the ground up to a month before the last frost, and then thin out the seedlings when you start to see leaves appearing. This is another fun plant to send your kids out to harvest, but don’t be surprised at their abnormal shapes. Depending on your soil, it can split the roots and produce funny-looking carrots that taste delicious!


6. Lettuce


Lettuce can be hard to germinate, so for best results, start some indoors and then transplant seedlings in early spring. They can be moved to your garden up to six weeks before the last frost. Sow additional seeds around the transplants for succession plants, giving you a season-long supply of lettuce. Cover the seeds with a light soil. Harvest leaves when there are enough on the plant for continued plant growth.


Don’t let the fear of frost keep you from getting a head start on your garden. Use cool weather-friendly plants to ease into spring, and enjoy the tender produce your garden will grow before hot weather sets in.


What frost-tolerant or frost-resistant plants would you add? Share your tips in the section below:

Tuesday, April 11, 2017

Grid-Free Climate Control: 3 Innovative Ways To Keep Your Home’s Temperature Comfortable

Grid-Free Climate Control: 3 Innovative Ways To Keep Your Home


Spring is perhaps the best time of the year to experiment with super-efficient heating and cooling systems, since the temperature can flip from chilly one day to warm the next.


However, another reason why spring may be a good time to get those systems up and running is because temperature swings can strain our AC systems. Allow me to explain. Much like automobiles, the stopping and starting of the AC motor — again and again — consumes lots of energy and also can lead to earlier-than-expected repairs. This is especially true for homes that have a heat pump on their system.


But there are innovative, off-grid, eco-efficient ways to stay comfortable during spring, no matter the temperature. And all three can run without the grid:


1. Compost hot-water system


Whether the idea came from a Ph.D. in engineering or a backwoods farmer with a huge amount of creative common sense, I wish I could shake that person’s hand for inventing the compost water heater. The system is set up by winding a heat-capable hose through the compost pile, and then routing it back into the building that requires hot water.


Are You Prepared For A Lengthy Blackout? Get Backup Electricity Today!


Hey, it’s no secret that compost generates heat. Heck, when piles of hay and mulch are left alone, they can spontaneously combust. So, why not put that kind of thermal energy to work? Chances are that you probably have a compost pile somewhere on the homestead, right?


2. The 5-gallon bucket swamp cooler


For those of you who live in the west or southwestern part of the U.S., you’re probably well-acquainted with the concept of the swamp cooler. When water evaporates, it will expend a tiny amount of energy and remove heat in the process – similar to how our sweat glands work. That’s how swamp coolers work.


Obviously, this system doesn’t exactly serve those of us who live in traditionally humid summer climates, but there’s one extremely handy way to harness the science of a swamp cooler and combine it with a ridiculous level of portability. And since this thing will make even a small solar panel array barely break a sweat, I figured the bucket swamp cooler made the cut.


3. Improvised geothermal climate control


And last but not least, I give you the whole kit-and-caboodle: the improvised geothermal climate control system. This one will also require low-wattage pumps and fans, but again, solar panels ought to do the trick with this one, as well.


The system essentially works like this: Even just a few feet below the ground, temps tend to settle at around a brisk 55-60 degrees Fahrenheit, holding steadily all year-round. In fact, if you’re able to dig deep enough, temps even can approach freezing. That’s why, for this particular system, the climate-control magic is derived from its subterranean water supply. In its most basic form, the system uses cool underground water from your homestead’s well to get the job done. To learn more, check out this great article.


All you need to do is move a little water and air, and the earth itself can take care of the hard part.


Have you experimented with any of these systems? Share your tips in the section below:


Be Prepared For A Downed Grid. Learn More Here.

Saturday, April 1, 2017

Seed-Storage Tips You Won’t Learn At The Big Box Store

Seed-Storage Tips You Won’t Learn At The Big Box Store

Image source: Jacki Andre


It’s here! It’s spring! It’s time to start breaking out the seeds!


If you’re like me, you probably spent at least some time this winter browsing through seed catalogs, creating wish lists, and making scale drawings of your garden to make sure that you have space to grow everything you want to. But before you buy seeds and start planting, it’s a good idea to take stock of your existing seeds and make a plan. Which seeds need to be started indoors, and which ones should be sown directly? When should they be planted? Are the seeds you saved from last year viable?


Taking Stock: Stored Seeds


Start by looking for seeds that you have stored away. I, for one, am bad at figuring out how many seeds I need and I usually have a lot left over after planting. You might be surprised at how many seeds you already have on hand — and using those up could provide a nifty little cost savings.


Testing the Germination Rate


If you’re using stored seeds, start with a germination test. Simply put, you want to figure out if the seeds will sprout. Seeds don’t have an expiration date, but many do lose their viability after awhile. If only a small percentage of your stored seeds sprout, you don’t want to waste time planting them and waiting for them to come up.


Need Non-GMO Heirloom Seeds? Get Them From A Company You Can Trust!


Seed-Storage Tips You Won’t Learn At The Big Box StoreIt’s simple to figure out the germination rate. Layer a few paper towels and thoroughly moisten them. Space out ten seeds of any one cultivar on the wet paper towel and then fold it up so that the seeds are covered. Place the folded paper towel in a clear plastic zip-top bag. Keep the bag in a warm, bright spot. Check on it every few days to make sure the paper towel is still moist and to see if any seeds have sprouted. It can take anywhere from a few days to a couple of weeks for the seeds to sprout.


If 9 out of 10 seeds sprout, that’s a 90 percent germination rate, and those seeds are good to plant. If you get a 50 percent germination rate, you can still plant the seeds, but you might want to sow twice as many as recommended (such as four squash seeds to a hill instead of two) to make up for the ones that won’t sprout. If the germination rate is very low, it’s better to source different seeds.


Starting Indoors vs. Direct Sowing


Some seeds need to be started indoors, or their produce just won’t be ready to harvest prior to fall frosts. Other seeds do best if sown directly into the garden. Still others can be started indoors or sown directly. It’s a good idea to start by sorting your seeds into three separate piles: “indoors,” “outdoors” and “either.” Once you know where to sow them, the next step is to figure out when.


Determining Planting Dates


Your last frost date is the key to figuring out when to plant. There are a number of interactive calculators online that indicate your exact last frost date, such as this one at The Old Farmer’s Almanac.


Next, read the seed packets or do some online research to find out how long before the last frost date the seeds should be planted. Then count backward from your last frost day to determine the best dates to plant each variety.


Tips for Organizing Seeds


Seed-Storage Tips You Won’t Learn At The Big Box StoreA simple seed organization system takes only a few minutes to create, but you’ll be able to use it for years to come. Remember that whichever organization system you use, seeds should be stored in a cool, dark, dry location, which has little temperature fluctuation.


Charts/Tables


One of the simplest tricks is just to make a written list of the seeds you usually sow and their planting dates.


Seamazing: The Low-Cost Way To Re-mineralize Your Soil


The list can be stored with your seeds in a shoebox or large zip-top bag for future reference.


Seed File Box


My own favorite seed storage idea is to use a small box as a filing system. Each file divider indicates the planting date, whether the seeds should be sown indoors or outdoors, and a list of seeds that should be planted on each date. That way, it’s quick and easy to determine if I have all the seeds I need for each round of planting.


Seed Journal/Book


My mom used a photo album with plastic sleeves to store her seed packets. Using an album with an area for notes is genius, because you can jot notes about each seed variety beside the packet to keep track of germination rate, planting locations, yields, etc. The album can be organized in any way you choose, but I do like the idea of sticking to planting dates so that by flipping through the album, you sequentially see which seeds to plant next.


Do you have tips for organizing seeds for spring planting? If so, please share in the comments below.

Monday, March 6, 2017

15 Slow-Growing Seeds Smart Gardeners Start In March

15 Slow-Growing Seeds Smart Gardeners Start In March

Image source: Pixabay.com


Is it spring yet?! As the days stretch out longer, and temperatures become increasingly mild, we start to feel the tug of the garden.


Many areas are still experiencing frost in March, but most of us can start planting seeds. Whether or not you can go ahead and start seeds depends on a number of factors, including your hardiness zone, your last frost date, which seeds you aim to plant, and whether you intend to start your seeds indoors or out.


Determine Your Last Frost Date


Your last frost date is important. It will help determine when to plant your various seeds. While information specific to our hardiness zones gives us a rough idea of our last frost date, it’s best to use an interactive calculator, like this one at The Old Farmer’s Almanac for a more exact date.


Sort Your Seeds


There are basically three types of seeds: 1) those best sowed directly into your garden; 2) those that can be sowed directly or started indoors; and, 3) those that most people should start indoors. Start by sorting your seeds into these three groups.


Seeds to Sow Directly


For a variety of reasons, some seeds do best when sowed directly into the ground. Some don’t transplant well. Others are cool-weather crops that can handle light frost and flourish in cooler temperatures.


Need Non-GMO Seeds? Get Them From A Company You Can Trust!


If you have any of the seeds listed below, pull them out and put them aside:


  • Beans

  • Beets

  • Dill

  • Carrots

  • Cilantro

  • Corn

  • Onions

  • Parsnips

  • Peas

  • Potatoes

  • Radishes

  • Rutabaga

  • Turnips

  • Leafy greens, including lettuces, arugula, kale, spinach, collard greens, mustard greens, chard

15 Seeds That Should Be Started In March


Some seeds must be started indoors in most parts of the country — otherwise their fruit may not come to maturity before fall frosts. If you have any of the seeds listed below, pull them out and make a second pile:


1. Basil


2. Broccoli


3. Cauliflower


4. Celery


5. Eggplant


6. Kohlrabi


7. Mint


8. Oregano


9. Peppers


10. Tomatoes


Seeds That Can Be Started Indoors or Out


While some seeds do perfectly fine when sowed directly into your garden, you also can start them indoors in order to get a jump on the growing season. It’s great to be able to enjoy some vegetables earlier in the summer. Plus, you also can stagger your planting by putting out transplants at the same time as directly sowing seeds of the same variety, so that your harvest lasts for several weeks.


The All-Natural Fertilizer That Doubles Your Garden Yield!


On the flip side, it can get daunting to find enough space, lighting, and time to look after large numbers of seedlings. Plus, don’t forget that you’ll need to haul your seed flats in and out for a little while, too, to harden off your seedlings before transplanting. Consider how many seedlings you must start indoors, plus the pros and cons listed, in order to decide whether to start any of these seeds indoors, too:


11. Cabbage


12. Cucumbers


13. Melons


14. Parsley


15. Squash – summer and winter, including zucchini


Determine Planting Dates for Indoor Seeds


Now that you know which seeds to start indoors, the next step is figuring out when to do it. Using the information on the seed packages, count backward from your last frost date to determine when to start your seeds. For example, some vegetables, such as broccoli, should be started 10 weeks prior to the last frost date. Cherry tomatoes should be started nine weeks prior, and full-size tomatoes eight weeks prior.


Have you started seeds indoors yet? When do you start them? Share your gardening and growing tips in the section below:


Bust Inflation With A Low-Cost, High-Production Garden. Read More Here.

Sunday, March 5, 2017

6 Ways To Maximize Your Raised Bed Garden This Year

6 Ways To Maximize Your Raised Bed Garden This Year

Image source: Pixabay.com


Sitting inside, pouring over gardening magazines, and dreaming about my spring garden, I envision acres of land covered in lush, green plants. Each row is teeming with fruits or vegetables, and my family is awed by the bounty of supplies that our garden provides.


When I step outside and face the reality of my yard, however, reality comes crashing back. I don’t have acres of land to work with, and my expanse of lawn is stopped abruptly by the fence that divides my yard from my neighbors (all three of them). To make matters worse, the “dirt” in my yard is more accurately called sand and doesn’t seem to want to grow more than weeds. How can I still achieve the garden of my dreams? With raised beds.


Using raised beds, I can still have rows of plants; they’re just contained in smaller areas.


Seamazing: The Low-Cost Way To Re-mineralize Your Soil


Here are six ways to maximize your raised bed garden this year:


1. Shapes matter


To maximize the space, think rectangle instead of square. Using long, rectangular boxes allows you to easily reach all the plants without having to leave pathways for walking. The benefit? You can fit more plants in your box. Use raised beds that are no more than three feet wide for maximum gardening ease.


2. Location, location, location


If you live in an area where good soil is hard to come by, raised beds allow you to grow plants anywhere. By mixing your own soil, you can grow a bountiful garden in your yard, on concrete patios or elsewhere. Place your raised bed in an area that receives full sun, has easy access to water and is safe from outside forces such as pets, running children or lawn mowers.


3. Spacing


Instead of long rows of plants with spaces in between, stagger your planting rows. A traditional garden uses planting squares to help guide your planning. In your raised bed garden, think triangles. Stagger the rows so that the plants in the second row are in between the plants in the first and third rows, forming triangles. This creates a fuller garden, giving you more production capacity.


4. Companion planting


6 Ways To Maximize Your Raised Bed Garden This Year

Image source: Pixabay.com


As you’re developing your garden plan, follow the lead of Native Americans and use “sister” crops. Planting corn, beans and squash together allows the cornstalks to support the beans, while the squash grow happily in the shade provided. Find other compatible plants to group together to provide an assortment of produce. Some other “sisters” are: tomato, basil and onion; carrots, onions and radishes; celery and beets.


5. Succession planting


Want the benefits of your garden to last all season? Plant in cycles. You can capitalize on fast-producers like lettuce by planting a new crop after your harvest. Replace the lettuce with peppers to keep your garden producing longer.


Need Non-GMO Seeds? Get The Best Deals Here!


For even more production, stagger plant dates by using transplants. Grow seedlings by starting them indoors at varying dates. Add plants to your raised bed at two or three week intervals to ensure a continuous supply of produce.


6. Think vertical


Even if you don’t have a large area of ground, your garden can still produce an abundance of food. Just grow up instead of out. Train cucumber and squash to grow up on stakes or trellises. Plant vining crops along one side of your raised bed with sturdy poles, or in the middle using trellises to provide shade or support to other plants.


Are you planning your spring garden? Maybe you’ve decided to try a raised garden bed this year, or you’ve done raised bed gardening in the past, but haven’t been happy with the results. Using these simple tips can help you maximize your raised bed, giving you and your family a rich harvest that can last year-round.


What advice would you add on raised bed gardening? Share your tips in the section below:  


Are You Making These Common, Avoidable Gardening Mistakes? Read More Here.


Friday, February 24, 2017

5 Wise Ways To Use The Last Few Weeks Of Winter (No. 2 Is The One Everyone Forgets!)

5 Wise Ways To Use The Last Few Weeks Of Winter (No. 2 Is The One Everyone Forgets!)

Image source: Pixabay.com


Transitioning from winter to spring is an exciting time around our homestead. We have used these last few months to research and plan new ideas to incorporate on our land throughout the coming growing season. Right now, we are seeing the last remnants of snow and ice melt away, creating a soggy mess of our land, but there are still plenty of things we can do inside to prepare our homestead for the busy spring season.


Using these last few weeks of winter to prepare for spring weather allows us to work efficiently during those first weeks of spring when life around the homestead becomes increasingly busy. As with any project, creating a plan, even if it is a simple list, enables us to establish what needs finishing before the weather breaks and it helps us take full advantage of the warm winter days that come our way. So, what will we be doing to ensure we are using these last few weeks of winter wisely?


1. Preparing for seeds.


This year we are going to use newspapers saved by neighbors, family and friends to create seedling pots. Cutting and folding enough pots for the seeds we are planning to start indoors this year will take some time, but the materials and labor are free. Additionally, using newspaper pots will allow us to place the whole thing into the ground. No chasing down plastic seedling trays blown about by the wind or finding a place to store them in the offseason. If you are using traditional plastic seedling trays, use this time to clean them, inspect them and replace them if necessary. Or consider newspaper pots!


2. Implement maintenance.


Now is the time to be sure your tools, mechanical and otherwise, are in sound, working condition. For hand tools, sharpen the edges, oil the blades and repair or replace splintered or broken handles. Sharpening the blades of mower decks, tillers, plows and other implements now will allow spring ground-breaking to get off to a smooth start.


Are You Prepared For A Long-Term Blackout? Get Backup Electricity Today!


5 Wise Ways To Use The Last Few Weeks Of Winter (No. 2 Is The One Everyone Forgets!)

Image source: Pixabay.com


In addition to the array of outdoor tools that need to be maintained, sharpen and oil your scissors and knives. Sharpening butchering tools in these last few weeks of winter will save you time during the busy harvest season.


3. Stocking up on the essentials.


If you produce your own soaps, detergents and other household products, stocking up now will ensure you make it through the busy spring and summer months without setting aside precious time to whip up more. Estimate the amount you will need to have on hand until after harvest, and set aside a day to complete multiple batches. This is also the perfect time to rotate food storage supplies while cleaning and reorganizing, if necessary.


4. Preparing soil amendments.


Not all of the prep work can be done indoors, so take advantage of those warmer days in the last weeks of winter to work outside. Enrich garden soils by adding a top layer of compost to the rows. This will allow the compost to begin breaking down before you till it under in a few weeks. If you are planning on adding new raised beds, begin marking off dimensions, or even start constructing them, weather permitting.


5. Building and fence maintenance.


Inspect your outbuildings and fencing for damage due to wind, ice buildup or other weather-related activity. Wet winters can cause wood rot, as well as mold and mildew issues if the temperature remains above freezing for long. Repairing buildings and fencing now will ensure there are no untimely accidents later due to escaped inhabitants or ruined food supplies.


What would you add to our list? Share your tips in the section below:


Bust Inflation With A Low-Cost, High-Production Garden. Read More Here.