Showing posts with label indoors. Show all posts

Monday, January 22, 2018

11 Ways To Stay Sane When It’s 20 Below

11 Ways To Stay Sane When It’s 20 Below

Image source: Pixabay.com


Much of the country has had unusually cold weather this year. Some of us live in regions where cold is business as usual, and others are more accustomed to milder temperatures. But frigid weather can be tough on everyone, even those who are used to it. If you need ideas for ways to keep from going insane when you’re stuck in the house during winter, consider some of these:


1. First, don’t be stuck in the house. Get outside. Even though it might be hard to get motivated to suit up and brace the cold, you’ll be glad you did. Fresh air will invigorate you and help put a new perspective on things.


2. Get some exercise. There are plenty of ways to work out during winter. You can swim laps at the pool, lift weights or work out on machines at the gym, or play basketball or other sports at the community center. If those options are not available to you, an exercise video or home equipment might be a possibility. Walking is always a good option if the sidewalks are plowed or if there are other ice-free surfaces available. If you live near multi-story buildings where you can go up and down stairs or near a mall or civic center where you can walk indoors, that could work, too.


3. Embrace what winter has to offer. Lots of activities are exclusive to winter, and it would be a shame to miss out. Ski, sled, ice skate, toboggan, snowshoe, build a snowman or an ice fort, throw snowballs, ride snowmobiles, or go ice fishing—whatever sounds fun!


4. Attend events. Winter is a great time to go to music concerts, circuses, themed performances, cooking shows, art exhibits, basketball and hockey games, community theater, and whatever else is available in your area. There also might be expos like home shows, outdoor recreation shows, and agricultural trade shows.


5. Use this time to tackle back-burner projects. That might be patching ripped pants or fixing an old radio or resurrecting a long-abandoned blog—whatever tedious or time-consuming jobs you put off during busier seasons, this is a good opportunity to get them done.


6. Do some early spring-cleaning. Organize a closet, donate unused boots and hats to Goodwill, spiff up the basement, scrub ceilings—this is stuff you won’t want to bother with once the weather turns nice enough to be outdoors!


7. Spend time on hobbies. The sky’s the limit with this one. Soapmaking, woodcarving, jigsaw puzzles, reading, target shooting, ham radios, wildlife photography, and online role-playing games are all just the tip of the iceberg when it comes to hobbies. You can enjoy activities you’ve always done, or learn something new. This might be the time to learn how to play guitar or make French pastries or tie fishing flies or train your dog to do new tricks.


8. Spend time visiting friends and loved ones, during a season when people are not too busy to visit. Socializing opportunities can be few and far between for many folks. Whether it’s gardening, food preservation, livestock care, haying, vacations, travel or home repair, most people stay extra busy during warmer months of the year. Winter is a great time to strike up a conversation with neighbors, invite old friends to lunch, or spend a weekend at Grandma’s.


9. Host a party—of any kind! Make it a pot luck, play board games or cards, give it a theme, do a progressive dinner, make the dress code be family pajamas, or even consider a bonfire in the snow. You can make any party suit your style and budget, from quiet and small and low-key to a big bash, or anything else that works for you. If you’ve been meaning to have a party but never seem to have enough time in other seasons, seize the moment in winter!


10. Be glad for the chance to relax. Catch up on the shows and books and crafts and social media you wish you had more time for during the rest of the year. Enjoy the warm wood stove and a comfortable couch. Give yourself permission to spend the day in sweatpants and slippers every now and then.


11. And by all means, dive into the seed catalogs! Enjoy dreaming and planning for next year’s garden, scoop up any discounts offered for early sales, and bask in the idea of fresh vegetables.


When you think about all the things you can do when it’s cold outside, winter doesn’t seem so bad. Try some of the ideas on this list, and you will not only avoid getting cabin fever but may actually enjoy the season.


What would you add to our list? Share your tips in the section below:

Saturday, December 31, 2016

How To Grow Peppers Indoors All Winter Long

How To Grow Peppers Indoors All Winter Long

Image source: Pixabay.com


There are few things that you can grow in your garden that are as versatile as the pepper. Hot, sweet, red or green – even yellows, oranges and purples can add a touch of the exotic to your next dish. For most gardeners it simply wouldn’t be the same without a nice harvest of peppers come late summer and early fall.


But why limit yourself to fresh peppers for only a few months of the year? Unbeknownst to many of us who do not live in a desert climate, peppers are actually perennial plants that can live for many years if given the proper care.


There are two main ways that you can grow peppers indoors. The first is by starting a plant from seed, and the second is by bringing your existing plants indoors at the end of your normal outdoor growing season.


Starting Peppers Indoors


Starting your peppers indoors from seeds is fairly simple and can be done at any time of year. Seeds should be planted in a mixture of peat moss, vermiculite and sand (roughly equal parts of each). Place two seeds in each pot near its center, and push the seeds just below the surface of the soil. Keep soil moist but not wet, and keep pots in a spot where they will get sunlight throughout the day.


Looking For Non-GMO Pepper Seeds? Get Them From A Company You Can Trust!


If you are starting peppers from seed, then you will have the advantage of selecting a variety that will grow to the ideal size for your indoor space. If you have lots of room, then you can grow larger plants such as red bell peppers or Hungarian wax peppers. If you are short on space, however, then try more compact varieties such as dwarf chilies.


Bringing Your Outdoor Peppers Inside


If you’ve already got pepper plants in your garden, you’re ahead of the game. Peppers in containers can be brought directly inside.


For peppers that are planted directly in the ground, the process for bringing them inside is trickier – but so worth it! Start this process well before your first frost. Using a sharp shovel, you can dig around each plant and lift it out of the ground, placing it into a plastic (not terra cotta) pot. This should be done during the evening so that the plant has the cool of the night to recover.


How To Grow Peppers Indoors All Winter Long

Image source: Pixabay.com


If there is extra room in the pot, you can add some compost, but avoid adding extra garden soil. Water you plants and place them in a shady spot outside, and leave them for a few days. Inspect you plants for any pests or aphids and rinse them off very well and then move them to a different spot. Repeat as necessary, until you can’t find any pests. After a few days, you can bring your plants into an in-between spot like a porch.


Finally, bring your pepper plants inside and place under florescent bulbs.


Keeping Your Peppers Fruiting


It is possible to keep your pepper plants fruiting the entire winter – but you will need to keep them toasty warm and give them sufficient light if you are to be successful. Ideally, the room that they are in should be a constant 65-75 degrees. Using very bring florescent lighting or a combination of sunlight and florescent light is best. Peppers tend to need more light than other plants, so if you want fruit you should plan on leaving their lights on for 14-16 hours per day. Some people control this using a timer, but it is also fine to leave the lights on 24 hours a day. Once plants have flowers, they should be fertilized on a weekly basis.


This New All-Natural Fertilizer Doubles Garden Production!


Watering may be done whenever the soil is slightly dry. It is important to never let your peppers sit in a pool of water, as this can cause disease.


Finally, in caring for you plants, remember that peppers are sensitive to air quality. They should not be kept in a room where people smoke or where there are other pollutants in the air, as this can damage the plants.


When fruit is ripe, you may harvest it using a sharp knife. This will help to prevent you from inadvertently damaging the plant.


Growing any type of fruit or vegetable indoors gives you greater control over your growing environment and provides an extended growing season. Peppers are a perfect choice for those who love to make spicy Asian or Mexican dishes to beat out the chill of winter.


Even if you decide that it is too much trouble to keep your pepper plants fruiting over the winter months, there is still good reason to bring this season’s plants indoors and keep them healthy. That’s because next season, you’ll be able to re-plant your mature pepper plants – instead of seeds or starts from your local garden center.


And those mature plants will start producing peppers fast, and you will be the envy of the neighborhood. Your only problem will be trying to figure out what to do with all of those peppers!


Have you ever grown peppers indoors? What tips would you add? Share them in the section below:


Bust Inflation With A Low-Cost, High-Production Garden. Read More Here.

Wednesday, December 14, 2016

The Indoor Winter Garden: 5 Vegetables You Didn’t Know You Could Grow In Hanging Baskets

The Indoor Winter Garden: 5 Vegetables You Didn

Image source: Pixabay.com


The square footage of my vegetable garden is about the same as the square footage of my house. While I do love fresh organic veggies, finding space to grow them indoors during the winter can be a bit of a puzzle. One way to maximize indoor growing space is to use hanging baskets.


Getting Ready to Plant


Bigger baskets will give your edibles more room to flourish. Choose baskets that are at least 12 inches deep. Their diameter can be as small as 6 inches, but the bigger you go, the more you can plant.


Keep your soil light by using a potting mix, and working in some perlite or vermiculite. Avoid bringing in soil from your outdoor garden, or using soil with clay or loam in it, as those will be heavy. Work some fertilizer in before planting to give your edibles a strong start.


Choose a location where your plants will get lots of sun, like a south-facing window. Most edibles need at least six hours of daylight each day, but some require up to 16 hours. Research your cultivars before planting to determine the amount of light needed, but remember that it’s easy enough to attach a small clamping grow light to a basket for supplementary light.


You also should consider your home’s temperature and humidity levels. Most edibles thrive in temperatures ranging from 65 to 75 degrees Fahrenheit, which is the usual range in most homes. Keep in mind that winter air is often quite dry; and placing your baskets near heat vents will cause further drying. Use mulch in to help maintain moisture, and plan to water daily. You also can increase humidity by misting your plants or running a humidifier.


Choosing Edibles to Plant


Dwarf varieties are best for hanging baskets. Compact plants that produce small, light fruits will keep your baskets healthy and manageable. Some plants, like tomatoes, have varieties bred specifically for baskets. For others, such as cucumbers, choose cultivars with smaller fruit.


1. Tomatoes


There are lots of great choices when it comes to tomatoes. Florida Basket and Micro Tom are just two of the varieties bred for baskets and pots. Tomatoes that mature early, such as Tumbler F1 and Tumbling Tom, are also good choices for growing indoors.


Looking For Non-GMO Herb Seeds? Get Them From A Family-Owned Company You Can Trust!


Tomatoes need at least eight hours of light each day, and should do well in a south-facing window for most of the winter. On the darkest days, supplement with a grow light if necessary. They are heavy feeders, and you should start fertilizing them twice a week once the plants are about three inches tall. Because there aren’t any insects or wind to do the job, you will need to hand pollinate your plants once they flower. Simply tap the flower stem to dislodge the pollen; or, if you like, you can use a cotton swab to transfer pollen from one flower to the other.


2. Peas and beans


The Indoor Winter Garden: 5 Vegetables You Didn

Image source: Pixabay.com


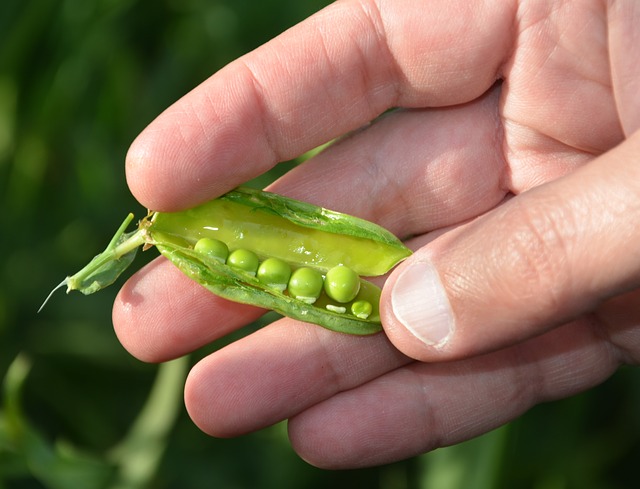
As a cool weather crop, peas are particularly well-suited to growing indoors during the winter. Since they can tolerate light frosts, you don’t need to worry about the vines getting too close to frosty windows. Keep your beans more protected, though, because they prefer warmer temperatures. Both peas and beans require only about six hours of sunlight daily. Plan to water once a day and fertilize once a week for best results.


3. Cucumbers


Choose your cucumber varieties carefully. Some, like Carmen, are bred to grow indoors — or, rather, in greenhouses. These cultivars have a high propagation rate, high yields, good disease resistance, and most importantly for the indoor gardener, they self-pollinate. However, Carmen produces large 14-16 inch fruit, which will be difficult to manage in hanging baskets.


Regular outdoor varieties will have lower yields, and you’ll need to help the pollination process along. However, a variety bred for planters (like Patio Snacker), or one that produces small fruit (like County Fair Hybrid) are excellent choices to grow indoors.


This New All-Natural Fertilizer Can Double Your Garden Yield!


Cucumbers require only moderate amounts of light (5-6 hours daily), but they bask in warmth. Plan to water daily and increase watering once the plants flower. Indoor cucumber plants should be fertilized once a week.


4. Salad greens


Lettuce and other salad greens like kale and spinach are cool weather crops, and are well-suited to growing in your home’s cooler nooks and crannies. They are also very easy to grow from seed. However, these veggies do need a lot of light — 14 to 16 hours a day is ideal. If you’d like to grow salad greens indoors, plan to attach a clamping grow light to your basket. Since salad greens need a moist environment in which to germinate, mist the soil frequently.


5. Strawberries


Strawberries grow well indoors as well as in hanging baskets. The best variety for indoor baskets is the Alpine strawberry, which produces small, fragrant and flavorful fruit. Strawberries do just fine in regular indoor temperatures and need only six hours of sunlight per day. Plan to fertilize about every 10 days, and break out your cotton swabs, because you’ll need to pollinate your strawberries as well.


Even with decreased amounts of sunlight, low humidity and frosty windows, it’s possible to grow some fruits and vegetables indoors during the winter. Use hanging baskets to maximize your growing space — and your harvest. Why spend your winter daydreaming about next year’s garden? Just go ahead and break out those seed catalogs now.


What do you grow indoors during winter? Share your tips in the section below:


Bust Inflation With A Low-Cost, High-Production Garden. Read More Here.

Monday, November 21, 2016

Mushrooms: The Perfect, Indoor, Fast-Growing Winter Crop

Mushrooms: The Perfect, Indoor, Fast-Growing Winter Crop


The idea of gardening indoors during the winter can be daunting. It’s easy to feel defeated by the low levels of sunlight and the limited amount of space. But some crops are excellent choices to grow inside during the winter, and mushrooms are one. They will happily grow in a plastic bucket, a chunk of log or a seedling flat — and they require minimal space. Plus, the naturally dark and cool winter environment suits them perfectly.


Mushrooms are little health warriors. Carb-free, gluten-free, low in calories and sodium, and nutrient-rich, they are incredibly healthy. Different varieties of mushrooms are packed with nutrients like potassium, selenium, iron, and vitamins B2 (riboflavin) and B3 (niacin). Mushrooms enhance our immune systems and lower hypertension and cholesterol. Their meat-like texture makes them ideal meat substitutes.


There’s no doubt that mushrooms are healthy, but how feasible is it to grow them in our homes? Many of us have heard stories about mushrooms being grown in places like abandoned mines. Plus, mushrooms grow from microscopic spores, instead of seeds. Still, believe it or not, mushrooms are fairly easy — and fun — to grow.


Mushroom Kits


Mushroom spores need to be mixed with a nutrient-rich base like sawdust, grain or straw. This mixture will develop mycelium: thin, soft, white threads (think of mold). Once mycelium develops, it’s called “spawn.” For the best mushroom crop, spawn should be spread on a substrate (base material). Common substrates include cardboard, straw, logs, manure and grain; but other materials like coffee grounds and tea leaves can be used.


Looking For Non-GMO Vegetable Seeds? Get Them From A Company You Can Trust!


Because each variety prefers different substrates and growing conditions, getting a mushroom harvest is a bit of an art. First-time growers should consider using a kit. Kits come complete with spawn, substrate, instructions, and often additional supplies like water misters and plastic sheeting. Growing mushrooms from kits is a breeze, and it offers a terrific chance of success.


Experimenting with Spawn and Substrate


Mushrooms: The Perfect, Indoor, Fast-Growing Winter CropKits are great because they give you a chance to see what’s involved in the process. But once you’ve tried a kit, it can be more fun to experiment with spawn and substrates. Start by researching different mushroom varieties and the types of substrates and growing conditions each requires. Once you decide on a mushroom variety, look online for spawn suppliers.


Using your own substrates is part of the fun, and it’s a money-saver. Most substrates do need to be pasteurized before use to kill off harmful bacteria and fungi, but the process is fairly simple. Common methods include baths in hot water, hydrogen peroxide or lime, and cold incubation.


Cardboard is an exception. Since most other fungi and bacteria won’t grow on cardboard, it doesn’t need to be pasteurized before use. Simply tear waste cardboard into small pieces and soak in water for at least an hour. Once it’s drained, it’s ready to use.


Cultivating mushroom spores so that you can bypass spawn suppliers is, unfortunately, labor-intensive and costly. It requires a sterile workplace, as well as a pressure cooker or autoclave. However, if you become an avid mushroom producer, you might want to look into cultivating your own spores, too.


A Step-by-Step Guide


  1. Buy a mushroom kit or spawn.

  2. If you’re not using a kit, prepare the substrate, and then inoculate it with spawn.

  3. Place the inoculated substrate in the best possible environment for the variety. Most mushrooms grow best if the temperature is around 55-60 degrees Fahrenheit, but some varieties will perform better in temperatures that are slightly cooler or warmer. Some light is OK, but keep the substrate away from direct sunlight. Basements often work well for growing mushrooms, as does the space under your kitchen sink.

  4. Keep the inoculated substrate moist by covering it with a damp cloth or a sheet of plastic that has some holes punched in it for air circulation. Remove the covering and spritz with non-chlorinated water two to three times a day.

  5. Depending on the variety chosen, the quality of the spawn, and the suitability of the growing environment, tiny mushrooms may begin growing within a few days to a few weeks. This process is called “pinning.”

  6. Once your mushrooms begin pinning, they will mature quickly, usually within a few days.

  7. The method of harvesting your mushroom depends on the variety you are growing. Some should be cut at the stem; others should be broken off in clumps.

And that’s it! Who knew it could be so easy to grow mushrooms? It really isn’t all that different from growing vegetables, except you are using spawn instead of seeds, and darkness instead of light. Because they prefer cool, dark environments, and require only a little bit of space, mushrooms are the perfect indoor winter crop.


Have you ever grown mushrooms? What advice would you add? Share your tips in the section below:


Bust Inflation With A Low-Cost, High-Production Garden. Read More Here.