Showing posts with label firearm. Show all posts

Monday, February 26, 2018

The Perfect Carbine-Pistol Package That Will Fill All Your Gun Needs

The Perfect Carbine-Pistol Package That Will Fill All Your Gun Needs


If you like compact and maneuverable carbines in the hot 22 WMR rimfire cartridge, then the Kel-Tec CMR-30 is for you. When Kel-Tec introduced the CMR in .22 WMR, it added another player to their lineup of lightweight, compact rifles. There’s a lot to love about this little gun, and if you combine it with the Kel-Tec PMR-30 pistol (same caliber) you would have a dynamite package for hunting, survival, defense and target shooting.


This carbine barrel is 16.1 inches with a 1 in 16-inch twist. With stock fully extended, the overall length is 30.6 inches. Thanks to mostly aluminum construction, it’s very light, at 3.8 pounds unloaded.


Lots of Features


The CMR is loaded with a wide range of useable features right out of the box. Examining this nice carbine overall you will find:


Adjustable stock. Kel-Tec calls it a four-position stock, but that doesn’t include the fully collapsed position, which shortens the gun to a very portable 22.7 inches. The ambidextrous adjustment lever is located just under the top front of the trigger guard. Operation in my experience has been silent and very smooth.


Metal sling loops on either side of the buttstock. Admittedly, they’re small, but that’s a trait that can be compensated for by using a length of paracord to accommodate larger sling hardware connecting points.


The magazine release, like most other things on this rifle, is ambi-friendly. Its location at the rear lower edge of the mag well takes a little getting used to, however.


Ambidextrous safety. Several folks that shot in testing the CMR are southpaws — and all found the thumb-operated lever convenient.


A textured pistol grip that complements this gun’s pack-ability with its narrow and flat profile. The signature Kel-Tec texture makes keeping a solid grip and shoulder mount easy.


A roomy trigger guard allows for safe operation, even with gloved hands.


Flip-up Magpul rear sight, with aperture that’s adjustable for windage. This (along with its mate up front) is a surprisingly high-end attachment. Regardless of the reason for putting better sights on the CMR-30 than on other Kel-Tec carbines, they did right by the consumer with this choice.


To match the rear sight, the front is a flip-up, Magpul adjustable post. This setup is great for keeping the gun compact, as optics can clear the sights without being mounted extra-high. The sights can thus co-witness with many optic setups.


More Pictatinny rail than you’ll ever use runs the length of the stock, top and bottom. You can add more stuff than you probably need!


Ambidextrous bolt operation, with a charging handle big enough to grab onto and operate quickly to clear a malfunction while keeping the gun shouldered. It’s also there to simply lock the bolt back, though doing that without breaking the firing position would take more work than I’ve put into this gun so far. The lock-back lever isn’t ambi; it’s on the left side only. At first glance it appears the charging handles may reciprocate during firing, endangering fingers. They don’t—they’re only for manually pulling the bolt rearward.


Threaded muzzle, with a good checkered steel cap, allows for quick installation of a suppressor or flash hider. The cap keeps the threads clean and the barrel streamlined without an accessory.


Trigger


The CMR trigger has a bit of take-up but isn’t heavy or grainy, and the reset is palpable without being match-grade sensitive.  Kel-Tec says the weight range is three to five pounds, and it’s not adjustable.


Finally, Kel-Tec provides a full-color, highly detailed owner’s manual. It’s a nice gesture in an age when most manufacturers are issuing dull, generic manuals that drive us to YouTube when it’s time to clean the firearm.


Accuracy and Ammo


Shooting the CMR with a variety of setups was found to be more than acceptable. Especially considering a magnified optic was NOT utilized for a detailed accuracy test.


Ammo types during the trial include CCI TNT Green (lead-free) 30 grain, CCI Maxi-Mag 40 grain, and Hornady Critical Defense 45 grain. All achieved one to one-and-a-half-inch groups at 25 yards, with the TNT Green forming the tightest group of less than an inch. This is not to pass negative judgement on the other loads, as improvised rests used in the prone position, wind and shooter error surely had some effect, as they usually do.


Keep in mind that just a year or so ago 22WMR ammo was quite challenging to find, due to supplies having been bought up over the previous six to eight years because of concerns over gun and ammunition availability. Moral to this story: Keep a very good supply of the calibers of ammo you enjoy shooting and intend to use for all purposes.


Magazines


The owner’s manual provides rather sternly worded instructions about loading the magazines, and they’re not kidding. Loading the 30-round mag is the only thing inconvenient about operating this gun. Ammo must be loaded from the front of the magazine while sliding the round toward the rear wall of the magazine. The manual recommends tapping the flat backside of the mag on a flat wooden surface every 5-10 rounds. The spring is quite tight, and much pressure is required to load the last 10 rounds. The rounds also tend, at any stage of loading, to get a little off kilter in their double-stack configuration. The four misfeeds experienced during the 125-round test (a three percent failure rate) can probably be attributed to a slightly displaced round near the top of a full magazine. Once you become accustomed to the magazine loading procedure, it’s not that big a deal.


The magazine drops easily from the mag well upon release. This allows one to run speed or tactical reloads without hassle.


Takedown


Disassembling the CMR-30 is a straightforward process, if unusual in comparison to most common semi-autos. A small pin located on the frame and above the trigger must be pushed through with an improvised pointy object. The grip/trigger assembly separate as one unit, along with the stock, and barrel/bolt assembly which can be separated for cleaning. It’s not intuitive, but once done, it’s easy to repeat.


Parting Thoughts


Mounted with a magnifying optic, zeroed for the shooter’s ammo of choice, the Kel-Tec CMR-30 is a highly portable, dependable and accurate tool for a variety of applications out to at least 100 yards and probably beyond. For shooters whose visual acuity is good, the same is true for using the rifle with its stock sights.


What’s even more attractive is that the CMR-30 companion gun, the Kel-Tec PMR-30, is a full-size pistol of the same caliber and the magazines are the same for both.


Both the CMR and the PRM appear to enjoy a continued high demand. Current retail pricing for the CMR-30 ranges from $450 to $550.


Have you ever shot either of these guns? What did you think? Share your thoughts in the section below:

Saturday, September 30, 2017

A 1,000-Yard-Range Survival Rifle? Yep

A 1,000-Yard-Range Survival Rifle? Yep

Image source: Wikimedia


If there is one iconic firearm of the 20th century that has come from an American arsenal, it is the M1 Garand.


The rifle that GIs and Marines lugged across Europe, slung through dense jungle and fought with on Korea’s frozen mountains. It saw action in Vietnam, and was given out liberally to many of America’s allies during the Cold War years. During the Vietnam protests, the M1 Garand was again used, this time by the National Guard to quell the riots.


The M1 was designed in the 1920s, perfected in the 1930s, and issued starting in 1937. John Garand, a Canadian by birth, took the better part of two decades to perfect his design and beat out the competition.  The rifle, in its final design, incorporated a gas piston-operated semi-automatic action. The M1 was fed from an en-bloc clip (yes a clip, not a magazine in this case) that held eight rounds of .30-06 ammunition. The rifle was both accurate and fast firing, and in fact there was nothing like it in the world that could compete with it at the time.


Be Prepared. Learn The Best Ways To Hide Your Guns.


The M1 gave troops a distinct advantage in WWII, when most of the enemies’ soldiers were still armed with WWI-era bolt-action rifles. The Garand could both lay down fire faster and be reloaded and brought back into battery quicker. Attempts by other nations to field a standard issue semi-automatic rifle failed. Only the German MP-44 Sturmgewehr, the world’s first successful assault rifle, was a better rifle than the American long arm. However, the Germans only produced about a half million MP-44s whereas the US produced over 6 million Garands.


After WWII and the Korean war, the M1 Garand was replaced with the M-14, which was just an updated M1 that fed from a detachable 20-round magazine instead of the 8-round clip. The M-14 also has a selector switch for full automatic fire. The M-14 was a failure as a standard issue rifle. For one, the cartridge it fired, the 7.62x51mm/.308, was simply a downsized .30-06 and was too powerful for full automatic firing from a shoulder-fired small arm. The remaining M1 Garands in stock were rechambered for .308/7.62 and passed to the National Guard, given to allies or sold as surplus to US civilians.


Story continues below video


Today, the M1 has found a home with competition rifle shooters at national matches. It is also a rifle that is passed down from generation to generation and is owned by millions of Americans. Whether chambered in the modern .308 or the more popular .30-06, the M1 is a powerful and somewhat heavy rifle by today’s standards.


While technically not what one would consider a “battle rifle” by modern standards, it is still able to hold its own. The long stroke gas piston action is very reliable. The rifle’s iron sights are very good, easy to use and accurate. The effective range of the Garand, especially shooting .30-06, is out to about 900 yards – although some shooters have hit targets at 1,000-plus yards. Try shooting that far with your AR-15.


Often the question comes up: Is the M1 Garand still a viable option for survival or home defense? Yes, it is, but it does have its disadvantages. Although I would contend that the M1 Garand is vastly superior to the very popular SKS (of which at least 10 million are owned by Americans), it is not superior to the AR-15 or the AKM platforms in a disaster scenario. First, the M1 cannot shoot most commercial .30-06 ammunition unless you use a different gas plug. Using modern hunting ammunition generates more pressure than the Garand was designed for — and it can blow up your rifle.


Surplus ammo can still be found but it is not cheap – around $1 a round. Steel cased and foreign brass cased ammunition loaded to mil-spec is available but not as cheap as the more readily available 5.56x45mm or 7.62x39mm rounds.


The rifle’s 8-round capacity also can be a handicap, as well as the distinctive “ping!” sound the rifle makes when it is empty and ejects the spent en bloc clip.  However, the sheer power of a .30-06 round or .308 can be enough to win a gun fight, or end a threat.


So yes, the Garand is still a viable option, albeit a little outdated. It is also expensive. You can buy an AR-15 or AKM for around $500-700 today, while a M1 in good shape will not sell for less than $1,000.


Have you ever used an M1 Garand? Share your thoughts on it in the section below:


Pump Shotguns Have One BIG Advantage Over Other Shotguns. Read More Here.

Sunday, September 3, 2017

I Was In Law Enforcement. Believe Me, You Need To Carry A Firearm Every Day

I Was In Law Enforcement. Believe Me, You Need To Carry A Firearm Every Day

Image source: Alien Gear Holsters


It’s very simple folks; the police usually will not be able to save you. Don’t get me wrong, I have been a law enforcement officer for many years. Officers want to get to you but the majority of the time the incident is over by the time police arrive.


So in essence I believe in my right, and your right to protect yourself and those around you. Having said that, do not take your decision to carry lightly. Once you have made this decision, stay well prepared and confident with your firearm and carry system. A fellow instructor once told me, “It has to become a lifestyle,” when it comes to your personal defense and by necessity your own well-being and preparedness. I couldn’t agree more.


So what do I carry? It depends on many factors. When I teach concealed carry I talk to students about tradeoffs when they begin carrying a concealed firearm. Considerations include concealability of your handgun, single vs. double stack magazine models, caliber, ease of operation, dependability, comfort, and of course there are many others.


I assure you that if your carry handgun and carry system are not comfortable, you will not carry for long. This brings to mind the quote, “the gun you have on you, is better than the one left at home”!


My selection for carry on any particular day is driven by such factors as weather (hot or cold outside?), activities and location planned for the day, along with attire.


The following comprise my concealed carry selection 98% of the time–


Smith & Wesson Shield in 9mm. I like the feel of this pistol; it’s streamlined and easily concealable. I shoot it well and have found it to be very reliable. It comes with eight- and seven- round magazines, plus one in the chamber, and it is a reasonable carry gun. I most often carry this pistol in an appendix position. I like the Guardian Angel holster system that provides a leather or soft back with a firm kydex outer portion. I most often carry a spare magazine as well.


Glock 19, 9mm. Likely one of the most common handguns for concealed carry. Very reliable with good accuracy and a great mid-size carry gun with a magazine capacity of 15. I will carry in a Guardian Angel or SpetzGear appendix or belt-mounted kydex, pancake-style holster.


Glock 42, 380 Auto.  When I need to go small with a high degree of concealability, this is my choice. I carry in the appendix or pocket position via a BladeTech or Sticky holster. The Glock 42 is very reliable and suitable for those attire-limiting occasions. The Glock 42 comes standard with a six round magazine, but plus two extensions are available for the magazine.


Ruger LCR, 38 Special. Very concealable and problem free from an operational standpoint. The 38 Special cartridge has taken care of its share of “bad guys” over the years and there is a wide variety of good defensive ammo available for this caliber. I often carry in the appendix position in a soft-sided Sticky Holster.


Understand, I have no opposition to larger caliber handguns, such as the 40S&W or the 45ACP. I have and will carry these caliber guns on occasion. It all boils down to your comfort and ability to shoot and handle the gun well.


Other EDC (Every Day Carry) items I am seldom without include; a spare magazine or ammo source for my carry gun du jour, a flashlight (most often a Steamlight ProTac- 2L), a good blade (or two) and a tourniquet (CAT, SWAT or comparable).


If you’re a person that has a high degree of concern over the caliber issue, perhaps keep in mind the following: carry the largest caliber handgun you can shoot well and will commit to carrying every day. And then train well; train often. After all you are carrying to protect yourself and those you care about.


Thursday, May 18, 2017

3 Pistol Problems That Could Ruin Your Range Time

3 Pistol Problems That Could Ruin Your Range Time

Image source: Eagle1Supply.com


As an instructor of many new shooters, I’ve come to expect certain equipment problems that crop up repeatedly. Here are some insights to help you not be that person whose enjoyment of shooting is diminished — or worse, injuries are sustained — as a result of gear issues on the range.


1. Inadequate pistol holsters.


Holsters, whether for open or concealed carry, come in two general types: rigid ones that stay open wide when the gun is drawn, and soft ones on which the opening collapses to some degree when empty.


There’s nothing wrong with a softer holster as a storage device for a gun that’s rarely used, or for uses in which you have lots of time to re-holster the gun after use.


Where problems arise is when people attempt to use non-rigid holsters for serious training, like rapid draws. Usually, they fail to position the gun in the same place every time, forcing the user to fumble around during the draw. If it’s a life-or-death situation, or a serious defensive shooting class you’re preparing for, soft holsters are a poor choice.


Fully collapsible holsters, like the soft one I wear in my waistband as a concealment aid, are great for comfort and everyday wear. For practice, I must remove the holster, safely re-holster the gun using two hands, and then put the whole business back in my waistband. There’s nothing fast about it. If I were in a situation where I had drawn my pistol for self-protection and the threat is still active, and I still had the gun out when police arrive on scene, I’m better off dropping my gun to the ground and trusting its drop-safe construction than fooling with a holster, gun in hand, and risking the appearance of being a threat to police.


The most frequent problems I see with soft-sided holsters, purses included, are safety issues. People often fail to realize they’re passing the muzzle over their own hand during the draw or re-holstering. On belt-mounted holsters that feature retention straps that cross over the backstrap and snap into place, risk of shooting oneself in the leg is presented by not making sure the holster opening is clear of the strap before inserting the gun.


The Self-Defense Weapon That Doesn’t Require A Firearms License!


There’s a time and place for soft-sided holsters, and a time to choose a rigid one. Although rigid holsters generally cost more, acceptable ones can be found for less than $45. That’s cheap prevention of a disabling injury.


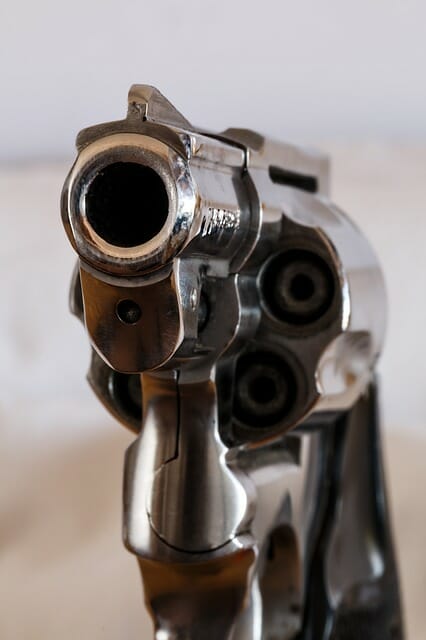
2. Revolvers that aren’t maintained.


3 Pistol Problems That Could Ruin Your Range Time

Image source: Pixabay.com


Virtually every presentation geared toward new shooters touts revolvers as an easy, user-friendly choice. Yet they are by far the most problem-riddled firearms that show up in my classes. Why? Lack of maintenance. Most users pull out or borrow a revolver, or ammunition, that’s been in storage and neglected for years. Then it’s a surprise when the cylinder won’t rotate, or won’t open, or when bits of hot shrapnel are spewed back to the shooter’s face (one reason you MUST wear glasses when shooting).


Revolvers, like any firearm, require occasional maintenance. Lint and dust can build up around the extractor. Repeated firing can change the barrel-to-cylinder gap, or cause excessive side-to-side travel when the cylinder is closed, among other problems. Any of these can cause a revolver to malfunction. Attention to cleaning and lubrication, even when in storage, can go a long way to prevent frustrating or unsafe experiences with your revolver.


3. Handgun sights that aren’t up to snuff. 


Whether they’re an aftermarket add-on or factory-made, a loose, broken, or fallen-off sight can ruin your plans for practice. Regularly check your front and rear sights. Ensure they’re not cracked or broken, missing parts like the day-glow or tritium insert, or loose.


There are many advantages to high-visibility sights, especially for that all-important front sight. Many aftermarket front sights are elongated to accommodate light-collecting tubes or other features. Especially with those designs, but with all models, there will at some point be leverage exacted on those sights, usually during re-holstering. Knowing this may affect what sights you select to replace the stock ones.


Many times, it won’t be immediately obvious that there’s a problem with the sights. Often the first sign is when shot patterns on target begin to be uncharacteristically inaccurate and random, especially for experienced shooters. Choosing sights made of steel instead of plastic can increase the odds that your sights will remain solid over time. Installing sights according to manufacturer’s instructions, particularly those that screw in, is not to be overlooked. It’s tempting, but can be disastrous, to over-tighten screws, for example. Follow instructions, and be vigilant about inspecting sights at the beginning and end of your practice time.


It’s Not About the Money


Usually with firearm equipment, the least expensive choice of product delivers the most disappointing results. However, it’s almost never true that the priciest choice is superior, either. Choosing reputable guns and gear is important, but the biggest advantage is gained by paying attention to the condition and maintenance of equipment. The only investment needed is a little time.


What problems would you add to our list? Share them in the section below:

Thursday, March 30, 2017

6 Intimidating (And Quiet) Alternatives To Guns

6 Intimidating (And Quiet) Alternatives To Guns


A firearm is a critical defensive tool to have in your survival kit, but there are a wide variety of non-firearm alternatives available on the market.


While a gun might be your first and best defensive option, it has some drawbacks, too. One of the biggest is noise – guns are loud, and even suppressed firearms are fairly noisy. Shooting an unsuppressed firearm can cause severe hearing damage, give away your location to an imminent threat, or scare away wild game that you are trying to hunt.


Another downside is that firearms need ammunition to function – without it, your expensive new gun is just a menacing-looking paperweight. Your supply of ammunition is limited by its cost, the amount of space you have to store it, and (in survival situations that require you to leave your home) the weight you can carry. Consequently, you may only have a limited amount of ammunition on hand when your survival plan needs to be put into play. You should consider purchasing one or more non-firearm defensive tools if:


  1. You want a backup to your firearm in case you run out of ammunition.

  2. You want a quiet defensive tool.

  3. You cannot carry a gun in some locations.

  4. You have moral, philosophical or ideological objections to the use of firearms.

This article will discuss your options for purchasing alternative defensive tools to add to your bug-out bag or emergency stash. Remember: You will need to practice and become proficient with any defensive tool to ensure that you can operate it effectively when a disaster strikes.


Projectile Weapons


1. A crossbow or compound bow.


While crossbows and compound bows are traditionally used for hunting, they also can be used as a defensive tool. While not as effective as a firearm, a good crossbow or compound bow will provide lethal accuracy out to 60 yards without the loud report of a gunshot. A well-constructed entry level crossbow (firing at 300fps or greater) will typically cost around $500, though lower-powered variants can be purchased for much less. Entry level compound bows firing at 300fps or greater will typically start at $200, and go up from there. You will want to purchase a case, spare bolts or arrows, replacement arrowheads, spare bow strings, and bow wax.


2. A survival bow.


As with the crossbow or compound bow, a survival bow is a hunting tool that can double as a defensive weapon. Unlike compound bows, a survival bow can be disassembled easily, and stored in a small pouch or carrying case. Aside from its ability to be disassembled for compact storage, the main benefit of the survival bow is its simple design when compared to a compound bow. However, survival bows are not as easy to shoot as compound bows because they have a much heavier draw. Your bow should have a minimum of a 40-pound draw – if the manufacturer doesn’t provide you with draw information, it is likely under the 40-pound mark. A decent survival bow can be purchased for as little as $90.


3. A slingshot.


They can use virtually any small object as ammunition, are compact enough to store virtually anywhere, and are very quiet. Steel ball bearings are the best ammunition for this type of weapon, but marbles, rocks and even steel nuts from a hardware store will function adequately.


The Self-Defense Weapon That Doesn’t Require A Firearms License!


While a slingshot may not kill an attacker, it can certainly break bones and cause substantial bodily trauma. The best part is the price – a decent slingshot can be purchased for under $100.


Handheld Weapons


4. A machete.


A machete is a great tool to have in your prep kit, regardless of whether or not you are looking for an alternative to firearms for defending yourself. You can find a high-quality machete for less than $50 at any hardware or sporting goods store. Just remember that machetes are designed to slash, not stab.


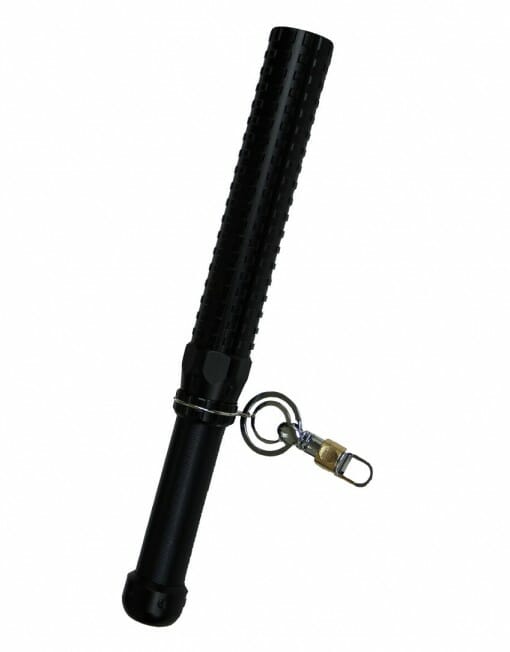
5. An expandable baton.


6 Intimidating (And Quiet) Alternatives To Guns This compact, concealable defensive tool is an excellent choice for close-range defense. The expandable baton is composed of a handle that contains telescoping metal shafts, and a weighted tip.


It’s The Low-Cost Way To Defend Yourself Against Criminal Scum!


With the flick of your wrist, the baton expands to its full size, and makes a formidable impact weapon. An entry-level expandable baton can be purchased for around $25, and high-end versions for under $100.


6. A knife.


A fixed-blade knife is an ideal defensive tool because it is designed to withstand a lot of abuse. However, they are harder to store because of their length. Folding knives may not be as durable or reliable as fixed blades, but are good to have because they are easy to store or carry unobtrusively. When looking for a high-quality knife, expect to spend at least $50, maybe more. Some can be purchased for under $20, but their quality and durability may be questionable.


What weapons would you add to our list? Share your thoughts in the section below:

Monday, January 16, 2017

4 Shotgun Accessories For A Better Home Defense

4 Shotgun Accessories For A More Effective Home Defense

Image source: Pixabay.com


A shotgun is the ideal choice for a home defense firearm for many gun owners. There are great reasons for this: avoidance of over-penetration, slightly less demanding accuracy standards in less-than-perfect shooting conditions, and mighty stopping power. Practically every conversation about home defense shotguns also includes mention of that ominous racking sound—but I hope no one is depending on sound effects to scare off intruders, when real force may be necessary.


Like anything else associated with the word “tactical” these days, a plethora of add-ons are available for defense shotguns, not all of which are really useful. Here, I’ll point out a few that are worth the investment for mounting an effective—and ethical—counterattack with a shotgun.


1. A sling


The larger your property, the more complicated your responsibilities at home, the more a sling makes sense. Being able to navigate space hands-free is a major asset; however, it’s also a good idea to keep your gun with you. A sling lets you do both.


Options for slings and sling mounts are many. From a simple latigo strap threaded through the swivel loops on a hunting rifle (making a two-point configuration that’s easy to shoulder), to a one- or three-point tactical setup that allows more options for the method of carry, this is a highly customizable choice.


Be Prepared. Learn The Best Ways To Hide Your Guns.


Expect to spend $20 to $35 for an entry-level tactical sling. Mounts are generally higher in price, starting at $25 and priced up to $75. Before purchasing a sling/mount set, make sure your shotgun has studs, rails or whatever is needed to attach the mounts. It would seem to go without saying, but make sure the sling’s hardware is a match for what’s on the gun. Paracord is a frequently used accessory for making stiff connections easier to work with, and for making a too-wide sling work with narrow loops or rings.


2. On-board ammunition


Let’s assume your gun’s capacity is more typical, between two and six rounds. Even six rounds may not be enough in dire situations where multiple attackers or poor marksmanship have created the need for more ammo.


Where will more ammo go? As with slings, there are choices. I’ll eliminate things like belt-mounted ammo storage for this discussion, since this is about ammo that’s needed in fast order—so it needs to be in or on the gun.


Extended magazine tubes are one choice, and the shortest distance between need and a hot chamber. Alternative mag tube choices exist for common platforms like the Remington 870, Mossberg 500, and their variants. A couple brands also have manufactured their parts to be compatible with Remington or Mossberg mag tubes, but be sure to check the specs before purchase. Expect to spend $50 to $80 on an extension for a magazine tube.


Not crazy about the idea of modifying your scattergun? One alternative is a cloth cartridge holder, which can stretch over or Velcro onto the buttstock, keeping ammo at the ready. I did find it necessary to secure this sock-like accessory with tape when I used one to prevent it from sliding around. That might be undesirable if you aim to preserve a finished wood stock.


Similar to a cloth cartridge holder, but possibly requiring some modification, is a sidesaddle-type shell carrier. These can be mounted anywhere from the buttstock to the receiver, depending on design, and price can vary from $25 to more than $100, depending on material and capacity.


Left-handed shooters should note that many cartridge storage products are made with a right-hand bias, and may not be usable without modifications.


One advantage of an external ammo storage system is being able to organize, and see, ammunition types in relation to their position on the gun. Methods vary, but some defenders like to have one type of ammo, like buckshot, in the magazine, and birdshot ready in the most available loading position. Perhaps slugs will be in the rearmost position. Storing the shells with primer up or down, or a combination thereof, also can help indicate ammo type in a high-pressure situation.


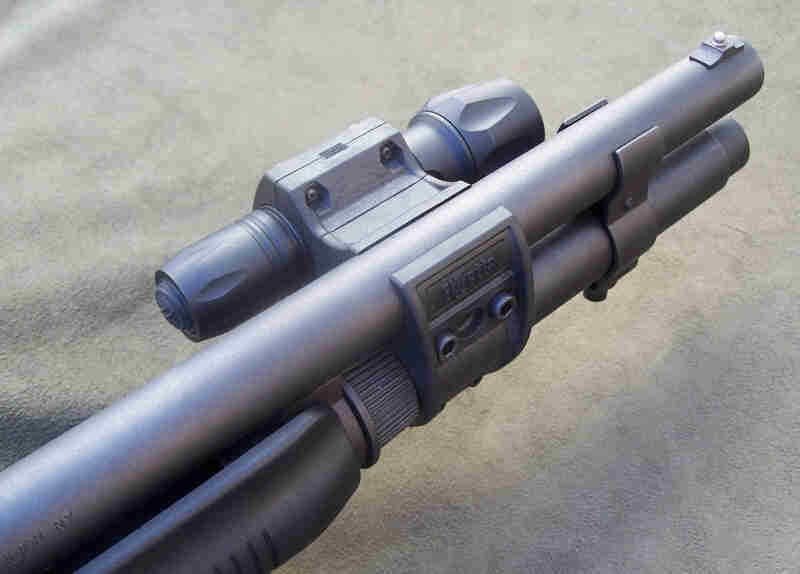
3. Auxiliary light


4 Shotgun Accessories For A More Effective Home Defense

Image source: LA Police Gear


It’s your legal and ethical obligation to correctly identify a threat before firing. The handful of tragedies and more near-tragedies that happen annually due to failure to identify the target are inexcusable.


We’re talking about a gun that you’re likely to use in the dark hours. Light is a must for identifying your target. It also might serve as a navigational or signaling aid, but this kind of use should be minimized since, with a weapon-mounted light, the muzzle will cover everything you light up—a shaky proposition from both safety and legal viewpoints; the latter especially applies when outside of your residence.


Wouldn’t a nice flashlight do just as well? Perhaps, but most people aren’t prepared to wield both a flashlight and a long gun while making accurate shots. So a gun-mounted light makes sense, though it cannot avoid the muzzling issue, so that safety rule about keeping your finger off the trigger until the sights are on target and you’ve decided to shoot applies — in spades.


Entry level long gun-mounted lights begin at around $65. Prices climb rather dramatically after that, with some excellent choices available for less than $200. You’ll want to select a light with a pressure switch — that is, one that you can operate with the hand that’s on the forend, and one that turns off as soon as you release pressure. When someone’s trying to kill you, it’s a good idea not to reveal your position with light more than necessary.


4. Tritium front sight


Least beneficial but still useful of the four items here is a front sight with a tritium insert, which glows in the dark and is visible only behind the gun. Without it, only a silhouette of the front sight will be visible with a weapon-mounted light. This accessory will cost $60-$100, but consider hardware and gunsmith costs. as well. Be sure to practice with any sight system so you know where your shots will impact at typical close-range distances, and adjust your sights accordingly, or adjust your hold if the sights are non-adjustable.


Hopefully. this has given you some ideas of choices to accessorize your home shotgun to make it safer and more effective for defensive use. While these gadgets are useful, having them is only half the equation. Practice, and with that, knowing how to use them in dim light, is equally valuable.


If readers have experience with other shotgun accessories they’re fond of, I’m interested in hearing about them.


Do you have other favorite shotgun accessories? Share your tips in the section below:


Pump Shotguns Have One BIG Advantage Over Other Shotguns For Home Defense. Read More Here.

Monday, October 17, 2016

Defensive Shooting Positions You Better Master Before It’s Too Late

Defensive Shooting Positions You Better Master Before It’s Too Late

Image source: Wikimedia


You have made the decision to carry a sidearm on your person or in your vehicle daily. You have selected a handgun and obtained some baseline training, and perhaps shot a qualifying score in a concealed carry class. Your accuracy is good – if you are standing squared up in front of a non-moving target, under little or no stress.


So while you continue to add layer upon layer to your training regiment, consider giving positional shooting a try. This will add to your overall shooting abilities and boost your confidence.


Because many shooters do not practice often from alternate positions, they find shooting accurately can be difficult. These positions can change how you see your sights, grip your handgun, and therefore influence trigger press. Remember, though, that the fundamentals are still the same: stance (alternate stance), grip, sight alignment, sight picture, breathing, trigger press, and follow-through.


Listed here are the positions I believe are practical and will make you a better defensive shooter.


1. Kneeling.


Aside from a good standing position, kneeling is usually the first alternate shooting position I teach to new law enforcement officers. There are at least four kneeling styles commonly taught: speed, braced, California, and extended speed kneel. I prefer the California (both knees on the deck) for greater flexibility in upper torso movement and shooting around cover. The extended kneel (strong side knee on the deck) is a close second and allows for the shooter to recover from the kneeling position quicker. Making yourself a smaller target is also a plus.


2. Sitting.


We spend hours sitting each day — in our vehicles, at work, at a café and the movies … so it would be logical to devote some training time shooting from various seated positions. Getting your handgun into play while seated may well be the biggest challenge — and something you should not assume will be easy under high stress. How and where you carry your pistol will influence quick acquisition and the ability to draw it.


3. Prone.


While not the most likely defensive position to find yourself in, shooting from prone with a handgun is a skill set I want to have. It does, however, offer some unique challenges. Most folks would assume because your body is flat on the ground and you can use both arms and elbows to support the pistol that it would be easy to shoot accurately from this position.


Be Prepared. Learn The Best Ways To Hide Your Guns.


At 25 yards during training, I see about a 50 percent miss rate from law enforcement officers in the prone. Why? It is not practiced enough and it puts the shooter outside the comfort zone. I teach a rollover prone position that gets the shooter more onto their side and off their diaphragm. This method also allows for resting the head on your bicep instead of straining your neck while lying flat and square on with the target. If you have minimal cover or have something you can get under to shoot from (a vehicle), prone may, in fact, be just the ticket.


4. Supine


I have seen little training devoted to this position. In reality, it’s not all that improbable that you could find yourself on the flat of your back in a confrontation. If so, you may find yourself looking up at an attacker with a knife, bat or some other deadly weapon in their hands. You have only a second or two to react. Shooting at a threat standing over you or having to shoot between your knees from your back as a threat closes in is disconcerting at best. Run some drills with a good instructor while performing these tasks so that your reaction would be “oh yeah, I’ve done this before” if that day ever comes.


5. Using cover or a barricade.


There is little doubt that if you find yourself in an exchange of gunfire that cover will become your friend. Shooting from or around cover, just like the different positions mentioned above, changes how you see your sights and how you grip your pistol, because now you are doing something outside the box, forcing you to become uncomfortable. You must practice it, from standing, kneeling and prone. Use cover when it’s available and if the situation allows for it.


Adding these abilities to your skill set will boost your confidence and make you a better shooter. Along with these shooting positions, you will find that shooting with movement and shooting with one hand will also be advantageous … but that is for another discussion.


What advice would you add for those practicing defensive shooting drills? Share your tips in the section below:


If The Grid’s Down And You Don’t Have Ammo, What Would You Do? Read More Here.