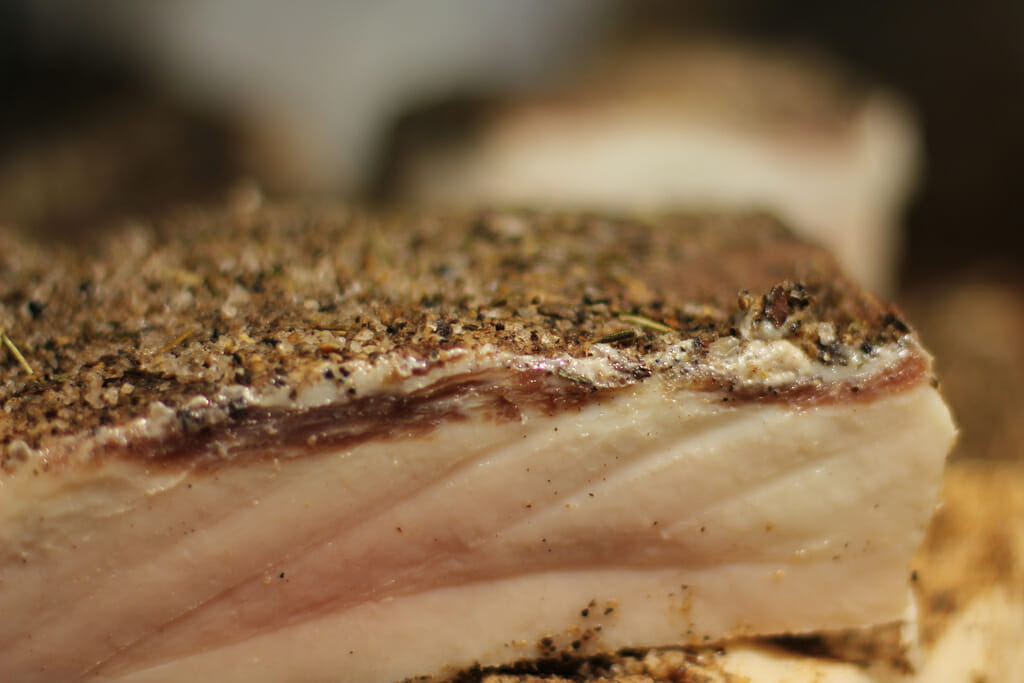
Forget all those negative connotations you might have heard over the years. You might have been led to believe it is unhealthy, dirty, sticky, or just plain gross.
None of those things are true about today’s lard. Around my homestead, homemade lard from pastured pigs is practically white gold. It’s one of my most used, sought-after, and bartered ingredients for everyday cooking. And it isn’t just me. Sources from celebrity chefs to health experts to sustainable living experts sing enthusiastic praises of lard, for reasons including health benefits, excellent cooking properties, and great taste.
After making my first batch of homemade lard several years ago, I threw out my store-bought vegetable shorting and never looked back. It is my opinion that lard is far superior to shortening in every way, and is better than other fats and oils for many uses too. Homemade pastured lard is lower in bad fats and higher in good ones than other cooking fats, is a good source for vitamin D, and contains potentially higher levels of healthy Omega-3 fatty acids. It has a high smoking point, meaning you can fry foods in it at higher temperature, and adds delicious flavor and excellent texture to everything from fried potatoes to pie crusts. It is also my experience that it significantly adds to the shelf life of baked goods.
But there’s a catch. That commercially-processed lard at the grocery store has probably been hydrogenated, which significantly decreases its healthfulness and usability. It’s probably been made from pigs that spent their lives in small miserable indoor cages, too. That leaves you with two choices: buy the upscale locally-processed products, or make it yourself. While either of those options is far better than going without lard, I’m all for the thrift and independence of making my own food.
Discover 1,147 Secrets Of Successful Off-Grid Living!
I tried to pry how-to secrets out of small-scale producers at value-added food fairs, with little success. Undeterred, I set about learning to make my own. There is such a plethora of instructions available online that getting started was a little daunting. But making your own lard is so easy it’s almost foolproof, and enormously rewarding. Here’s how.
Getting Started
First, a few words of definition and clarification.
Lard is fat from a pig. Cows, sheep, and other livestock also contain useful fats, but they are enough different that I will not include them in this discussion.
There are two kinds of fat in a pig. One is called fatback. This is the layer of fat that surrounds most of the pig’s body immediately under its skin. There is quite a lot of it on most pigs, often fifteen or more pounds of fatback on a single animal. It can be used to make salt pork as well as lard.
The other kind is called leaf fat. This is the fat that surrounds the animal’s kidneys and possibly other internal organs. Depending upon how lean or mature the pig was, it could have as little as one to two pounds of leaf fat.
Both kinds of fat can be used to make lard, but the leaf fat is the good stuff. The really good stuff. The stuff that causes me to exclaim “Wait, you’re using the wrong lard!” to anyone who scoops out a dollop of fatback for pan-greasing or skillet-frying. Leaf lard has a lighter flavor, fewer impurities, and is solid-but-malleable at room temperature. It is perfect for baking flaky pie crusts, melt-in-your-mouth biscuits and tender-crumbed homemade breads. Fatback lard tastes porkier and is great for frying savory foods. It gets rock solid in the refrigerator and near-liquid at room temperature, so while it can also be used for baking, it’s far less convenient than leaf lard.
Wait—is it lard, or is it fat? It’s both. The stuff that comes off the animal is fat—hard-ish lumps of adipose tissue that you would not dream of dropping into a mixing bowl. The stuff you have when you’re done making it—or rendering it—is lard, thick matter the consistency of soft shortening (if it’s made out of leaf fat).
Rendering is basically cooking the fat at a low temperature until it liquifies, and then allowing it to become solid again. That’s it. That is truly all you need to do, and it can be accomplished by way of a few easy steps.
First, trim the fat. For leaf fat, cut out big chunks of blood and other impurities. Don’t worry about little blemishes—you’re going to drain it later anyway. For fatback, also cut off the skin.
Next, cut the fat up into pieces as small as possible. If you happen to have a meat grinder, either manual or electric, that’s ideal. I used a borrowed one in the past, but more recently have had to resort to cutting it up by hand. If you have better skills with an electric food processor than I do, that might work for you.
However you cut it up, the key is this: Keep the fat at a state which is neither completely frozen nor completely thawed. Too far either way will impede success and safety. It often happens that the fat will go in and out of the freezer a few times during cutting up. I store my fat in the freezer until I am ready to do a batch. I take out one package, do trim work and cut it into large workable chunks, then put half of it back into the freezer while I work with the other half. Depending upon how fast or slowly you work, or how big the package is or how warm your kitchen is, you may have to keep less out at a time, or return it to the freezer more often. Don’t worry about what you’ve learned about diminishing food quality by refreezing and rethawing—this is a short-term process, and won’t affect your end result.
Use Only Sharp Knives
Whether you use knives just for trim work or for the whole cut-up operation, make sure they are as sharp as possible. Think safety first and take your time. If your knife handles or your hands get greasy, stop and clean them off so you don’t slip.
The next step is to heat your fat bits slowly for several hours. You can do this in a baking pan in a low oven, around 250 to 300 degrees. You can use any pan at all, from a roaster to a casserole dish, but shallow pans are harder to get in and out of the oven without spilling. My preferred method is to use a slow cooker. I set it to low and walk away, just stirring it every half hour or so.
Another advantage to using a slow cooker is that it can be used in a lesser-used room of the house or even outside—making sure it’s nowhere that children or animals can accidentally bump it, of course. The reason this is a nice option is because of the smell. Rendering fat is not a bad smell, but it’s not exactly a trendy scented candle fragrance, either. If you can do it outdoors or with windows open and avoid the whole-house smell of melting pig, choose that option. Otherwise, it will dissipate fairly quickly and is not too big a deal.
The fat will liquify. Keep it at a very low simmer and stir it occasionally. Plan on at least three hours, and possibly much more. If you need to shut it off and leave it for a while, you can.
Eventually you will have more liquid than clumps, and it will be time to drain it. There is no single right way to do this, but remember that your first objective is to avoid getting burned by hot fat and the second is to avoid making a colossal mess.
Here’s how I do it: I set a large glass bowl with a pouring spout into the sink, with a metal colander in it. After allowing the lard to cool slightly, I scoop-pour the lard in, chunks and all. I let it drain some, then pour the liquid into another spouted container with another colander, this one lined with a jelly bag or a few layers of cheesecloth. Feel free to adjust this process in a way that suits your abilities and equipment, in order to end up with well-strained liquid.
Pour the liquid into storage containers. I use either wide-mouth pint mason jars, or round plastic pint freezer containers. If using plastic, make sure the liquid is cooled enough so it doesn’t melt the containers. Set the covers on loosely, and allow the lard to set at either room temperature or in the refrigerator. It will be yellowish when it’s hot, but don’t worry. When completely cool, it will turn milky white.
You can put the chunks, which are called cracklings, back in the crockpot for another round of cooking if you like. I am more likely to do this with leaf lard, because it is so dear, and less likely with fatback lard. Some sources call this later-stage cooking “savory” lard, but I have not noticed any real difference in taste. If you are concerned about diminished quality, you can always store it in separate containers and label it as savory.
Give the cracklings and gleaned bits to the chickens and other homestead omnivores, or keep them to fry up with potatoes.
Don’t Can It!
Do not can lard. This is not a safe procedure, despite the fact that people might tell you they have done it with no ill effects. Instead, keep them in the freezer except for the one you are using. Leaf lard in current use can be left in the cabinet, unless your kitchen is very hot, usually for the amount of time it takes to use one up. If you find that your lard is going bad—which can be determined by a foul smell or a change in texture—before you can use it up, try storing it in smaller containers. Fatback lard should be kept in the refrigerator, and taken out for short bursts as necessary to soften it for measuring if you’re using it for baking instead of leaf lard.
The best place to get fat for rendering is from animals you raised by yourself or someone you know. Other options are to ask at farmers’ markets or local custom slaughterhouses, or via any local homesteading or preparedness network you may belong to.
I always run out of leaf lard first, long before the fatback and usually even before the rest of the pig. Luckily for me, there are still people out there who raise their own pigs or buy them from neighbors who don’t use the fat. I’ve traded leaf fat for homemade goat cheese, fresh apple pies, and organic blueberries, and always thought I came out on top of the deal.
What advice would you add? Share it in the section below:

